Bypass Google Account FRP On All Motorola Devices Without PC, SIM
If you have got FRP Protection or mistakenly soft reset your moto devices, and unable to bypass google verification now, so you don’t need to worry about that, we have easier procedure to Bypass Google Account FRP Motorola on all moto devices, whether it is moto x play, or moto x series, or Moto G 3rd Gen, or other moto devices. Bypass Google FRP Protection without any PC or without any SIM.
Note: This method is successfully tested on Moto X Play, Android 6.0.1, Android Security Patch Level 1 January 2017.
But you can also apply this method on:
♦ Moto X Play
♦ Moto X Style
♦ Moto X4
♦ Moto X
♦ Moto G3
If you have any other model except moto x series, you can apply this method on that device too.
Warning: You do have 90% Battery before applying this process.
Let’s Start to Bypass Google Account FRP Motorola Devices:
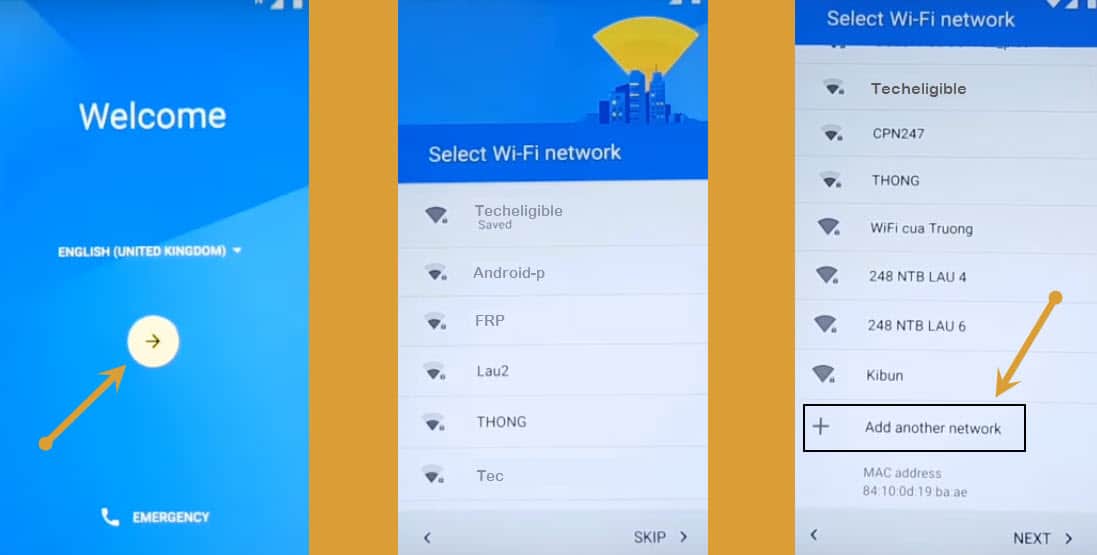
-Tap on “Start”.
-Connect Wi-Fi to your Moto Device.
-Swipe Up and tap on “Add Network”.
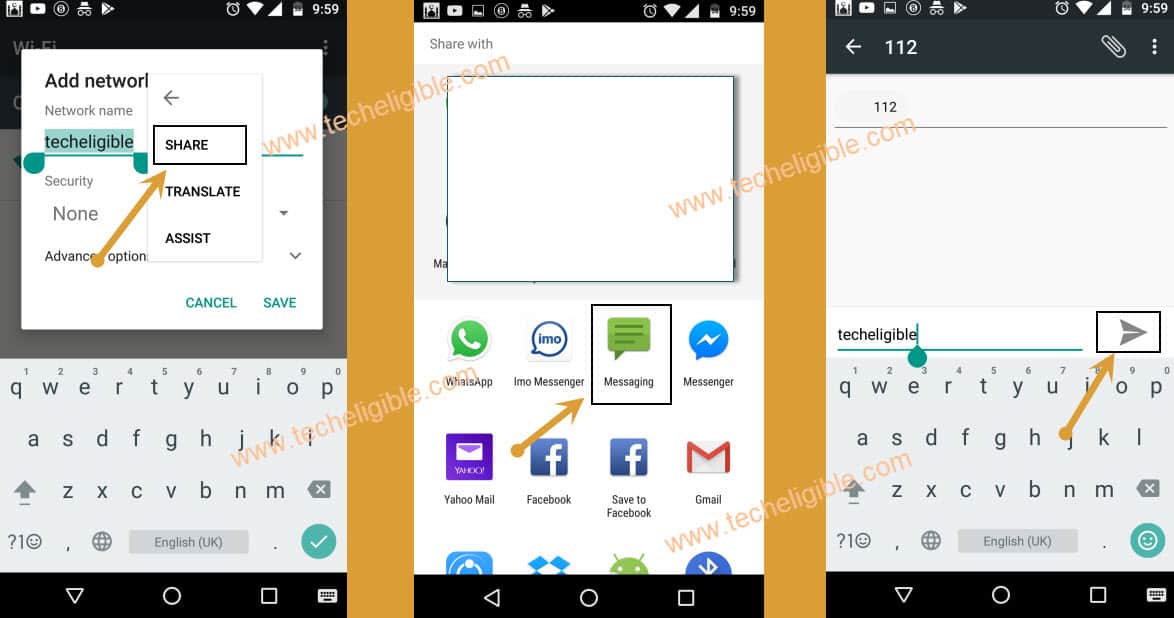
-Type ” Techeligible” in network name, and then “Double Tap” or “Long Press” on that text so that (CUT, COPY, SHARE) Options display.
-Tap on “Share”, then tap on “Message” icon from bottom popup.
-Type “112” number in “TO” Filed, where usually we type number to send message.
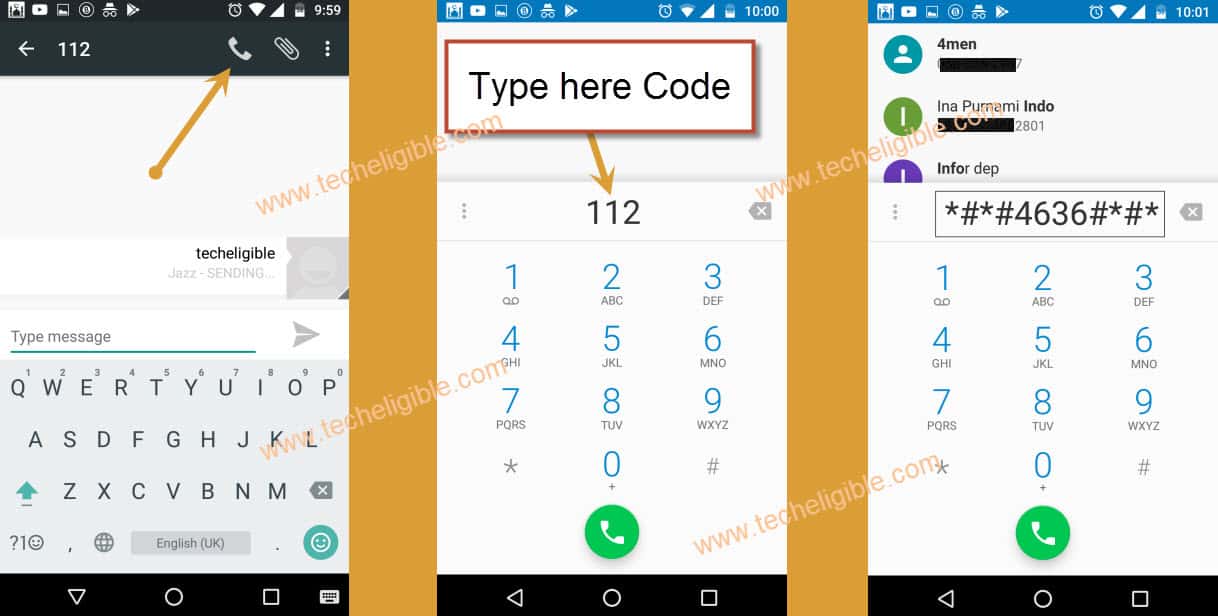
-Now tap on “Send” icon to send message, after that “Call Icon” will appear on top right corner.
-Tap on “Phone Call” icon.
-Now Type there this code ( *#*#4636#*#* )
Note: If you are unable to remove frp, you can try our latest method to bypass Moto google account.
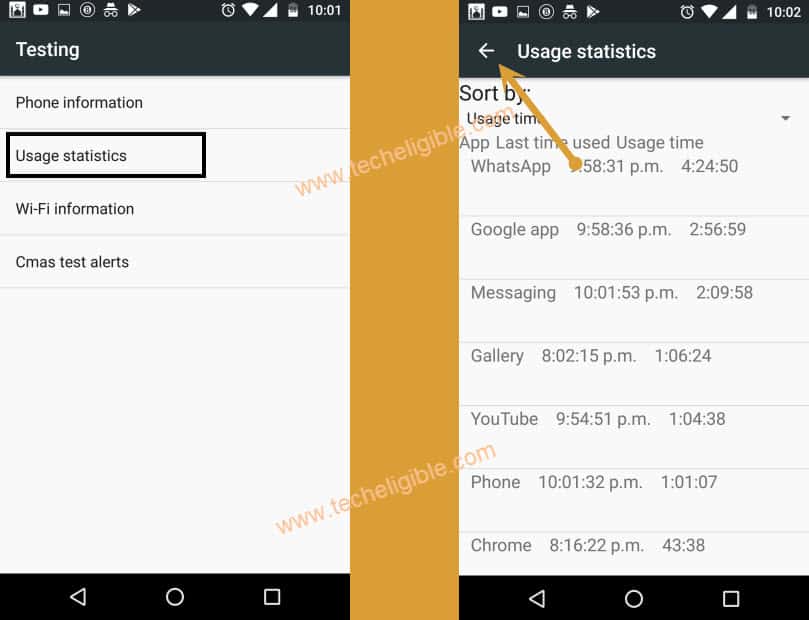
-Now tap on “Usage Statistics”.
-After that tap on “Back Arrow” from top left corner.
Let’s Open Google to Bypass Google Account FRP Motorola:
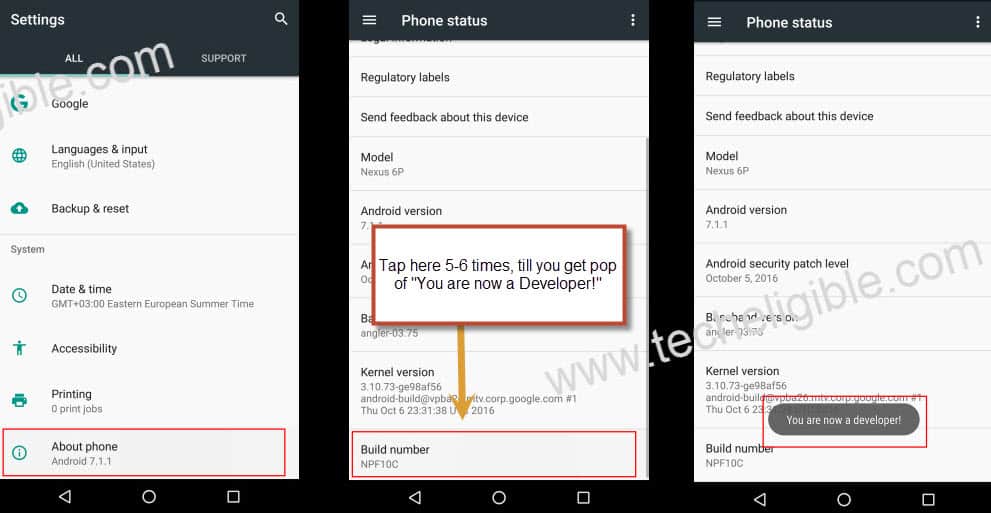
Note: If you don’t have “Developer Options Enabled”, then tap on “About Phone”, after that tap 5-6 times on “Build Number” until you get message of “Developer Options Enabled”. Now go back to “Settings” screen.
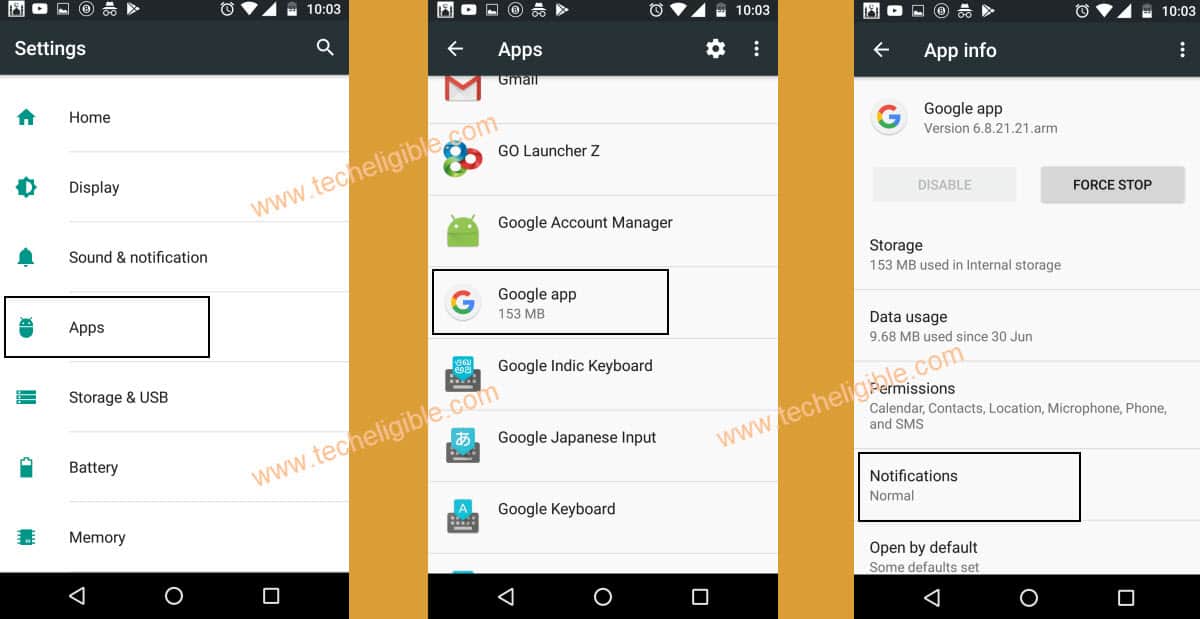
-Tap on “Apps”, then “Google App”, after that tap on “Notifications”.
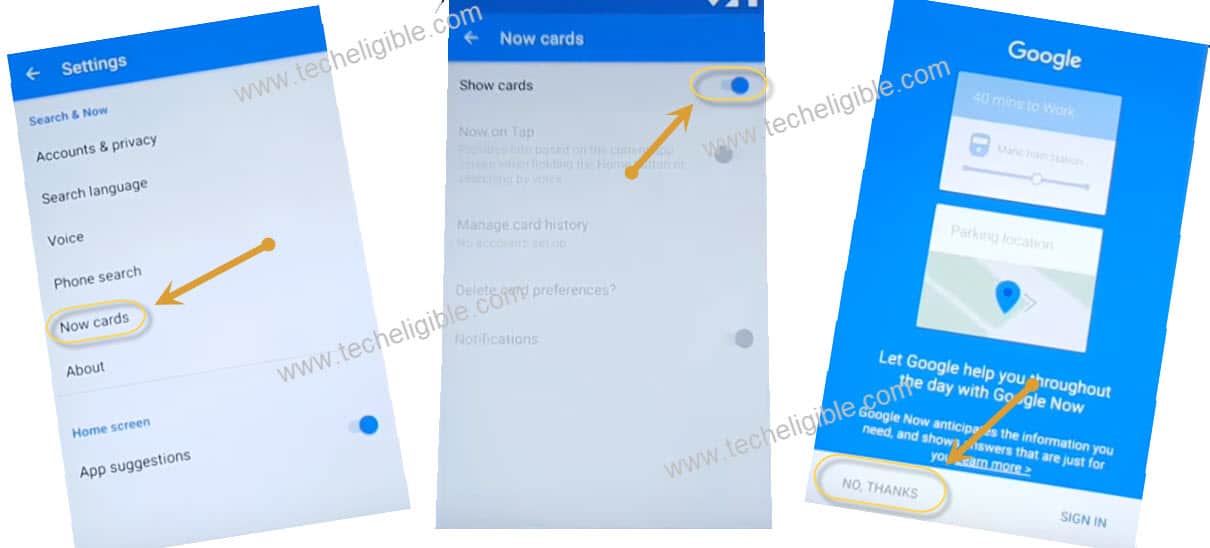
-After that tap on “App Settings”.
– Tap on “Now Cards”, and then enable “Show Cards”, after that tap on “No Thanks”, to open google.
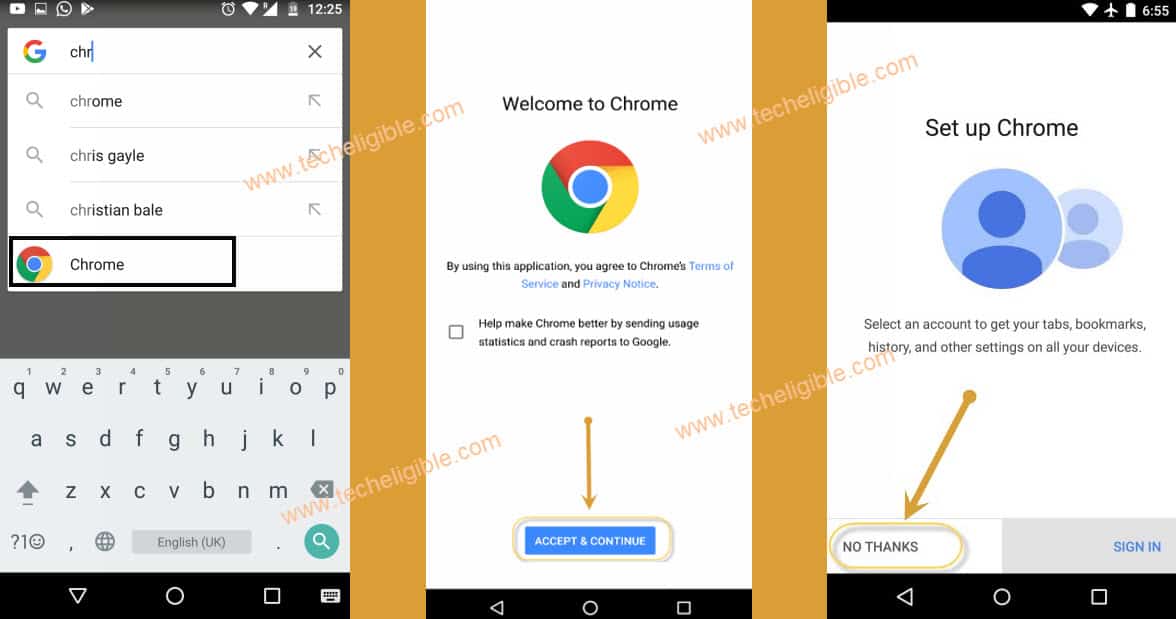
-Type in google search “Chrome”.
-Tap on “Chrome” to open it, then tap on “Accept & Continue”, after that “No Thank You”.
Download “Test DPC 2.0.6”:
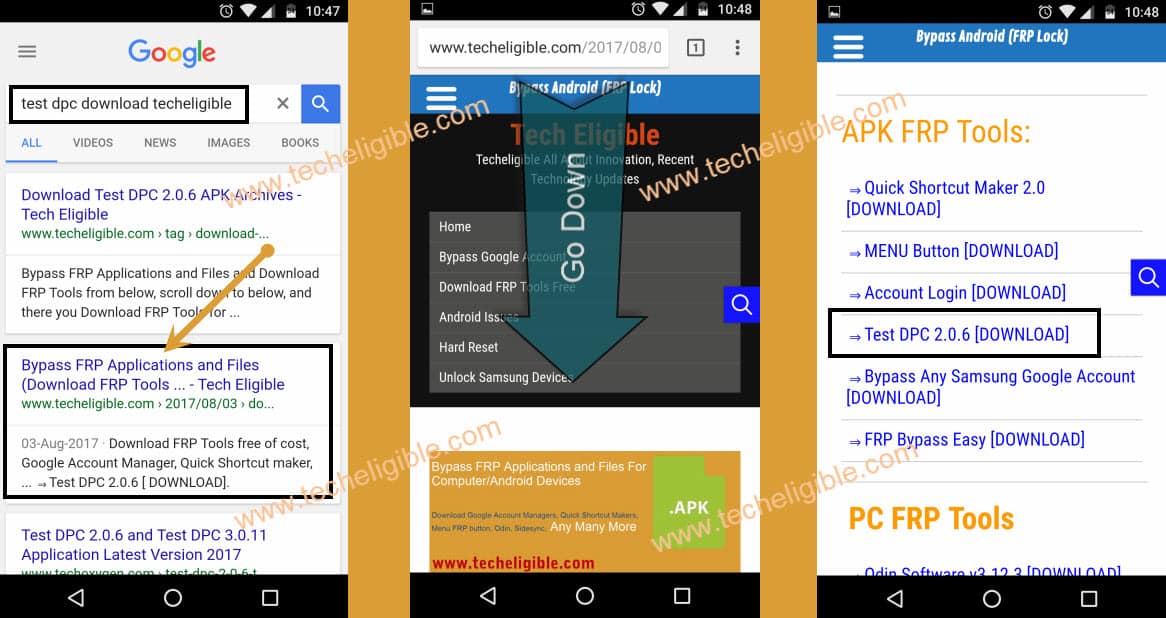
-Type in search bar “Test DPC Download techeligible“.
-Open most relevant search result as shown in below image.
-Tap on “Test DPC 2.0.6 or 4.0.5” to download it.
Open Download Folder and Install Test DPC:
-Once downloading finish, Keep tapping on “Back Key” from your moto device until you go back to “Google”.
Note: If you get back to “Now Cards” screen, just enable from there “Show Cards”, then No thanks, and google will open.
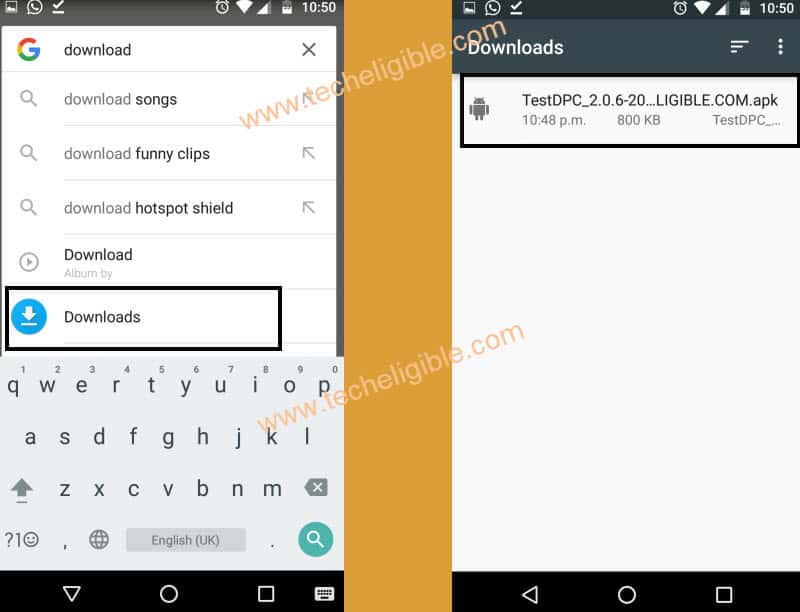
-Type “Download” in google, and tap on “Download” icon to open download folder.
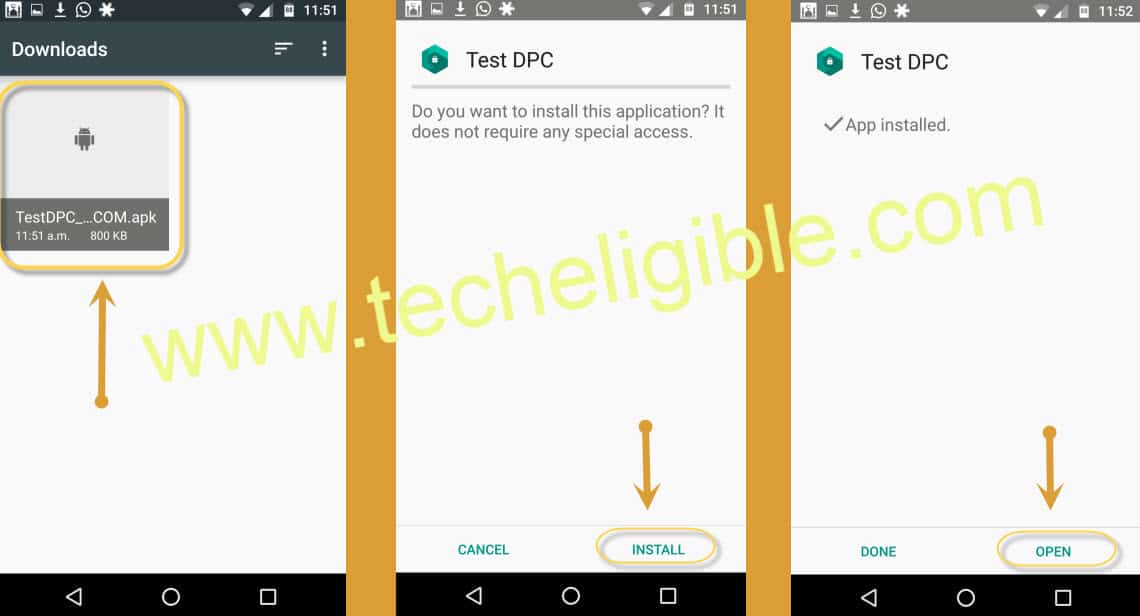
-Tap on “Test DPC Apk” file to install it.
Install Test DPC & Open it:
-Tap on “Install”, then tap on “Open”.
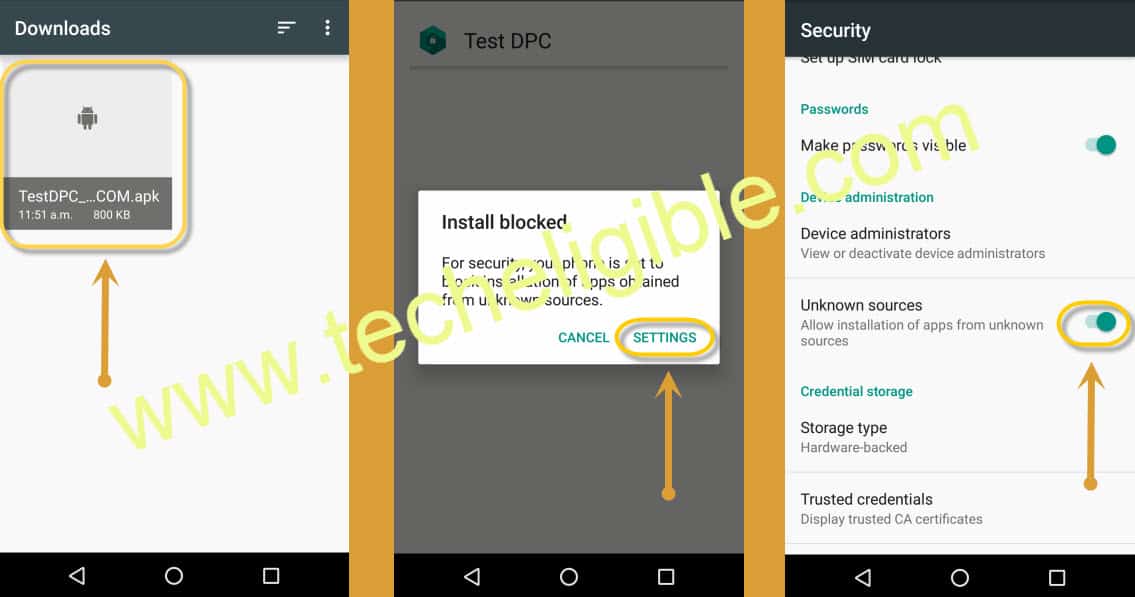
Note: If you get “Installation Blocked” popup, tap on “Settings” from popup, and then enable “Unknown Sources”, then again install “Test DPC“, and open it.
Encrypt your Moto Device:
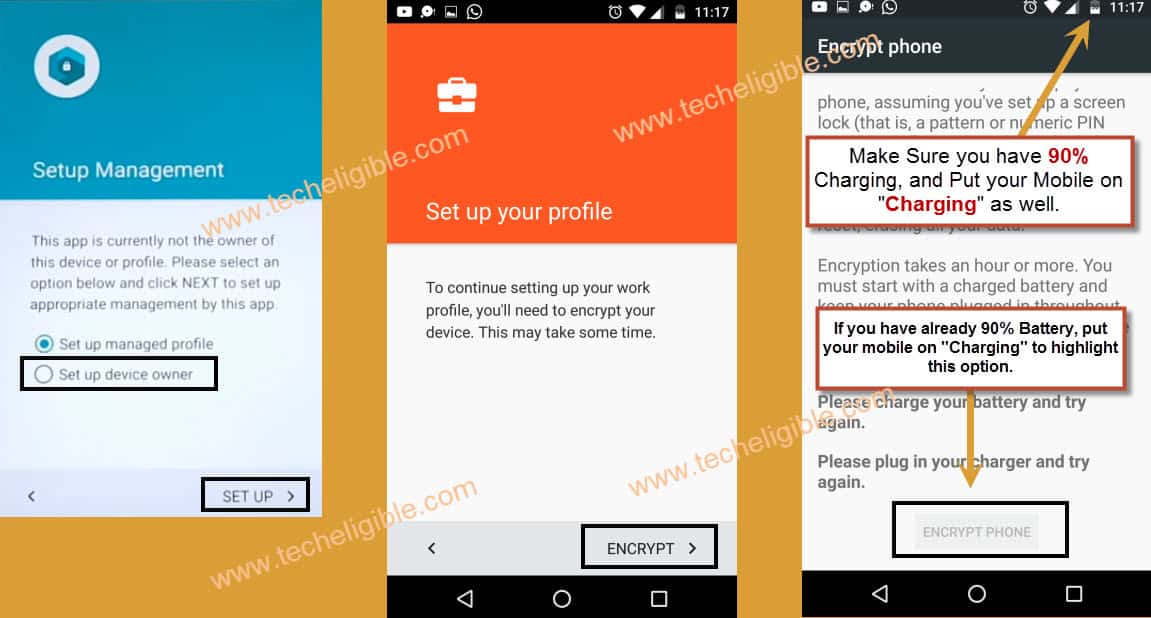
-Now tap on “Set up device owner” from “Setup Management” screen, after that tap on “SET UP”.
-Tap on “ENCRYPT”.
Remember: Your Moto Device must have 90% Battery, and put your Moto Device on “Charging” via charger, so that “ENCRYPT PHONE” option highlight.
-Once you put your Moto device on charging, and it has already 90% charging, “ENCRYPT PHONE” will auto highlight, and then tap on that.
-Now MOTO device will auto restart, and it will start “Encrypting”.
-Once encrypting process finish, wait until it restart, and then tap on “START” from Welcome Screen.
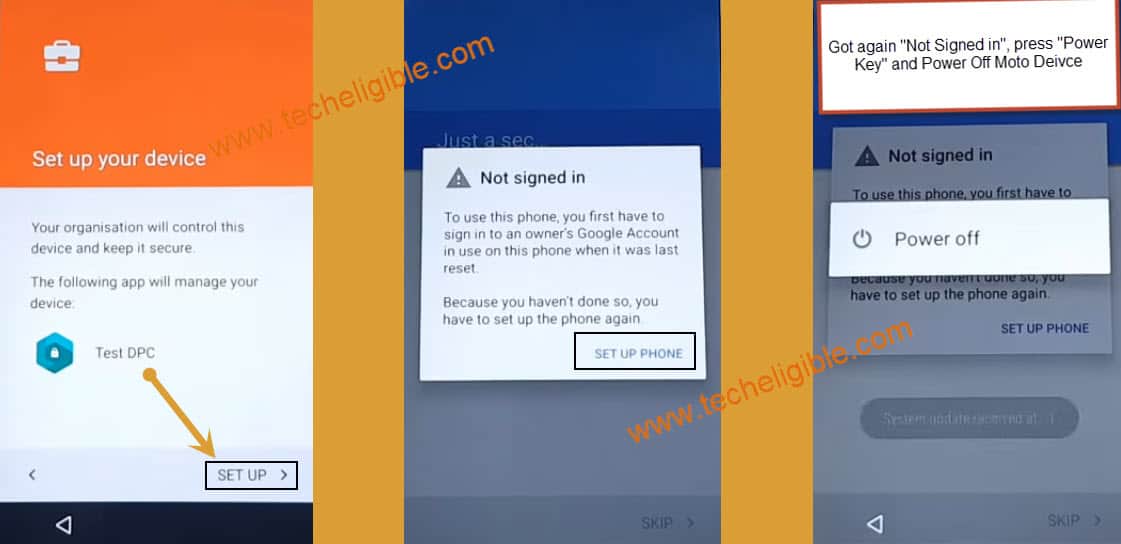
-Now wait until “Wi-Fi” auto connected, then it will redirect you to “Set up your device” screen.
-From there tap on “Setup”, then you will get a pop up of “Not Signed in”, from pop up tap on “Set up Phone”.
-Now you will get again same popup of “Not Signed in”, just press “Power key” and “Turn Off” your moto device to successfully Bypass Google Account FRP Motorola.
Switch On your Moto Device:
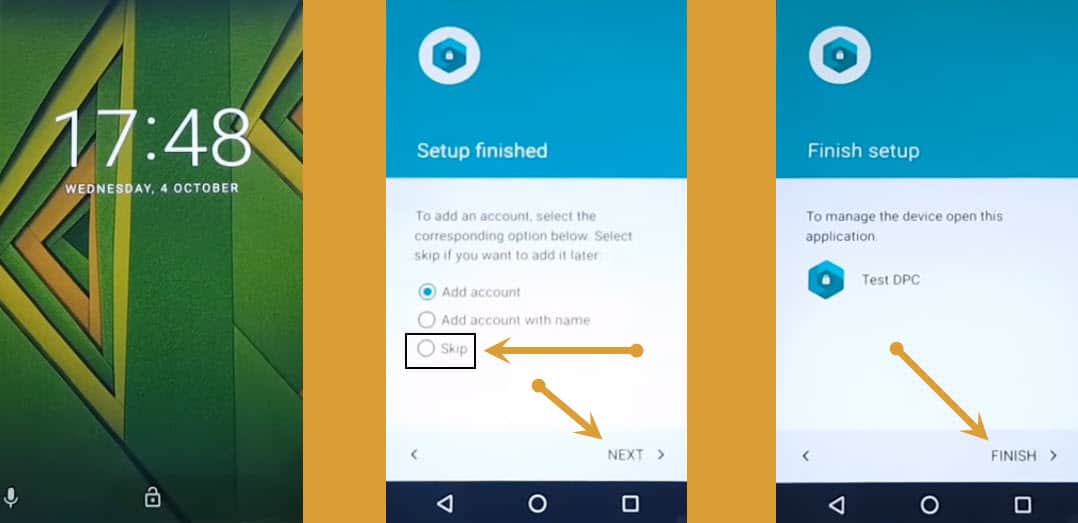
-Press “Power Key” to switch on.
-Tap on “Skip”, after that tap on “Next”.
-Now tap on “FINISH” to finish Bypass Google Account FRP Motorola.
Enable Developer Options and Enable OEM Unlock:
-Go to Moto device “Settings”, then tap on “About Phone”, now tap 5-6 times on “Build Number” until you get pop up of “You are now a Developer”.
-Now tap on “Back key”, then tap on “Developer Options”, and enable “OEM unlocking”.
-Tap on “Back Key” to go back to “Settings”.
Backup & Rest Moto Device:
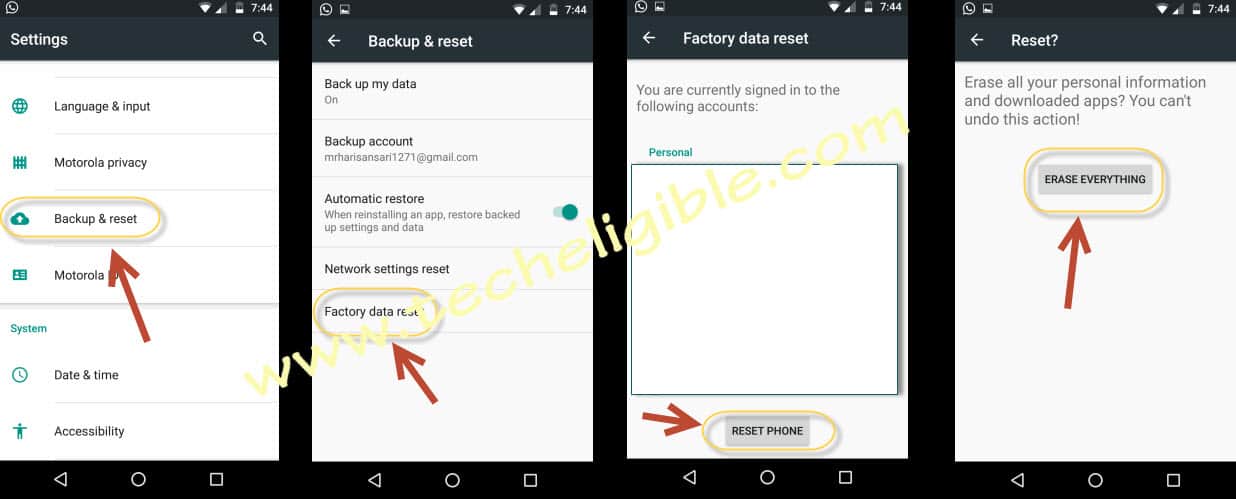
-Tap on “Backup & Reset”, then “Factory Data Reset”, after that “Reset Phone”, then “ERASE EVERYTHING”.
Complete Initial Setup on Motorola Device:
-Select your desire “Language”, tap on > Start > Skip > Skip Anyway > wait for several minutes > Skip > Skip Anyway > Accept & Continue > Next > Tap on “Not Now“, then > Next > now remove check from “Protect this device“, then tap on > Skip > Skip Anyway > now “Swipe Up” from google services, then tap on > Next.
