Bypass Gmail Verification ZTE Blade A310 Android 6 Without PC 2019
Are you getting Gmail account verification screen and unable to enter valid Gmail account to access your device. That means, you have got FRP Protection on your device and you can’t access your ZTE device home screen until you Bypass Gmail Verification ZTE Blade A310 Android 6.0.
Disclaimer: We highly recommend you to apply this method only on your own device, if you are not owner of this device, or you found this from some where, you must return to its real owner.
Let’s Begin to Bypass Gmail Verification ZTE Blade A310:
-Tap on “Yellow Arrow” from welcome screen to go to next.
-Tap on “SKIP”.
-Now Connect “Wi-Fi” by selecting your desire network.
-After successfully connected to the wifi, tap on “Add another Network”
-Type in search box “Techeligible“.
-Long tap on your typed text, so that you get some option like (Cut, Copy, Share, 3 dots).
-Tap on “3 dots” & select “ASSIST”.
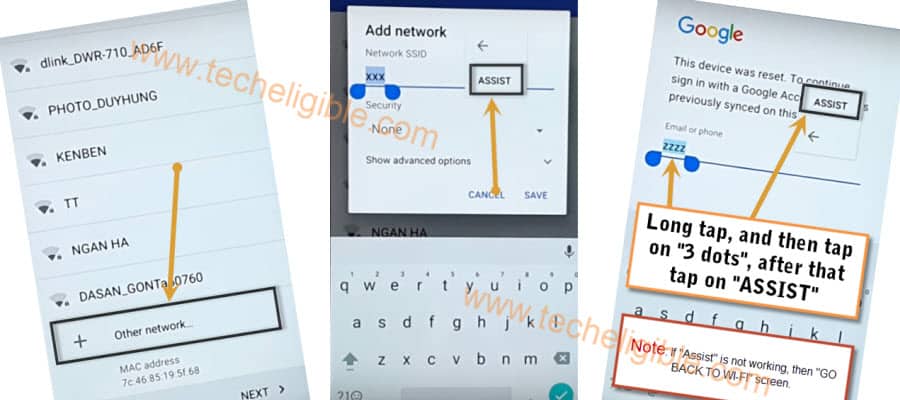
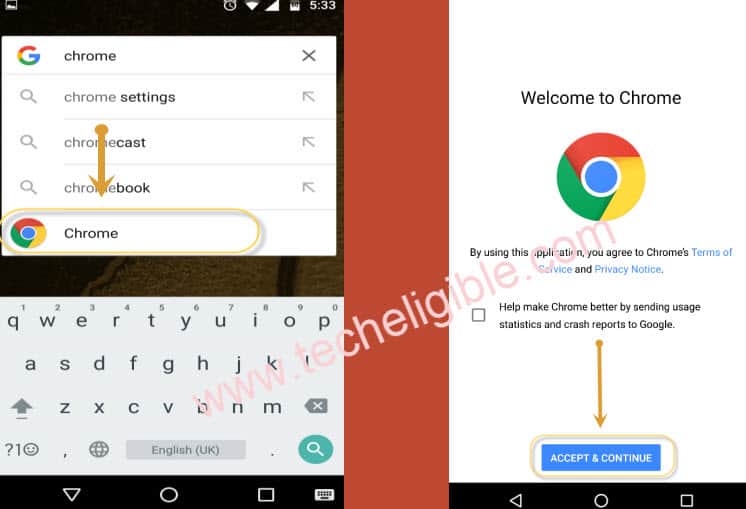
-After few second you will have new google screen, just tap on “No Thanks”.
-Type in search box “Chrome“.
-Tap on “Chrome icon” to go to chrome browser.
Download FRP Tools:
-Type in search box “Download FRP Tools“.
-Visit 1st search result from there.
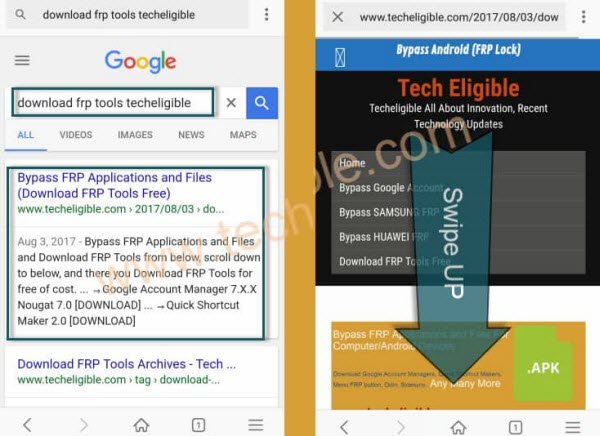
-Go down & download from there below 2 apk apps.
1-Google Account Manager 6.0
2-Quick Shortcut Maker 2.4.0
-After successfully download both apps, we have to go back to “Google”, to the same page, where from opened “Chrome Browser”.
-Keep tapping on back key until you get back to “Google”.
-Type in search box “Download“, and tap on “Download icon” to open download folder.
-There you will be able to see your both downloaded frp bypass apk tool.
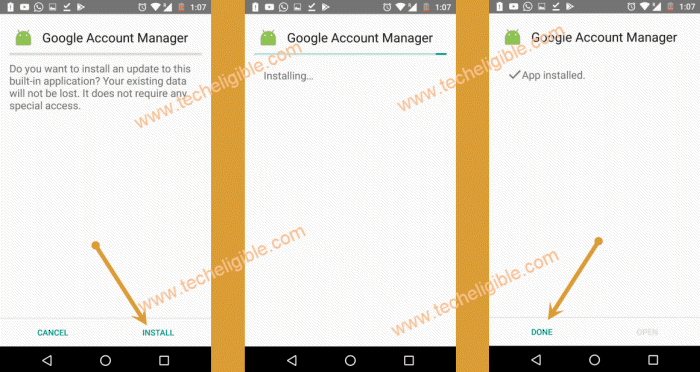
-Tap on “Google Account Manager”, and then you will get the popup “Installation Blocked”, just tap on “Settings”.
-Enable the option of “Unknown Sources”.

-Tap on “Back Key”.
-Now tap on “Install” to install Google Account Manager, once installation finish, just tap on “Done”.
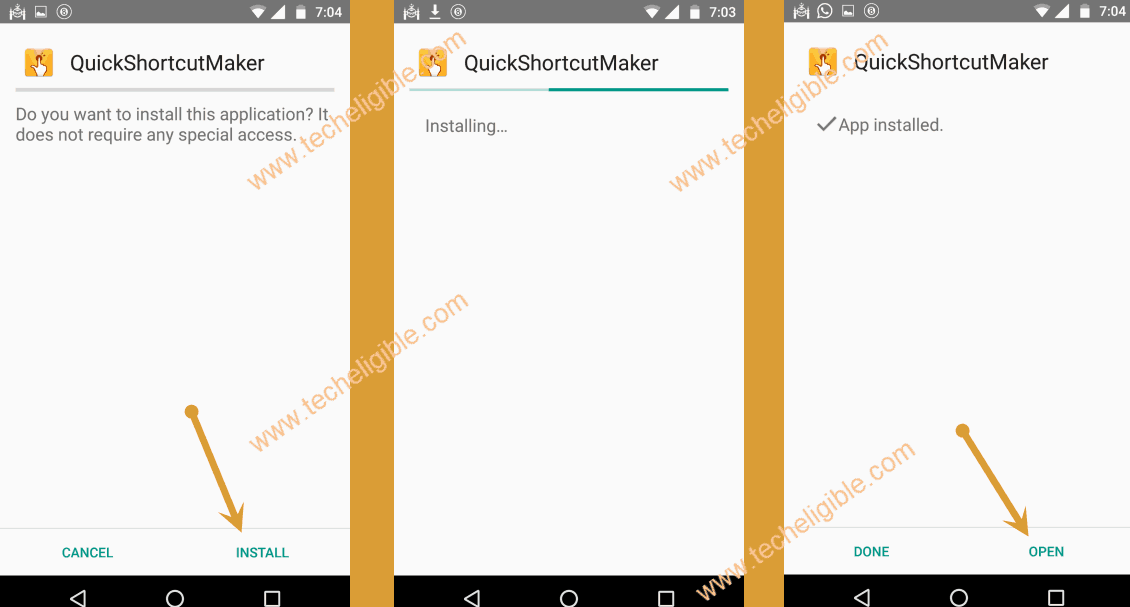
-Tap on “Quick Shortcut Maker”, and then tap on “Install”, after that tap on “Open”
-We are only few steps away from bypass Gmail Verification ZTE Blade A310
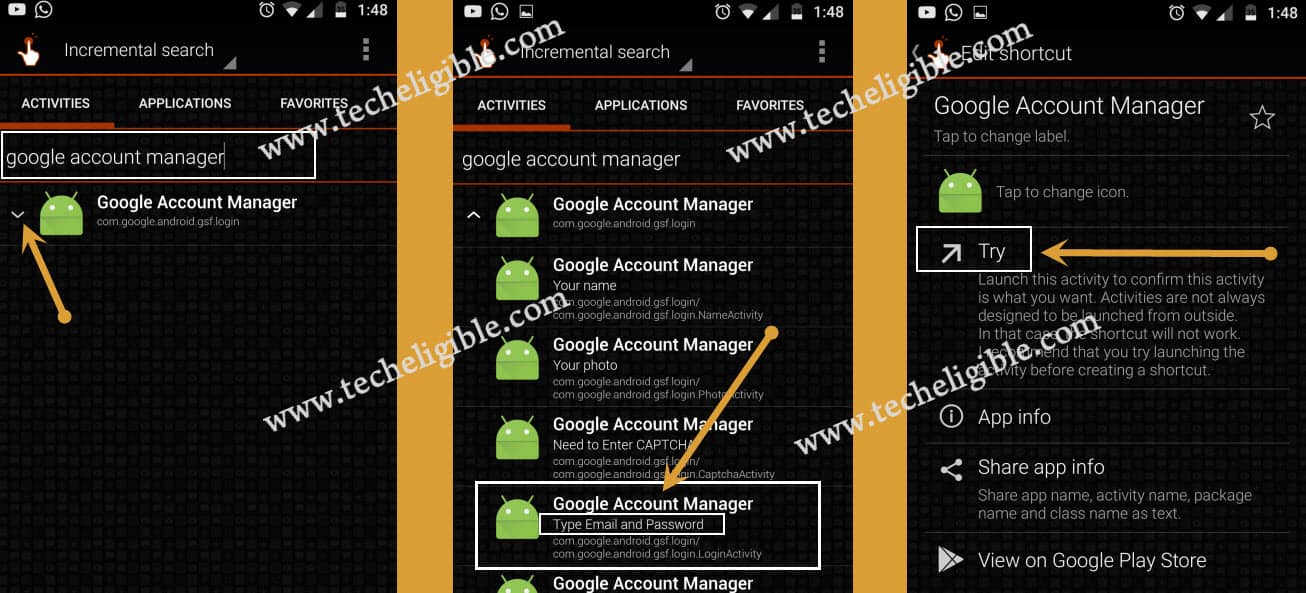
-Once you entered in “Quick Shortcut Maker”, there you will be able to see list of apps.
-Type in search box “Google Account Manager”.
-Tap on “Google Account Manager”, and then you will have list of “Google Account Managers”, just select the one that appears with “Type email and password” (See below image).
-Tap on “Try”.
-Now tap on “3 dots” from top right corner & select “Browser Sign-in”.
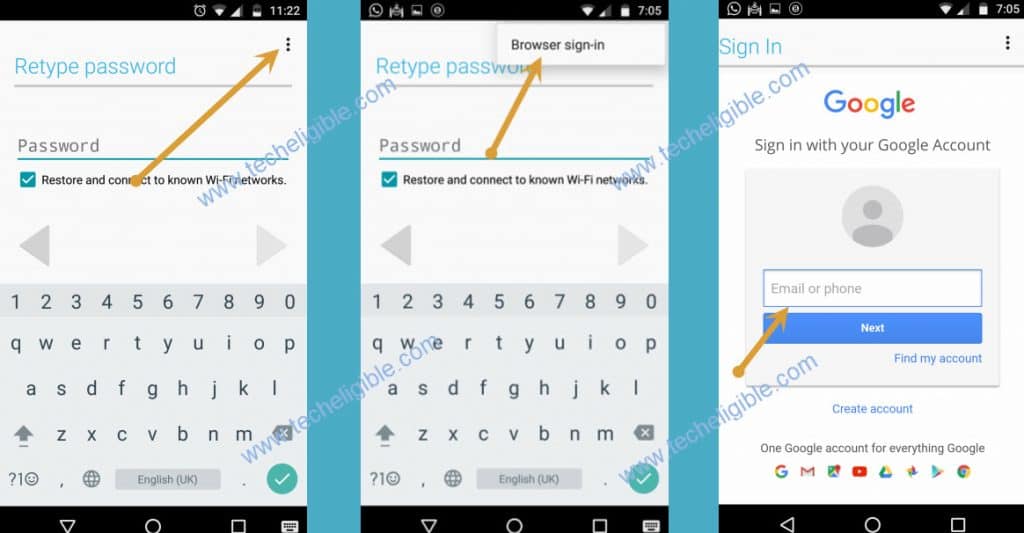
-Now enter any valid Gmail account there to sign in and to bypass Gmail Verification ZTE Blade A310.
-Long press (Power Key) and select “Restart” to reboot your ZTE Blade A310 device.
-After rebooting finish, just complete initial setup, and this time you will not be asked to enter your previously synced Gmail account.
Read More: