Latest Method to Bypass FRP Asus ZenFone 3 Without PC and ADB Mode
Facing gmail verification screen? and unable to bypass it, so that means you are facing frp lock in your ASUS Zenfone 3, to Bypass FRP Asus ZenFone 3, you have to follow our all steps carefully, but make sure your device has access to internet, because we will download some frp removal applications and will in our ASUS Zefone 3 to bypass google account verification.
Warning: This method is only for Device Owner.
Note: This method has successfully been applied on Asus ZenFone 3 Z017DB.
Let’s Start to Bypass FRP Asus ZenFone 3:
-First of all turn on your ASUS device & connect to WiFi.
-Go back to very first welcome screen.
-Long press both keys together (Volume Down + Power key) to capture screen shot.
-Once the screen is captured, you will get “Share” option bottom of your screen, just tap on that “Share” option.
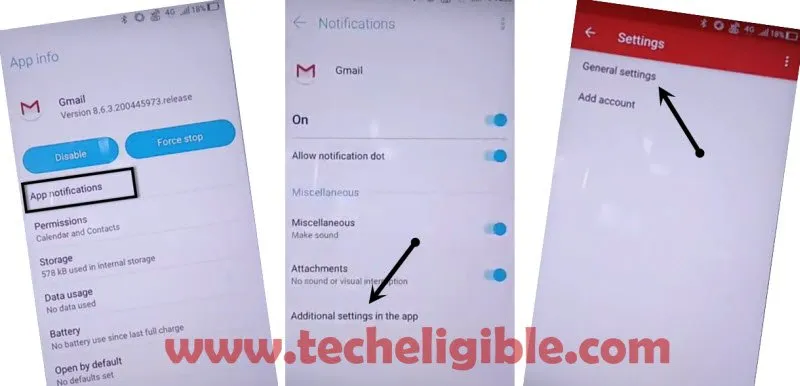
-Long tap on “Gmail icon”, and then tap on “App Info”.
-After that tap on “App Notification”.
-Now tap on > Additional settings in the app > General Settings.
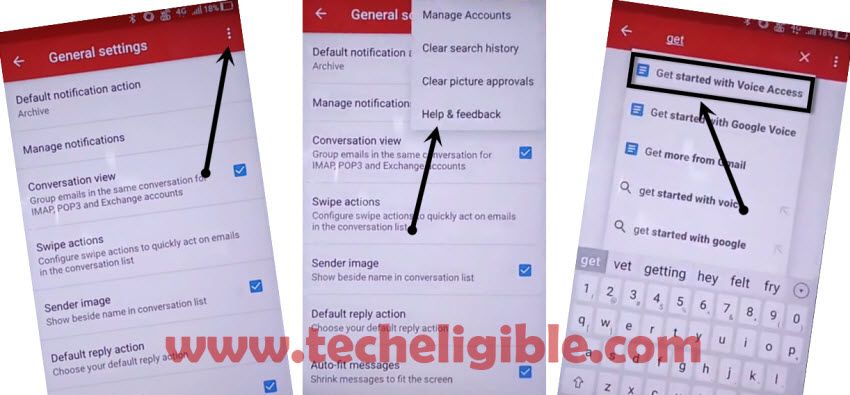
-Tap on “3 dots” from the top right corner & select “help & feedback”.
-Now type in address bar “Get started”, and then tap on “Get Started with voice access” from the search result.
-Tap on “Video”, and wait few seconds until you get some option on your youtube bar.
-Tap on “Clock icon” and then boom, you will be redirected to the chrome browser.
-Afterwards from the chrome welcome screen,just tap on > Accept & Continue > Next > No Thanks.
Download & Install FRP Removal Apps:
-Let’s download frp removal app to Bypass FRP Asus ZenFone 3.
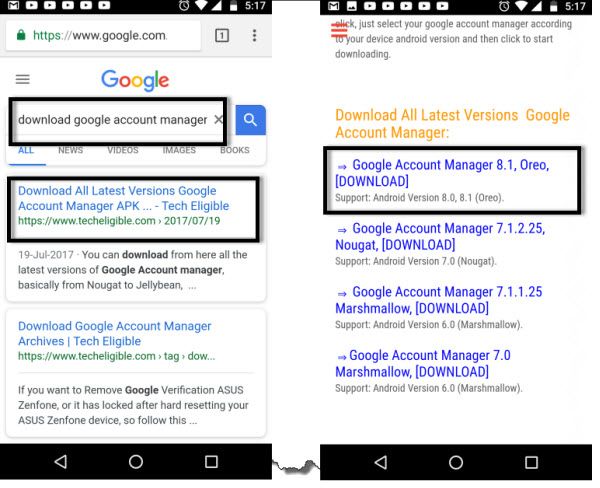
-Type in address bar “Google Account Manager Techeligible“.
-Visit first search result same as can be seen in below image.
-Download from there “Google Account Manager 8.1“.
-Wait until downloading finish.
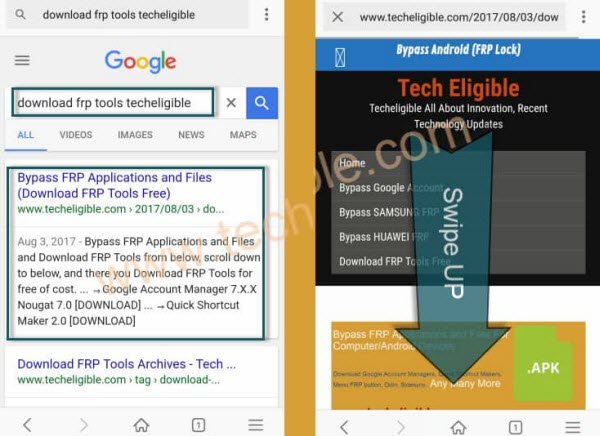
-Now again type in address bar “Download FRP Tools“.
-Visit 1st search result same as shown in below image.
-Scroll down & Download from there “Account Login” apk app.
-Once downloading finish, just tap on “3 dots” from top your top right corner of the browser.
-Select “Downloads”, after that you will be able to see your both downloaded apk apps there.
-Tap on “Google Account Manager”, now you will chrome browser popup window, just tap on “Settings”, and then enable the option of “Allow from this source”.
-Now tap on “Back Key”.
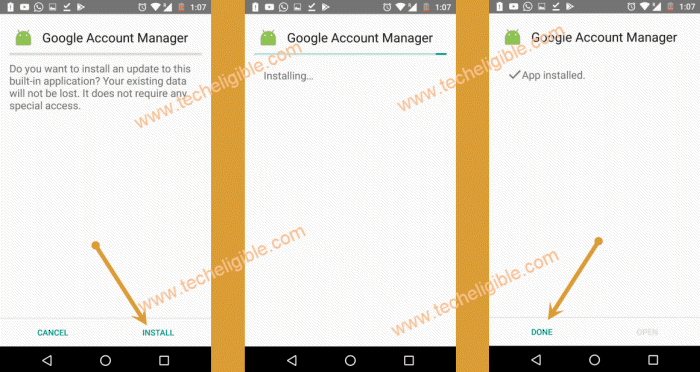
-Tap on “Install”, and after installation successful, just tap on “DONE.
-Perfect, now we have successfully installed google account manager 8.1.
-Tap on “Account Login” app to install, now tap on “Install”, after installation done, just tap on “OPEN” to launch account login app.
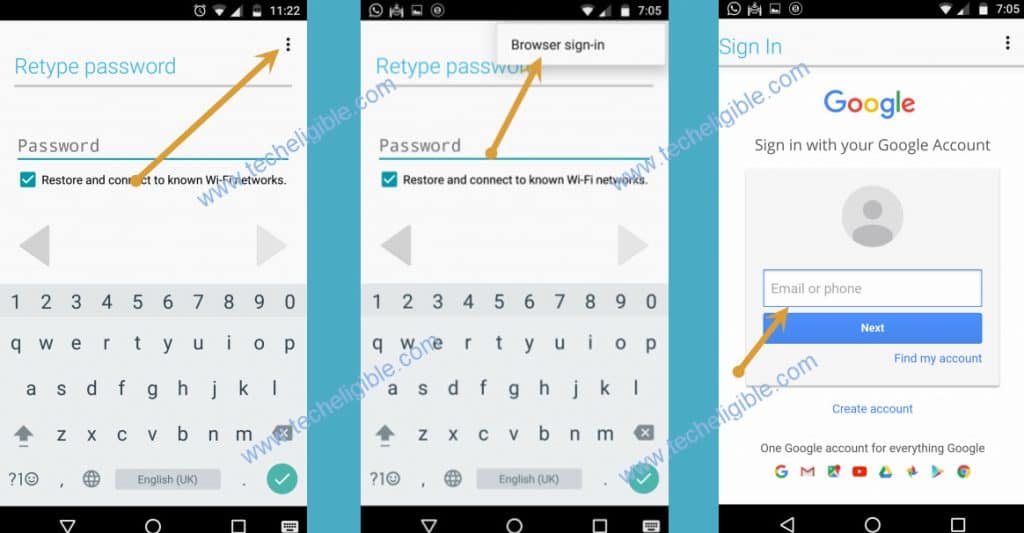
-Now you will see “retype password” screen.
-From there, just tap on “3 dots” from top right corner & then tap on “Browser Sign-in”.
-Now enter your any active gmail ID to Bypass FRP Asus ZenFone 3.
-Once you signed in successfully with your other gmail ID, after that restart your ASUS Zenfone 3 device by long press power button.

