
Bypass frp Huawei Y9s/Y9 Prime Android 10 STK-L21M without PC and Safe Mode
In this latest process of Huawei Y9s/Y9 Prime Android 10 STK-L21M, we will soft reset our phone first and after that we will follow new way to access inside the phone and sign with our new Gmail account, and we would like to let you know that, this bypass frp method is only for device owner and for educational purpose only.
Let’s Start to Bypass frp Huawei Y9s/Y9 Prime Android 10:
-Power off your phone.
-Press & hold (Volume up + Power key) together.
-Release only (Power key) after you see “Huawei Logo” while keep holding (Volume UP) key until you enter into EMUI Recovery mode screen.
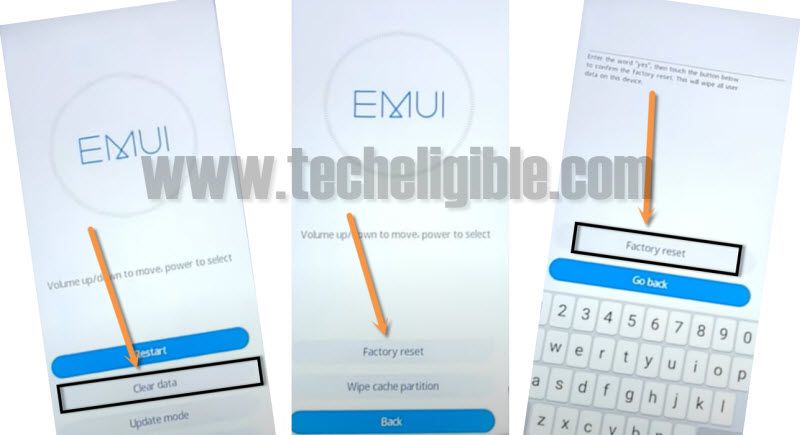
-Tap > Clear Data > Factory Reset.
-Type “Yes”, and then tap to “Factory Reset” again to completely factory reset your phone, after that we will be able to Bypass frp Huawei Y9s/Y9 Prime Android 10.
-This may take several minutes in completing factory reset process, so keep patience.
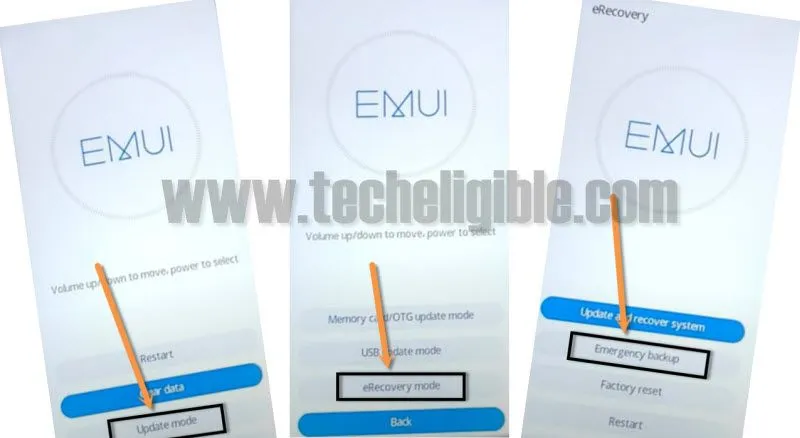
-After that tap on > Back > Update Mode > eRecovery Mode > Emergency Backup > Continue >
-Now from the Emergency Backup screen, just tap on “Back UP” option.
-There you must see a hyper link with the named of “Here“, just tap on that and you will be redirected to the chrome app.
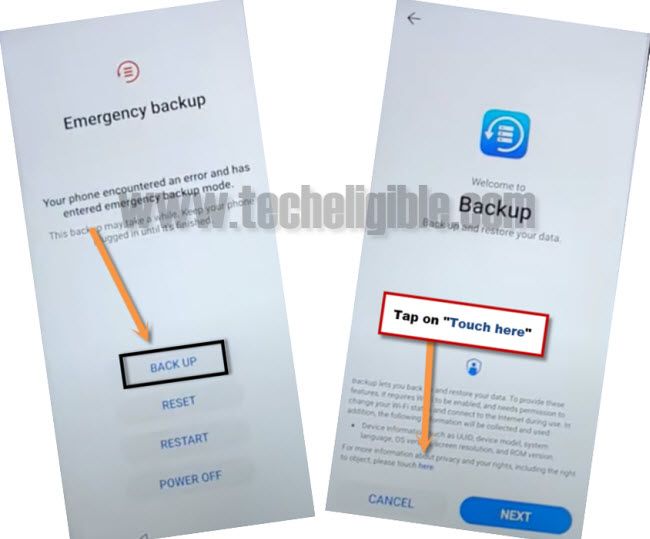
-From welcome to chrome screen, just hit on “Accept & Continue”, and after that tap “No Thanks”.
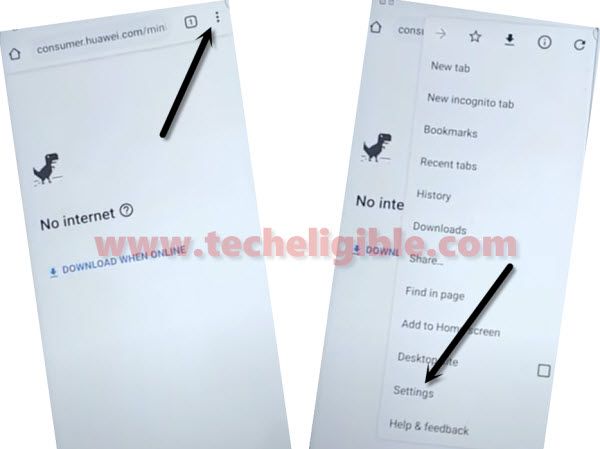
-From “No internet” screen, just tap “3 dots” from top right corner and then select “Settings” from the menu window.
-Tap “Notifications”, and then tap on “Chrome icon” from the top.
-Tap “Permission”

-After that, just tap “Location”, and then tap on “See all apps with this permission”, and then tap “Google”.
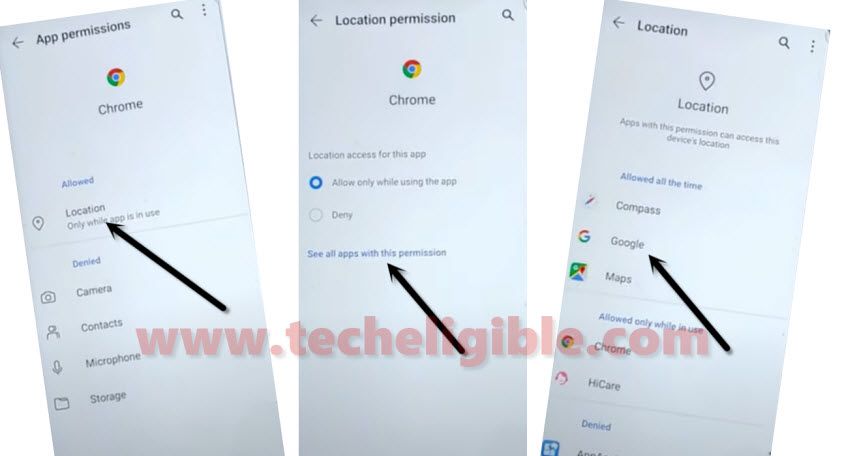
-Hit on “See all google permissions”. after that hit on “Google icon” from the top.
![]()
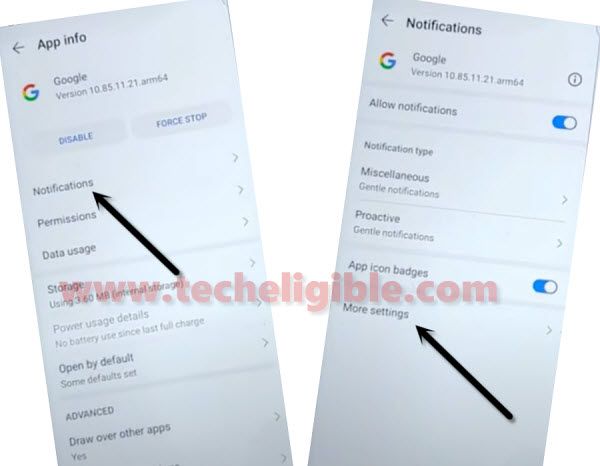
-Go to > Notifications > More Settings.
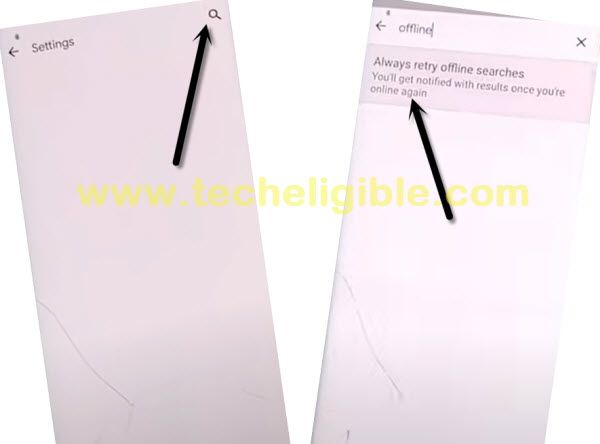
-Tap “Search icon” from top right corner.
-Type there “Offline”, and then tap on “Always retry offline searches”.
-Go down and tap on “Manage Pending Searches”.
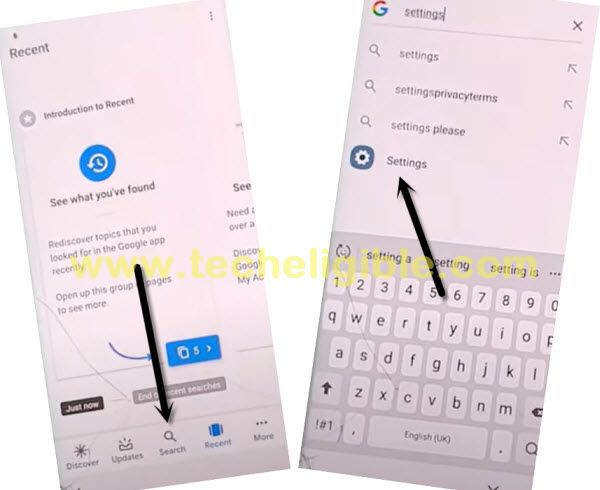
-Afterwards, just tap “Search” from the center of bottom menu.
-In the search box, just type there “Settings”, and then tap on “Turn on wifi and select a network”.
-Turn on “Wi-Fi” from there, and then select your wifi network and give password to connect to your wifi network.
-Once your device is connected to your wifi, just tap on “Back Arrow” few times to get back to google app same as shown in below image.
-From there again go to > Notifications > More Settings > tap “Search icon” from top right corner.
-Type there “Offline”, and then tap on “Always retry offline searches”.
-Go down and select hyperlink “Manage Pending Searches”.
-Afterwards, just tap “Search” from the center of bottom menu.
Note: If you see google sign in popup window, just select “No Thanks”.
-Type in search box again “Settings”, and this time you will be able to have “Settings gear icon” just tap on that.
Let’s Setup 6 Digits PIN:
-By setup 6 digits pin lock code in our phone, we can easily Bypass frp Huawei Y9s/Y9 Prime Android 10 without PC.
-Go to > Biometrics & Password > Lock Screen Password.
-Setup your any desire easy peezy password there.

Note: From the “Add Fingerprint” dialog box, just tap on “Cancel”.
-Tap on “Back Arrow” from top left corner to get back to your phone settings.
-Go down and tap on > Accounts > Add an account > Google.
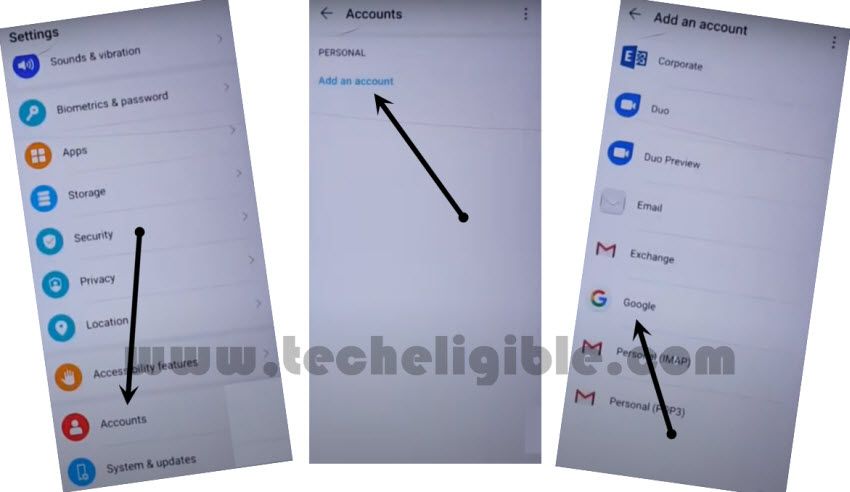
-You will be asked for PIN, just enter your already setup 6 digits pin code.
-Congrats, you have got google sign in screen, and now just add your new gmail account there for permanently Bypass frp Huawei Y9s/Y9 Prime Android 10 without PC.
-After you signed in successfully, just go phone settings by tapping on back arrow from top left corner.
-From the settings, go to > System & Update > Reset > Reset all settings > Reset all settings.
-Give Phone device PIN.
-After that, select “Restart” option from emergency backup screen.
-Now your phone may take several minutes from bypassing “HUAEI LOGO” screen, so keep patience.
-After that you will be shown first “Welcome” screen, now just complete initial setup screen to access your phone normally without having any frp issue.
-Do not connect “WiFi” from the wifi screen, you can skip that option for now and connect wifi later on after completing setup wizard.