
Reset Google FRP Moto G9 Plus Android 11 Without Computer
Are you finding a working method to Reset Google FRP Moto G9 Plus Android 11, try this method once, we hope this work on your device, reach to your device easily without signing in with previously logged in google account, this process is only for device owner, if you can’t remember your google account, which you added in MOTO G9 device, follow below steps to solve this problem easily.
Let’s Start to Reset Google FRP Moto G9 Plus:
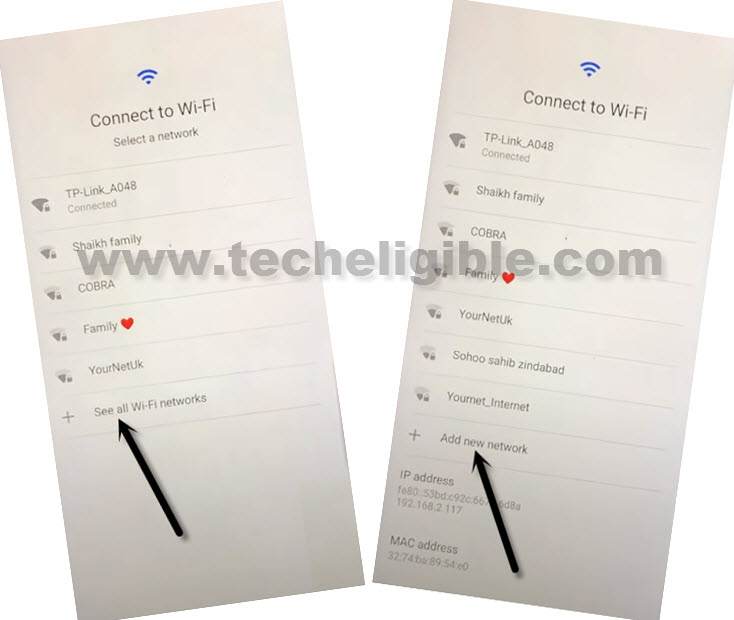
-First of all, connect WiFi, and go back to first start up scree (Hi there).
-Tap to > Start > Skip > Don’t Copy.
-As soon as you see (Checking info..) screen, just tap to “Back Arrow” 2 times to get back to (Connect to WiFi) screen.
-Hit on > See all WiFi Network > Add new Network.
-Hit on “Mic icon” from bottom keyboard corner, and tap to “Deny” from popup window.
![]()
–Tap to > Mic icon > Deny & Don’t Ask Again.
![]()
–Tap to > Mic icon > Allow.
![]()
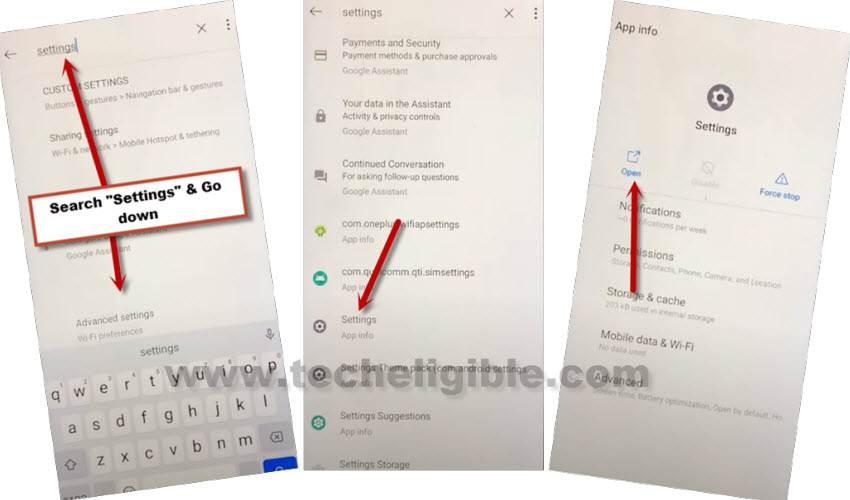
–Go to “Permission”, and hit over “Search icon” from top corner.
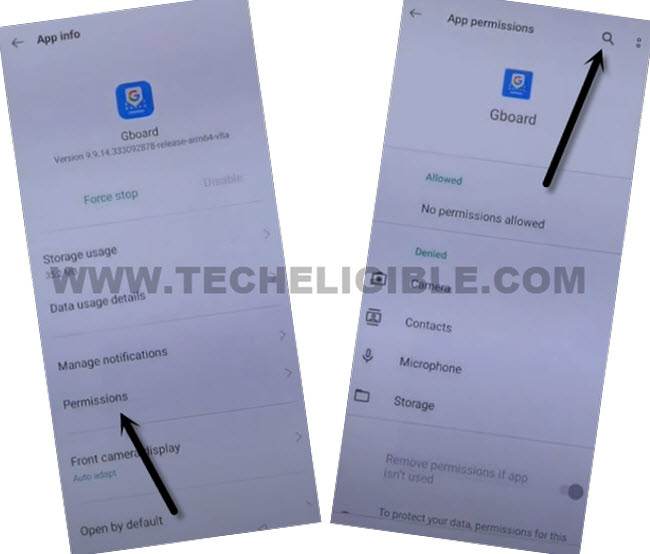
–Type in search area “Settings”, and then go to down, and hit on > Settings > Open to Reset Google FRP Moto G9 Plus.
Enable Shortcut Menu in Moto G9 Plus:
–Go to > Accessibility > Accessibility Menu > Turn on.
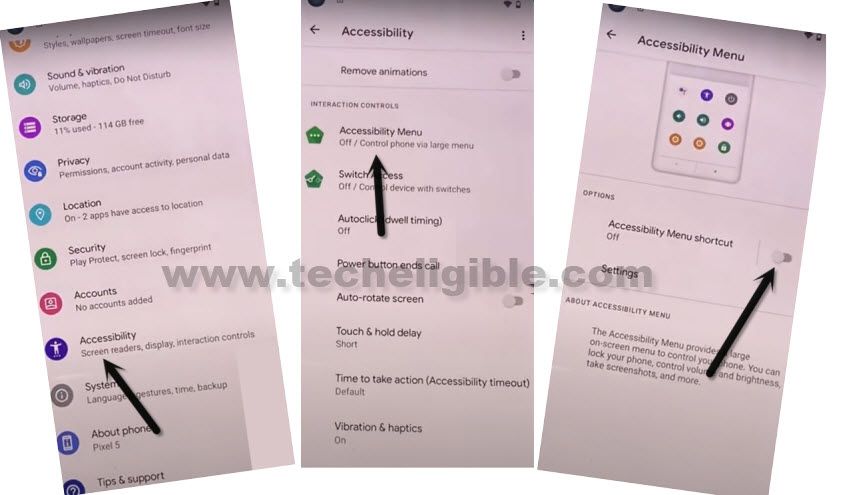
Note: Just for verification, swipe from bottom to top using two fingers, and the MENU Shortcut will appear, that means you have successfully turned on this option. this will assist us to Reset Google FRP Moto G9 Plus.
–Go back to (Settings), from there tap to > Apps & Notification > App info.
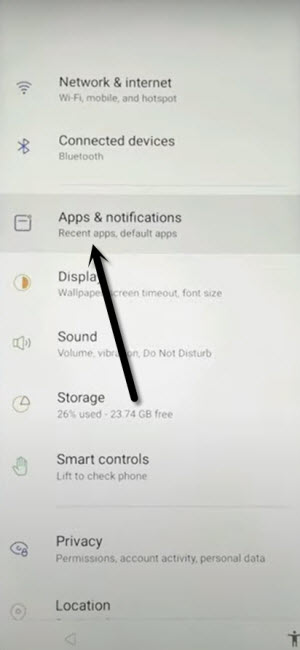
–Tap on > 3 dots > Show system Apps.
![]()
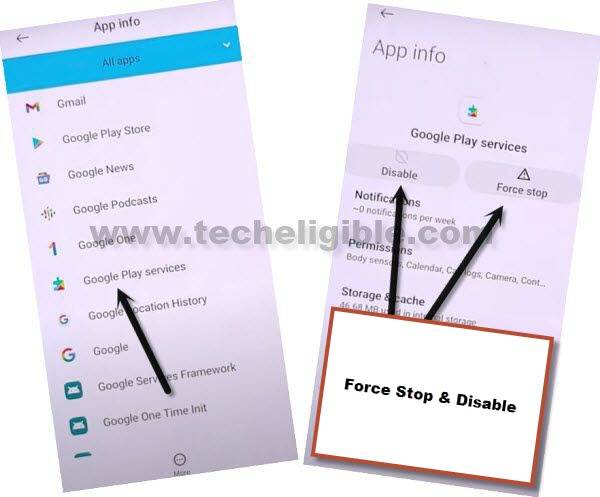
Disable Few Applications to Delete FRP:
–Find blue color settings icon “Android Setup” same as shown in below image, so just tap to > Force Stop > OK.
![]()
–Find and tap to > Google Play Services > Force Stop > OK, now hit on > Disable > Disable App.
Enable Google Play Services to Finish Setup Wizard:
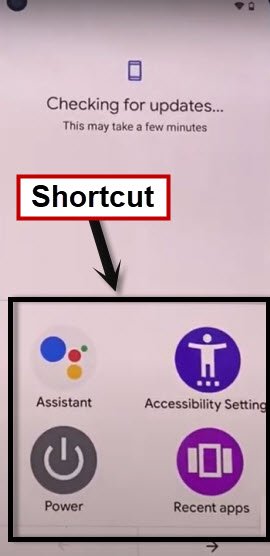
–Go back to “Hi There” screen by tapping on “Back Arrow” several times, from there tap to > Start > Skip > Don’t Copy.
–As soon as you see “Checking for update…” screen, we have to bring “Shortcut Menu” by swiping up from bottom of the screen using 2 fingers.
Follow Below Steps Fastly:
–Quickly tap to > Assistant > Settings > Enable (Google Play Services).
Note: You may have to repeat below steps for many times, because after hitting on “Assistant” option, this wont show you (Settings) at first time, so you will have to try this for almost 10-20 times to reach (Google Play Services) screen.
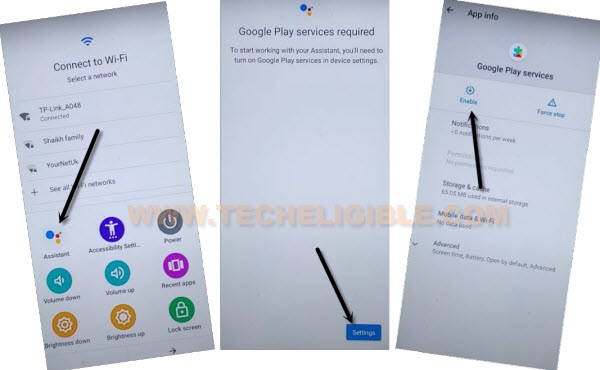
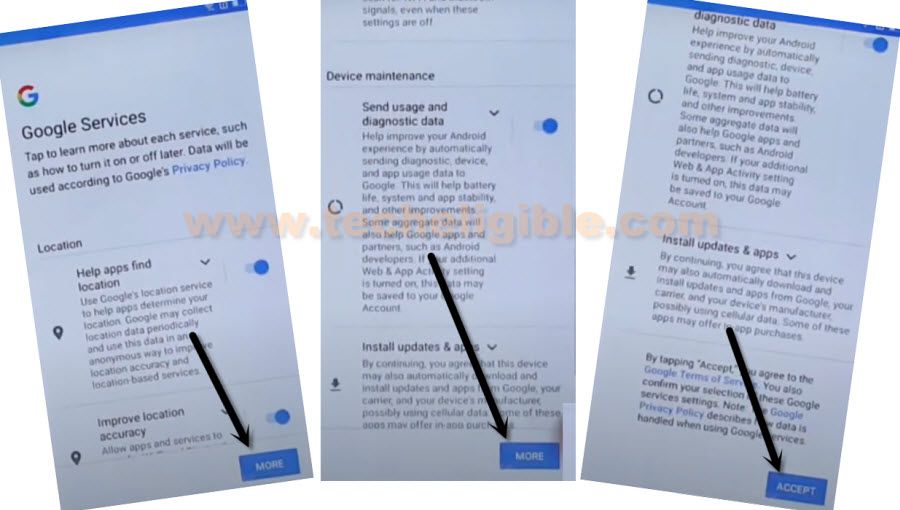
–After successfully enabling (Google Play Services), just tap “Back Arrow” from left corner of the screen, and you will be taken to the next screen (Google Services), that means you are all done from Reset Google FRP Moto G9 Plus, now only you have finish setup wizard.
–From there, tap to > More > More > Accept.
–From (Set Screen Lock) screen, tap to > SKIP > SKIP > OK > Accept & Continue, finish remaining steps to reach homescreen.
![]()
–After reaching inside device MENU successfully, don’t forget to add new google account and setup new security PIN/Pattern.
Read More: