2 Ways to Bypass FRP Itel Vision 2s Android 11 [UPDATED]
You can bypass frp itel vision 2s with 2 best method from here, we also have updated method-1, so you can easily reach to your device homescreen without signing in with google account, so there are different methods, if you fail with method-1, then go for method-2 to easily reach inside the device homescreen and login with new google account.
Warning: Do not try this frp method on a stolen phone, this is a serious crime, if you are trying to bypass frp on a stolen phone, you may also be jailed, this process is for device owner and for educational purpose only.
| Method 1: Remove FRP Itel Vision 2s New |
| Method 2: Remove FRP Itel Vision 2s |
Method 1: Bypass FRP Itel Vision 2s [New]
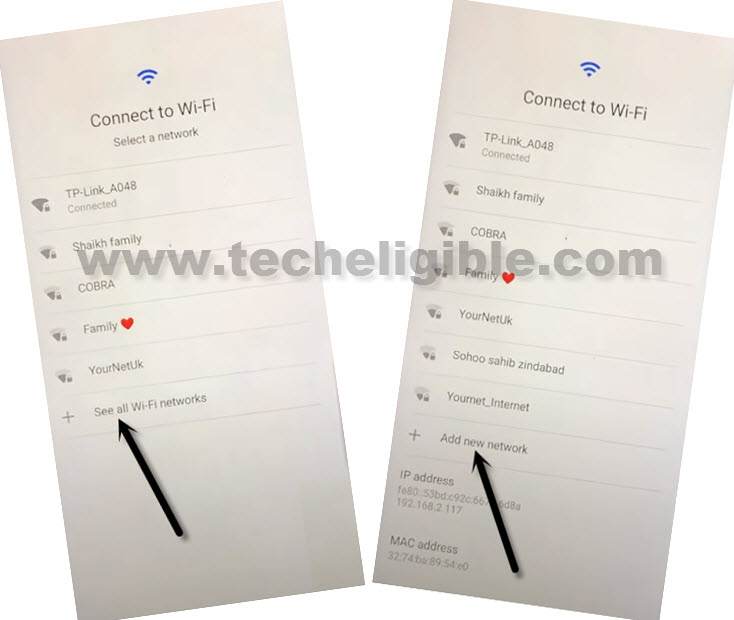
-First of all connect WiFi, and then go back to (WiFi Setup) screen, from there, hit on > See All WiFi Network > Add New Network.
-Hit on a “Mic icon” from the bottom right top corner of the keyboard, and then tap to “Deny” from popup message.
![]()
-Lets tap again on “Mic icon”, and then, hit on “Deny & Don’t Ask Again” from popup message.
-Tap to > Mic icon > Allow.
![]()
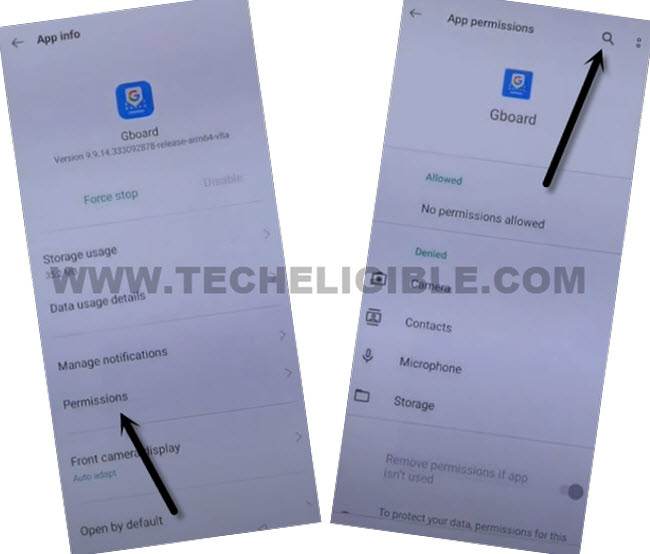
-Once you reach to inside (Gboard) screen, from there Go to “Permission”, and hit over “Search icon” from top corner.
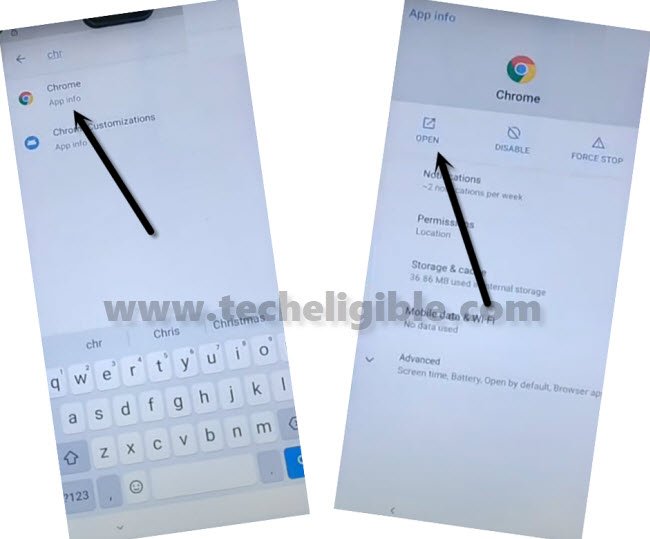
-Search over there “Ch”, and then from the searched result, tap on “Chrome”, and then tap on “Open” to launch this browser, so that we could easily setup new pattern lock to Bypass FRP Itel Vision 2s.
Setup New Pattern Protection:
-Search in browser “Download FRP Tools“, and go to our website searched result same as shown in below image.
-Scroll down and tap on “Setup Pattern Lock” option to be redirected to pattern lock screen directly.
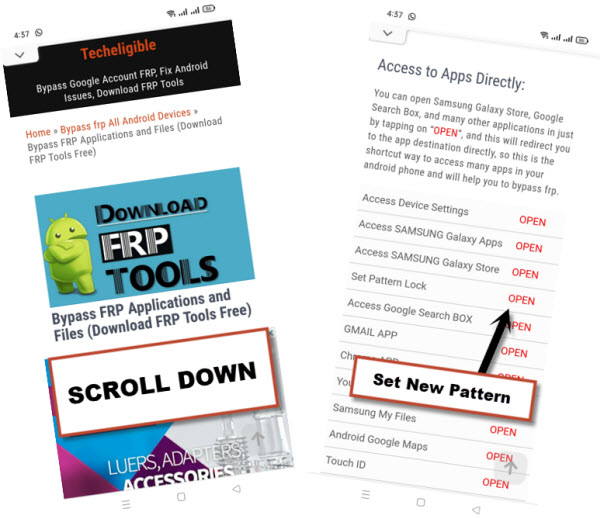
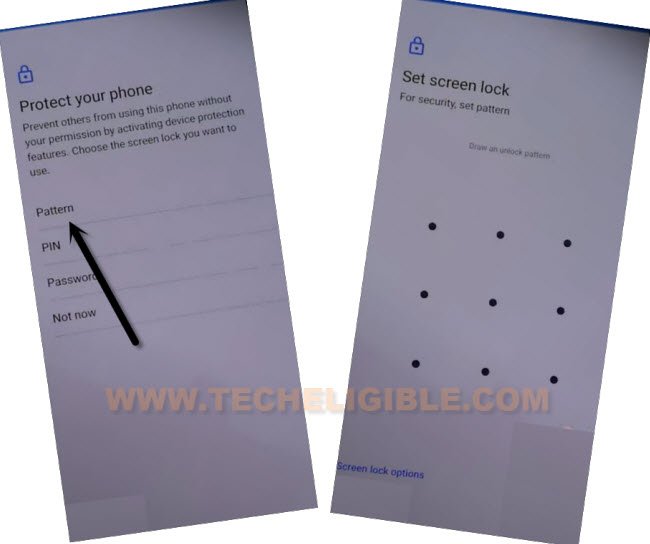
-Tap on “Pattern”, now draw your pattern twice time, and then tap on “Confirm”.
-You will be redirected to the (Sett Security Question), just hit on “BACK Arrow” from top left corner.
-Now, go all the way back to first (Hi there) homepage by tapping on back arrow several times.
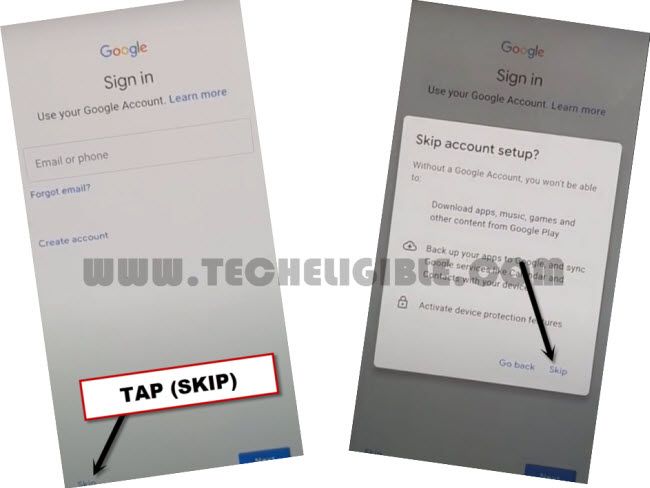
-Finish your setup wizard, and you will be asked for (Pattern) lock, just use your already setup new pattern lock there, and then you will access to (Google Sign in) screen same as shown in below image, just hit on > Skip > Skip.
-Finish setup wizard and reach to device homescreen without signing in with previously added google account, this is how you can easily bypass frp itel Vision 2s without using app and PC, thanks for visiting us.
Method 2: Bypass FRP Account Itel Vision 2s
Bypass FRP Itel Vision 2s Android 11 just using another android device, transfer 2 frp tools in your itel device and then bypass frp easily through adding new google account, if you are unable to recover your previously synced google account, then i would recommend you to apply below steps to get your device back.
Required Tools:
1/ FRP Lock Device
2/ Any other Android Device
3/ WiFi Connection.
Let’s Start to Bypass FRP:
-Connect WiFi & Go back “Hi There” homepage.
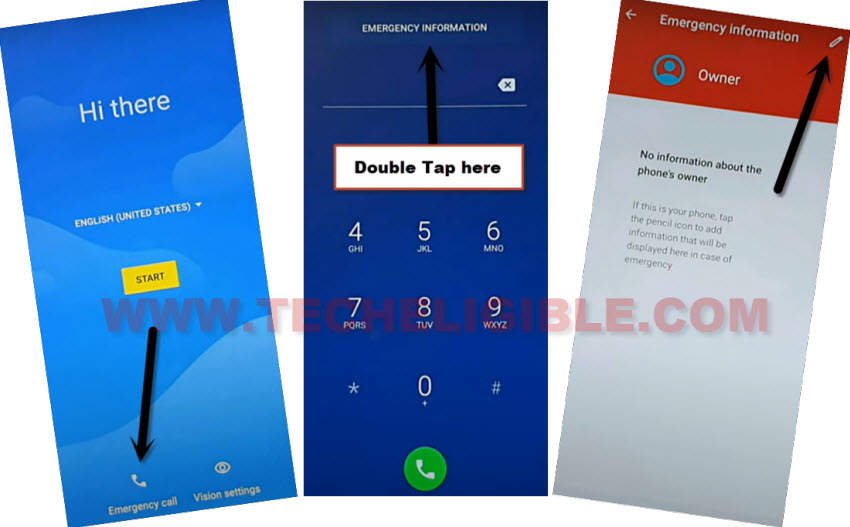
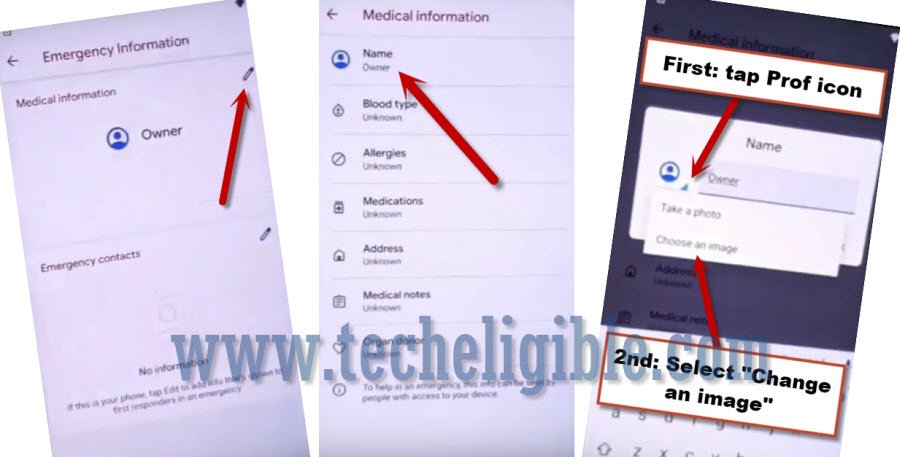
-Tap on “Emergency Call”, and then double tap “Emergency Information”.
-Tap on “Pencil icon”.
-Tap on > Pencil icon > Name.
-Tap on “Down Arrow” which is underneath the profile icon, and then tap on “Choose an image”.
-Hit on “MENU” button from top left corner of the screen.
-Long hit on “Drive”, and then tap to “Permission”.
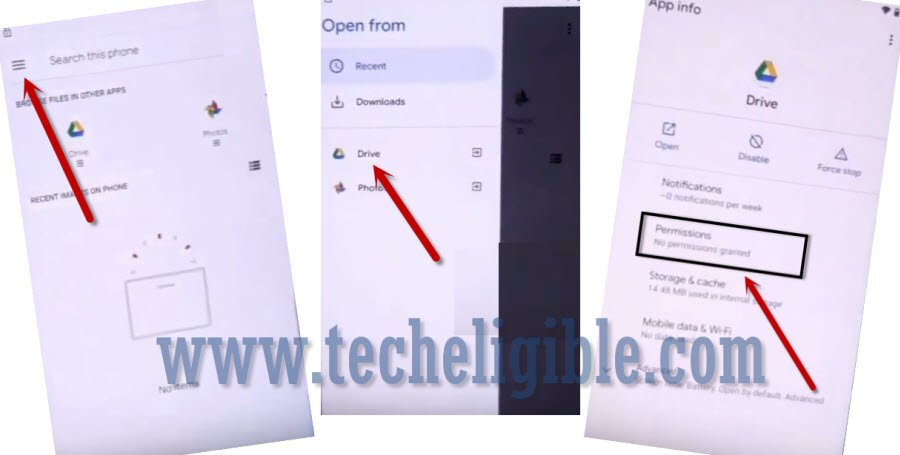
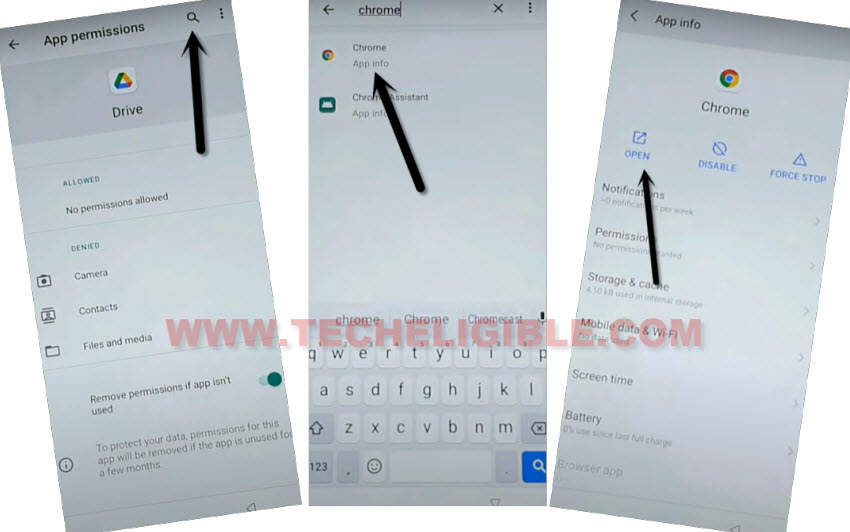
-Tap on “Search icon”, and type “Chrome” in search box.
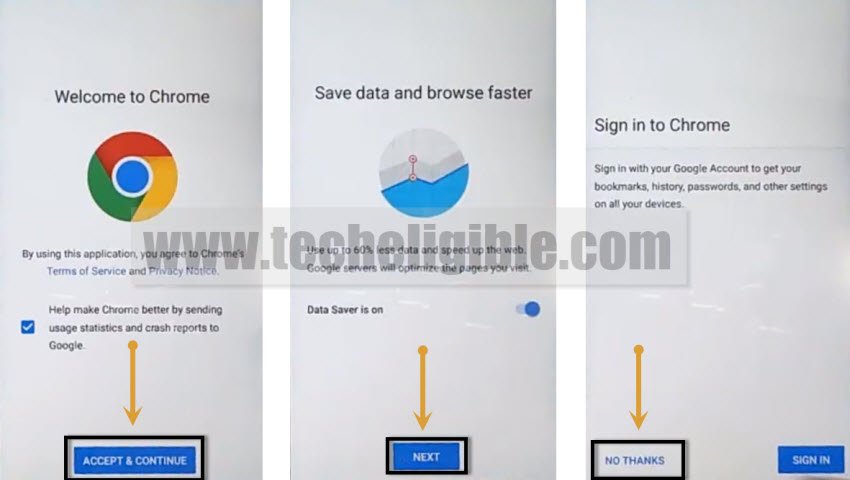
-Tap on “Chrome” from searched result, and hit on “Open”.
-Tap on > Accept & Continue > Next > No Thanks.
Download Xshare App:
-Search in browser “Download FRP Tools“, and go to 1st searched result.
-Scroll down and download “Xshare App” from there.
-Go to top of the page, and tap to “3 dots” from top corner, after that tap on “Downloads”.
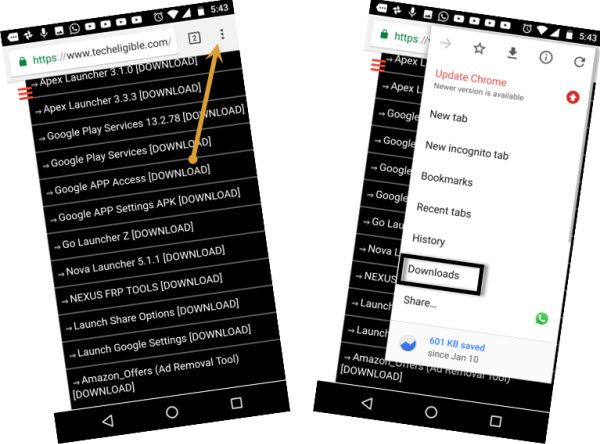
-There you will see “Xshare” app, just install this app in your device to Bypass FRP Itel Vision 2s.
Note: While installing this app, you may see (Chrome Popup) box, just tap to “Settings”, and enable option “Allow from this source”.
-Tap to “Back Arrow” and hit on “Install” button to install Xshare Application.
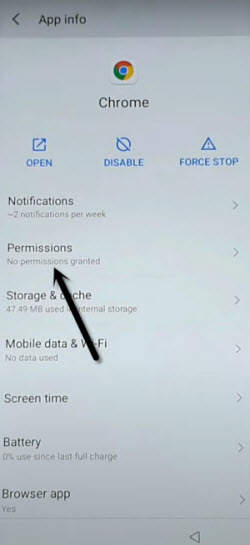
-By tapping on “Back Arrow”, just get back to same “Chrome” screen as can be seen in below image.
-Hit on “Permissions” from there.
-Tap to “Search icon” from top corner, and search there “Settings”.
-Tap to “Settings” from the searched result, and then hit on “Open”.
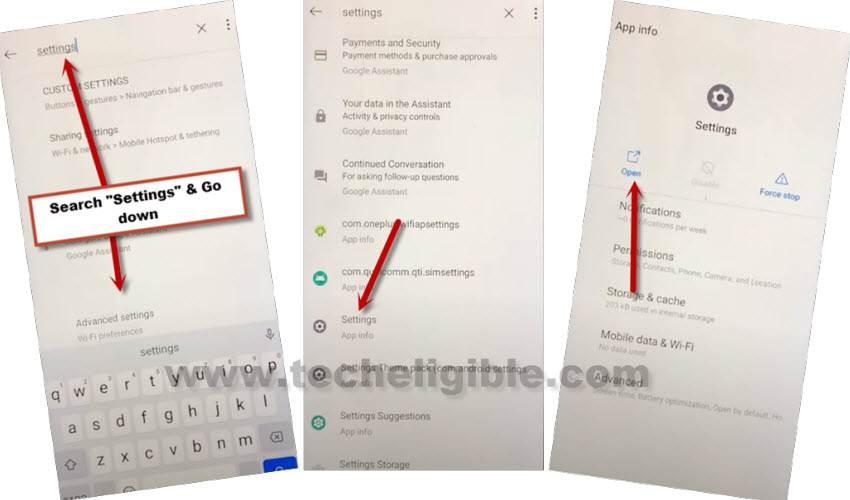
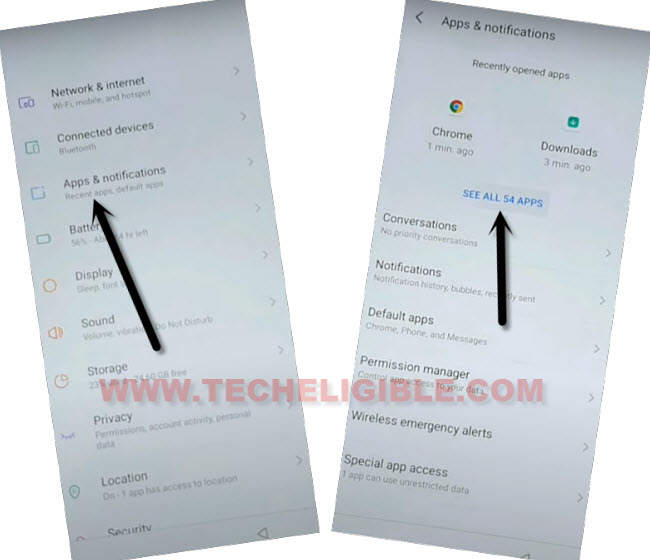
-Go to > Apps & Notifications > See All Apps.
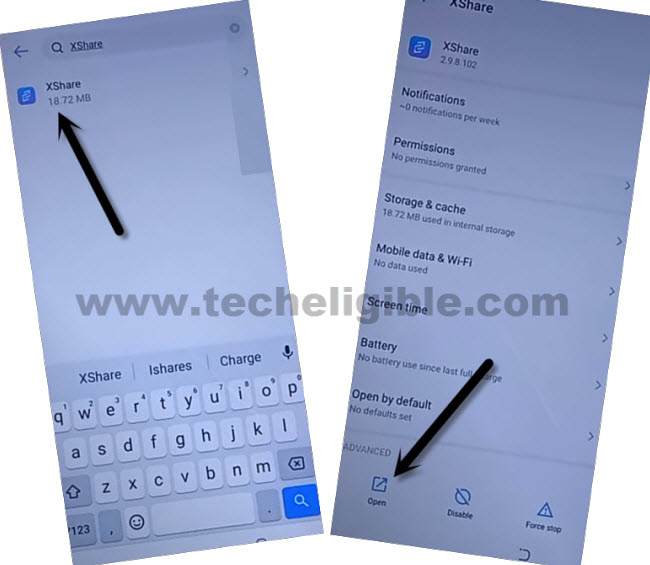
-From app list, search and open “Xshare” application to Bypass FRP Itel Vision 2s.
-Swipe screen to left 2-3 times, and then tap to “START > Agree > Allow”.
-We will transfer 2 apps from our other device to Itel Vision 2s, and through these 2 apps we will easily Bypass FRP Itel Vision 2s.
Download FRP Apps in Other Phone:
-In any other android device, first of all download frp apps, for that, open chrome browser and search “Download FRP Tools“.
-Access to our website frp tools page by following below image.
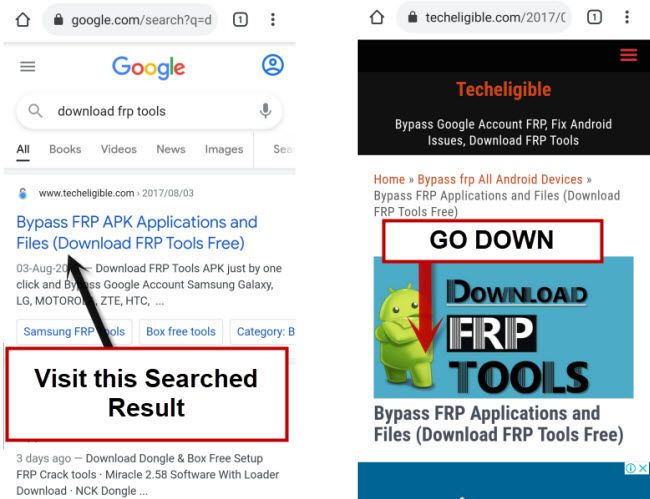
-Download from there below 2 apps.
1/ Google Account Manager 9.
2/ Account Login.
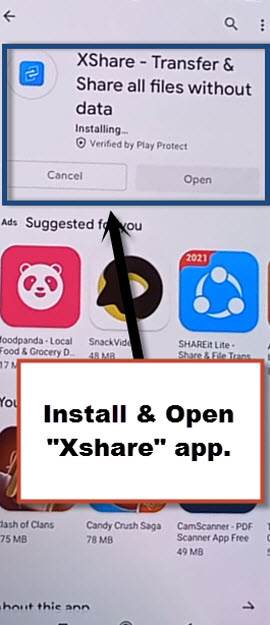
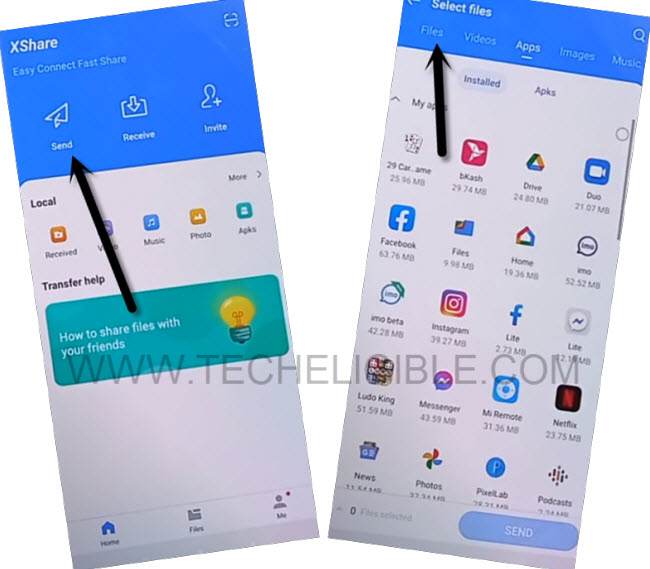
-Open “PlayStore” in other android phone, and install & open (XShare) App from there.
-Tap to > Send > Files > Phone Storage > Download > Select your both downloaded frp apps.
-Hit on > Send > Allow > Allow modify settings.
-Tap to “Back Arrow”, and then tap to “Allow”, and then tap turn on “Allow from this source”.
-Check mark option (i am aware of this possible….), and then wait, and tap to “OK”.
-This will show you a (QR Code).
Scan QR Code from Itel Vision 2s:
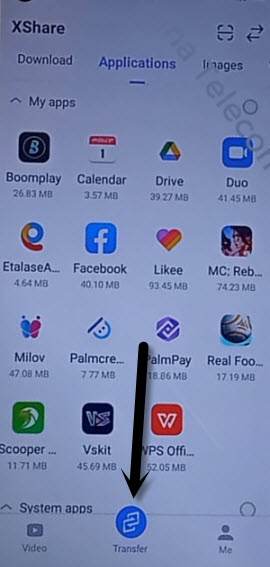
-In Itel Vision 2s device, tap to > Transfer > Receive.
-Hit on 1st option “Allow” for few times until you see “Scanning QR Code” screen.
-Now scan QR Code, that you received in other android device.
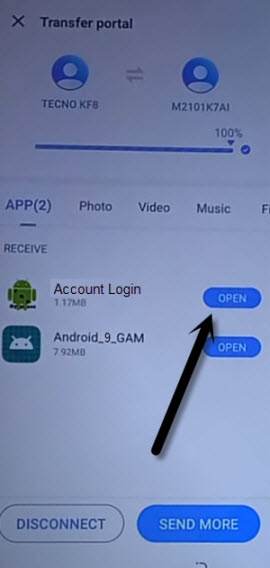
-After that, both device will be connected each other, and it will starts transferring both downloaded frp apps from other android device to Itel Vision 2s.
-Open “Account Login” app.
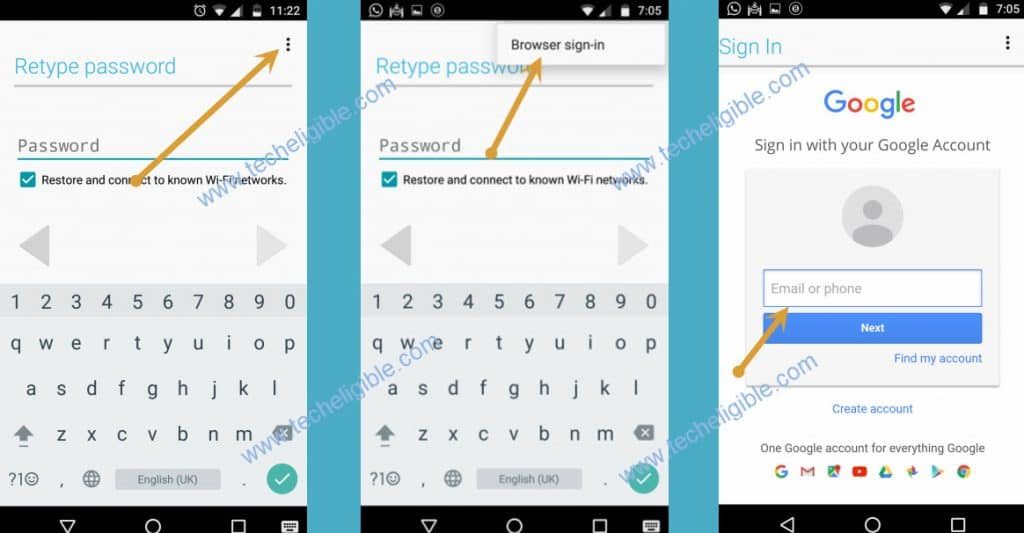
-You will be redirected to “Retype Password” screen, from there tap to “3 dots”, and then “Browser Sign-in”.
-Sign in with your valid Gmail Account to Bypass FRP Itel Vision 2s.
Verify Added Account & Finish Setup Wizard:
-After that, go back to “Settings”.
-Tap to “Accounts”, and there you will see your signed in google account, that means you have successfully removed old added Gmail account.
-Go back to > Settings > Apps & Notification > See all Apps.
-Uninstall your both frp apps (Google Account Manager + Account Login).
-Get back to first “Hi There” homepage by tapping on back arrow several times, and then finish your setup wizard by hitting on > Start > Skip > Don’t Copy, there you will have (Account Added) screen.
-Tap to > Next > Next > More > More > Accept.
-After wards, hit on > No Thanks > No Thanks > Agree, now select your country, and tap to “Next”.
-Congrats on Bypass FRP Itel Vision 2s successfully from here.
Read More:
