Bypass FRP Sony Xperia 5 Android 11 Without PC [New Way]
If you have a Xperia device with Android 11, and got your device a FRP lock protection, so you must need to follow steps here to Bypass FRP Sony Xperia 5 without wasting time here and there, this is very straight forward solution, and this solution is working on many other devices those are running android version 11.
Note: We highly recommend you to apply this method only on your own device, if you are not owner of this VIVO Y33s device, or you found this from some where, you must return this device to its real owner.
Let’s Begin to Bypass FRP Sony Xperia 5:
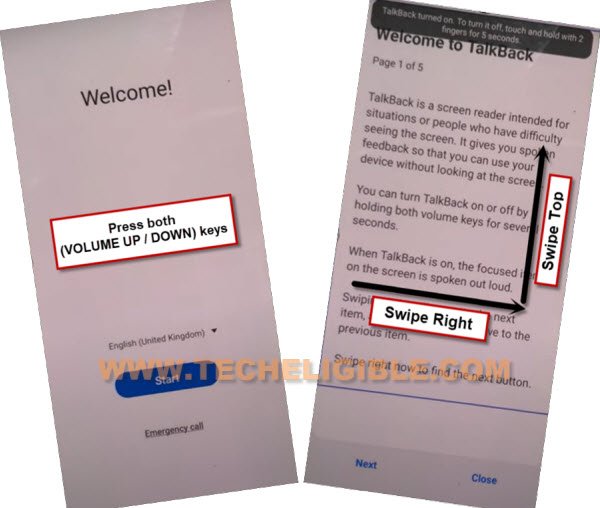
-Start the process just by connecting WiFi first, after that long press both (Volume UP / Down) keys at same time, this will enable talkback feature in your device, and will show you talkback screen.
-If you don’t see (Welcome to Talkback) screen, just long press both (Volume UP/DOWN) keys again to get talkback screen.
-Let’s draw reverse “L” letter by swipe right and then swipe up.
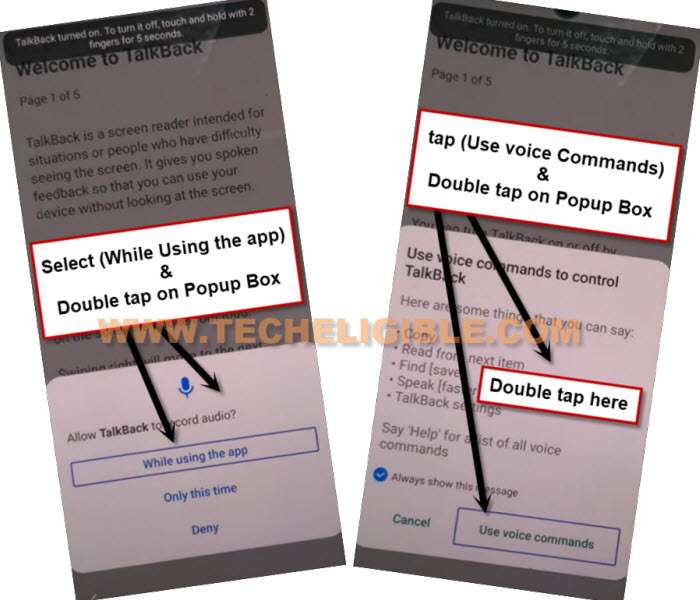
-Select option “while using the app”, now double tap on anywhere on screen.
-Select “Use Command Voice” option, and double tap on popup box or any where on screen.
-Speak loudly “Open Google Assistant”.
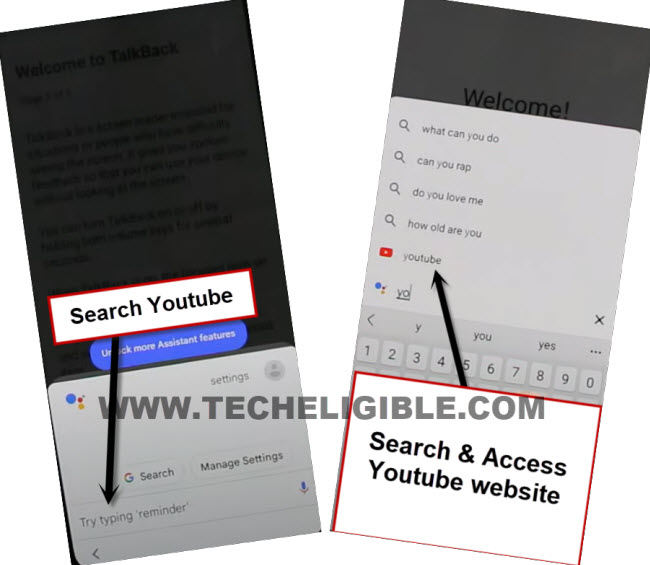
-After that, new popup box will appear, just double tap to “Keyboard” icon from there.
![]()
-Search and go to “Youtube” website by following below image.
-Tap on “Profile icon” from top corner, and go to > Settings > About > Youtube terms of service.
![]()
-From chrome window, tap to > Accept & Continue > Next > No Thanks.
Disable Apps from Settings:
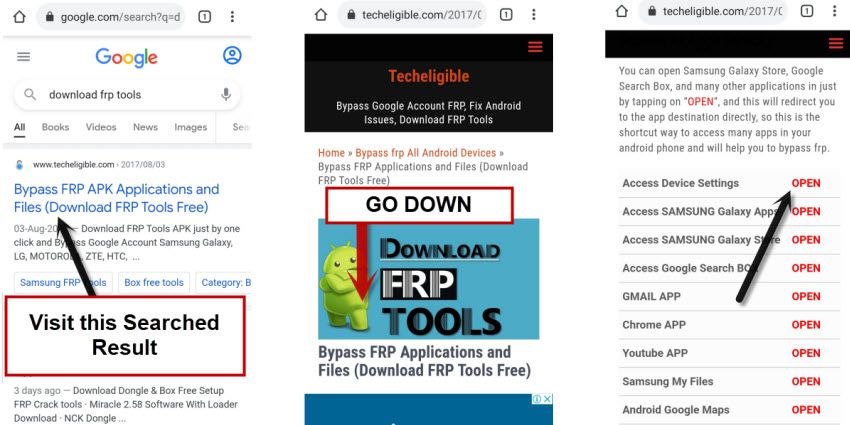
-Search in browser “Download frp tools“, and visit our website searched result.
-Tap on “Access Device Settings” to get into your device settings directly.
-Go to > Accessibility > Accessibility MENU > Turn on (Accessibility MENU Shortcut) > Allow > Got it.
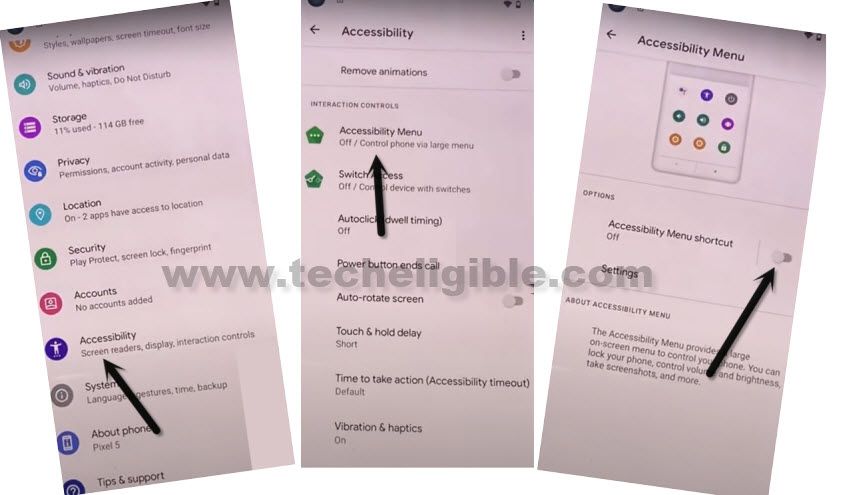
-At bottom right corner (3 dots) icon will appear up, this will appear only after you successfully turn on (Accessibility MENU Shortcut) option same as shown in above screen shot.
Go to Applications List to Disable:
-Go back to (Settings) again, from there tap to > Apps > See All Apps.
-Tap on “3 dots” from top corner, and then tap to “Show System”.
![]()
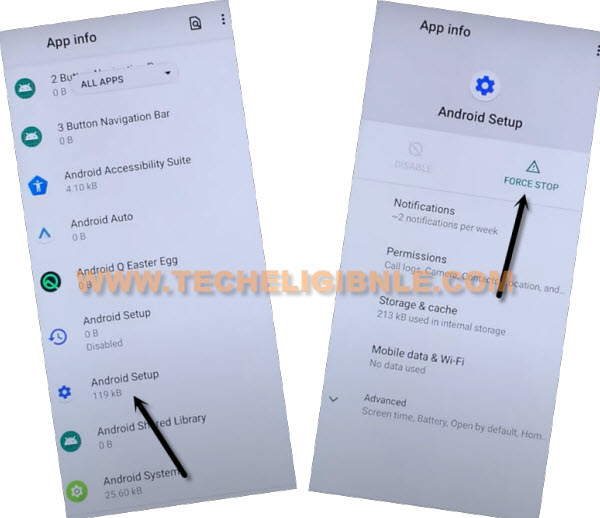
-Go to settings icon (Android Setup), and then tap to “Force Stop”, and then “OK”.
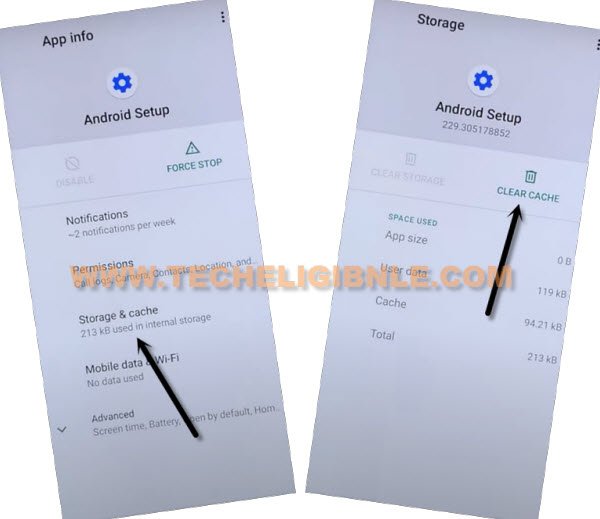
-Go to android setup “Storage & Cache”, from there tap to “Clear Cache”.
-Lets get back to “App list” by tapping on back arrow “2 times from bottom”.
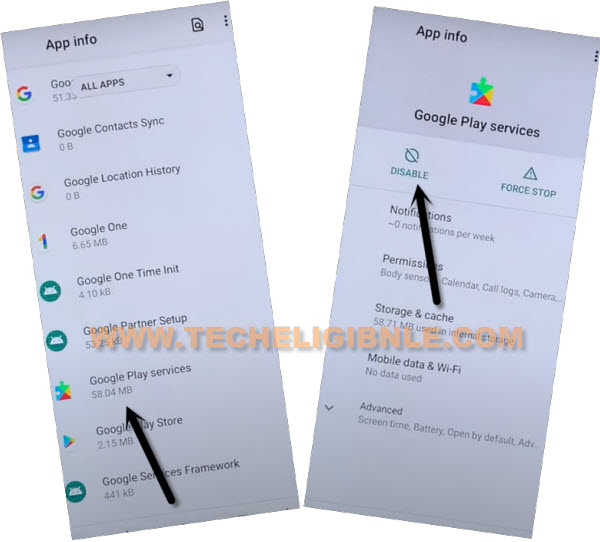
-Scroll down little bit, and go to > Google Play Services > Disable > Disable App.
-After that tap to > Force Stop > OK.
-Go to this same app “Storage & Cache”, and then hit on “Clear Cache”.
-Restart your device to bypass frp Xperia 5.
Follow Below Steps Rapidly/Fast:
-When the device is started, tap to > Get Started > Accept > Skip.
-Now you will have “Just a sec…” loading screen, just wait there for 15-20 sec.
-After that quickly follow below steps, you may need to repeat below steps few times to reach successfully (Google Play Services) to enable that app again.
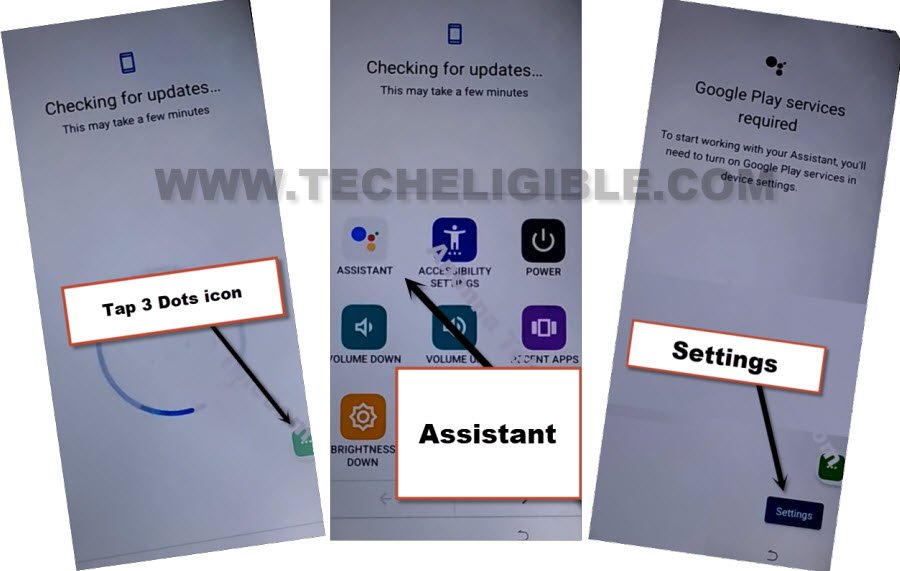
Step 1: Quickly tap to “3 dots” icon.
Step 2: Quickly tap to > Assistant > Settings.
Tips to Finish Above Steps quickly: After hitting on “Assistant”, keep tapping on rapidly on “Settings” position before the (Settings) appear, so as soon as “Settings” option will come up there, you will hit that as well.
-Once you reach inside (Google Play Services) screen, quickly tap to “Enable” button from there.
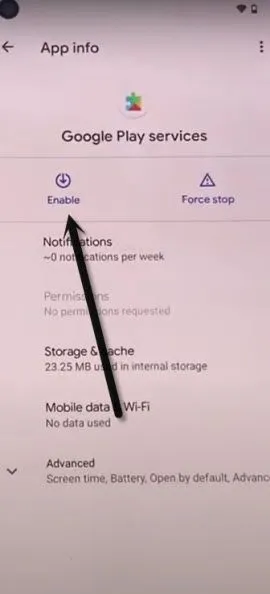
-Tap on back arrow to get back to “Just a sec…” screen, now wait there for 15 sec at least.
-Tap again on “Back Arrow” from bottom, and you will get back to (Connect to WiFi) screen, from there hit on > Setup Offline > Continue.
-Now you will see (Google Services) screen, from there tap to > More > More > Accept.
-Skip set a PIN screen, and then tap to > Continue > Next > Finish.
-Congrats, you are now inside your device homescreen, now we have to perform reset task from device settings to permanently Bypass FRP Sony Xperia 5.
-Go to > Settings > System > Reset Options.
-Tap 3 times on (Erase all data), and the device will auto restart, after that old google account account will deleted, and you can easily setup new account, thanks for visiting us.
Read More:
Remove Sony Xperia 10 | Xperia 10 Plus | Xperia 1
