Samsung Galaxy S20, S20 Plus, S20 Ultra Bypass FRP (Android 11)
You can remove frp Samsung S20, S20 Plus, Samsung S20 Ultra on a (Android 11) version devices, we hope, this process will help you to get back your device with updated new Gmail account, use a free (Samfirm) pc software, that will allow you to open youtube and chrome browser, once you reach to this Samsung device, you will be able to setup new google account, and permanently remover the forgotten account.
Warning: This method is only for device owner and for educational purpose only.
| Method 1: FRP Bypass Galaxy S20, S20 plus, S20 ultra (Android 11) |
| Method 2: FRP Bypass Galaxy S20, S20 plus, S20 ultra (Android 11) |
| Method 3: FRP Bypass Galaxy S20, S20 plus, S20 ultra (Android 12 | 11) Latest |
Method 1: Bypass Google Account on Galaxy S20 Ultra, S20 Plus, S20
Tools We Need:
⇒ SamFirm Tool.
⇒ Samsung UBS Drivers.
⇒ Any other android device.
⇒ Gmail ID.
Step 1: Install & Open “SamFirm Tool 1.6.4” in your PC [DOWNLOAD HERE]
Step 2: Install “Samsung USB Drive” in PC [DOWNLOAD]
Step 3: Connect “WiFi” to Galaxy S20, after that connect with PC.
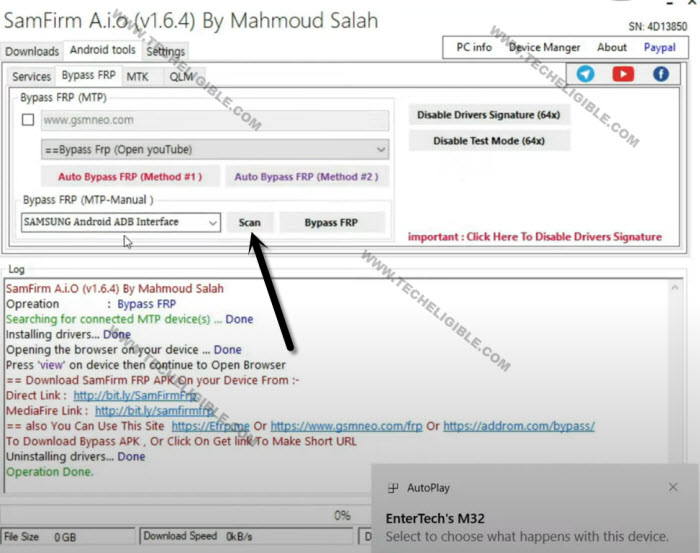
Step 4: From (Samfirm) software, tap to > Android Tool > Bypass FRP.
Step 5: Tap to > Scan > Bypass FRP.
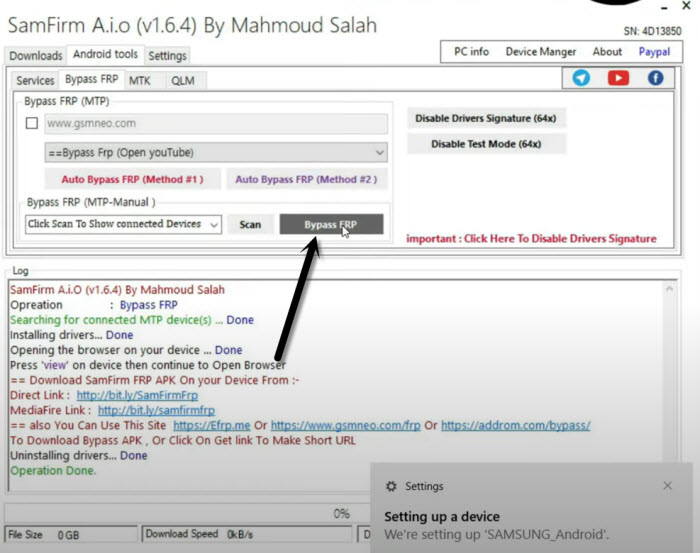
Step 6: You will receive a popup window in Galaxy S20, just hit on “View”.
Note: If you do not receive a popup window, just tap to “Disable Driver Signature” from the Samfirm tool, and then reconnect your device and try again.
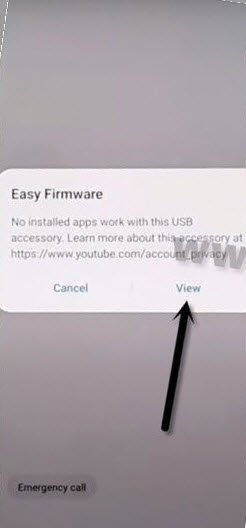
Step 7: Tap to > Accept & Continue > Next > No Thanks.
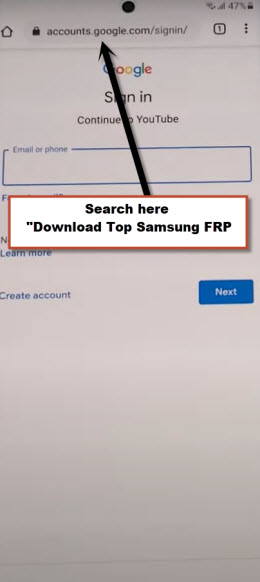
Step 8: You will see “Google Sign in” screen, but there will be a search area at the top bar, we are going to access Samsung frp tools page.
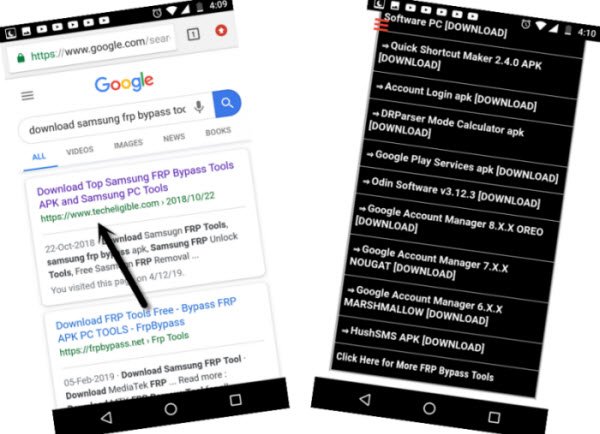
Step 9: Search “Download Top Samsung FRP Tools“, and visit our website searched result.
Step 10: Scroll down from there, and tap to “Install S9 Launcher“‘.
Step 11: Tap to > Update > Install & Open > Login with Google Account.
Step 12: From popup window (Want a faster way to sign in), just tap to “Cancel”.
Step 13: Now hit on > Allow & Download > Install Anyway > Continue > OK, afterwards, you will get into your device homescreen automatically, but still we are required some more steps to bypass google account.
Follow Steps in Other Android Device:
Step 14: Now we are required another non frp lock device, open > Settings > Accounts & Backup > Accounts.
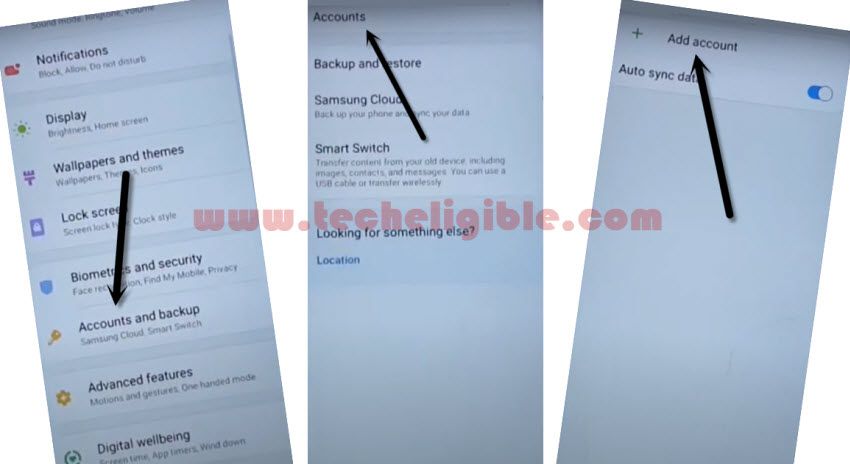
Step 15: Add your Same (Gmail Account) which you have already added in your Galaxy S20 device while downloading (S9 Launcher) app to Bypass FRP Galaxy S20.
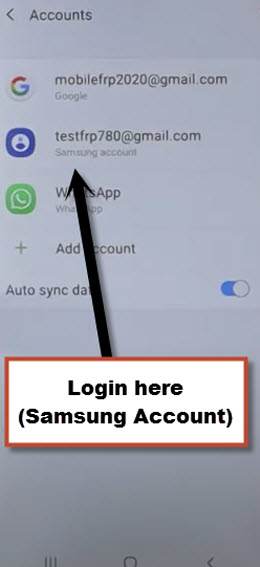
Note: Make sure, your both android devices are on same WiFi network and on Same Samsung Account.
Step 16: Open “Play Store” in other android device, and install “Alliance Shield X” app.
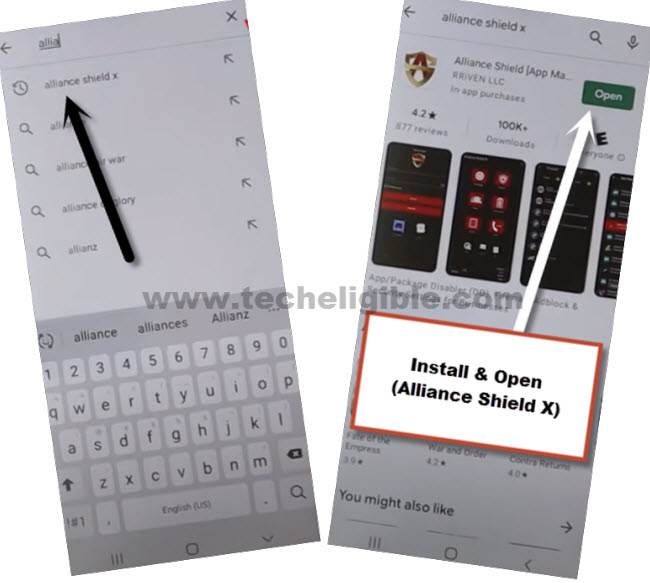
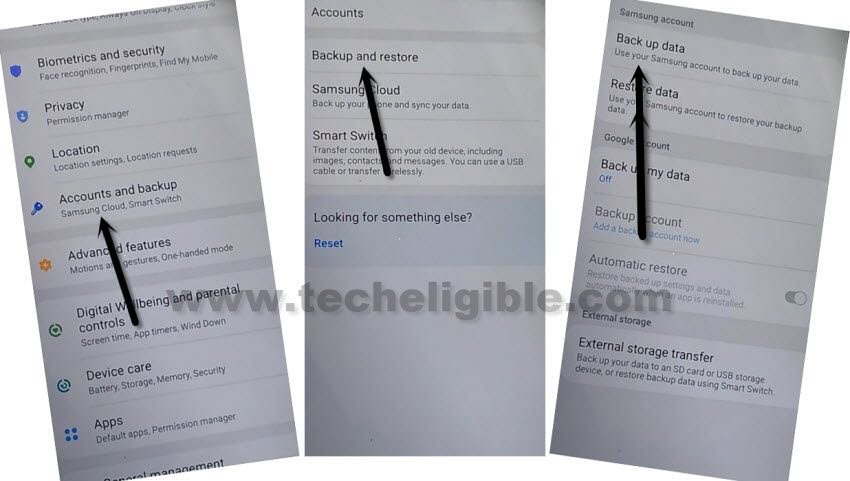
-Go to > Settings > Accounts and Backup > Backup And Restore > Back up data.
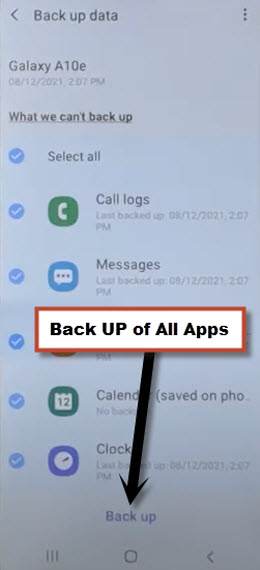
-Tap to “BACKUP UP” button from below to backup all your apps in Samsung Account, which is already signed-in in your (Galaxy A22) phone.
Follow Steps in Galaxy S20 Device:
Remember: The same (Gmail Account) which you signed in (Galaxy S20), should also be signed-in in your (Other Android Device), means your both devices should be with same Gmail Account in order to remove frp correctly.
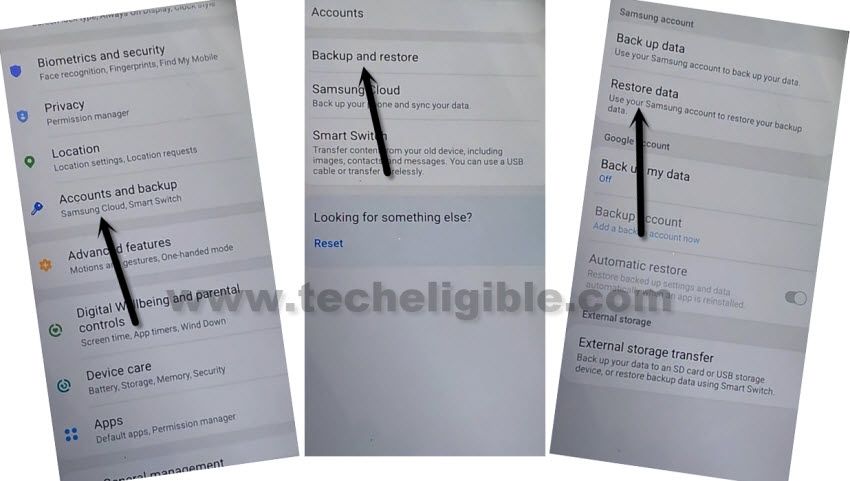
Step 17: From Samsung device (Settings), just go to > Accounts & Backup > Backup and Restore > Restore Data.
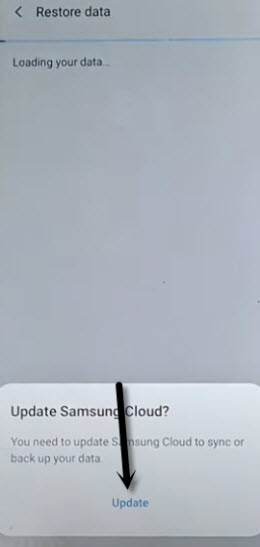
Note: You may have a (Update Samsung Cloud) popup window, just hit on “Update” button, after that tap to “Restore” and wait until this updating process done.
Step 18: After few minutes waiting, tap again on “Restore Data” option.
Step 19: There you will have (Choose a verification Method) screen, Choose any one of your method to verify your email.
Step 20: Now tap to “Get Started” button and this will start restoring data.
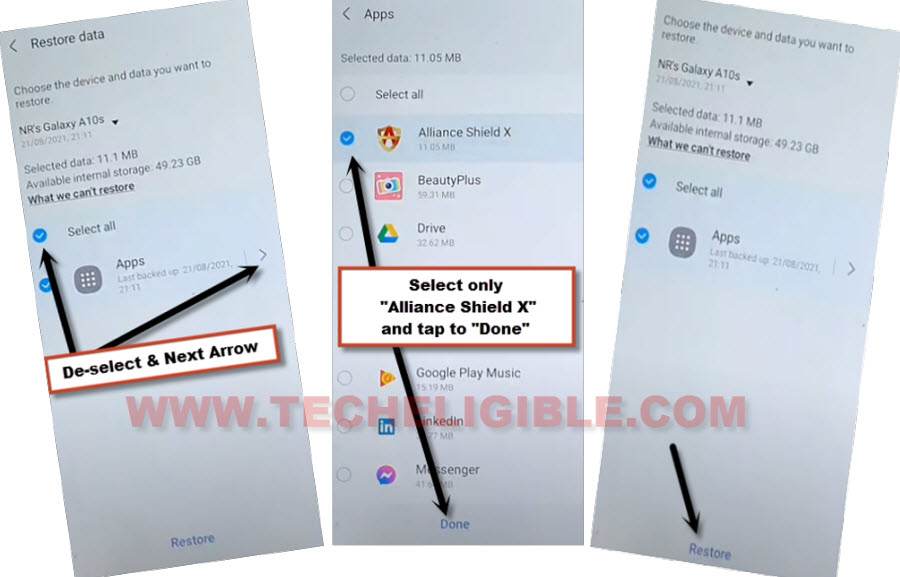
Step 21: De-select the “Select All” option, and the tap to “Next Arrow” which is right next to the (Apps), after that select only “Alliance Shield X”, and then tap to > Done > Restore > Install.
Register New Account in Alliance Shield X:
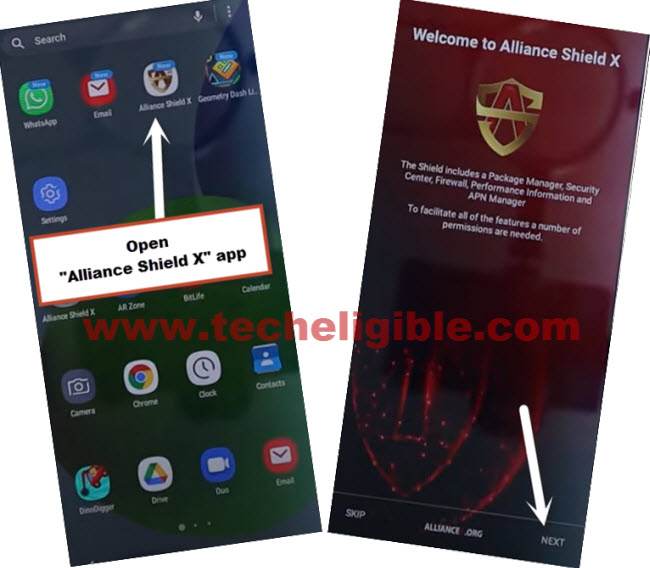
Step 22: Go to > MENU > Alliance Shield X.
Step 23: From the (Alliance Shield X) app, tap to > Next > Next > Next > Got it.
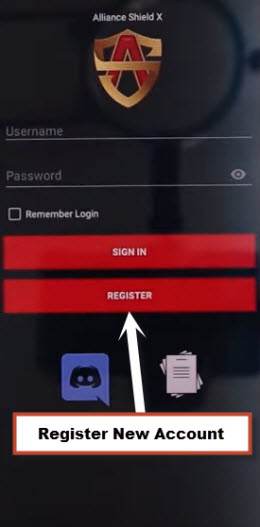
Step 24: Register your new account in (Alliance Shield X) .
Step 25: Sign-in with your registered account in (Alliance Shield X) app to Bypass FRP Galaxy S20 Ultra, S20 Plus, S20.
Step 26: Type any “Device Name”, and then tap to “Next”.
Step 27: Turn on “Device Admin”, and hit on > Activate > Next.
Step 28: Turn on “Knox”, and select option (i have read and agree…), and tap to > Confirm > Next > Finish.
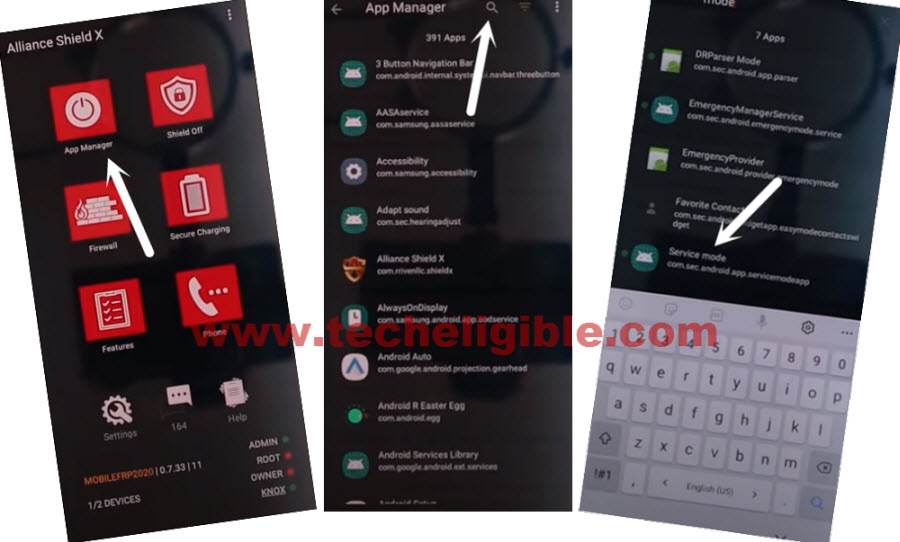
Step 29: Tap on “App Manager”, and tap to “Close” from popup box.
Step 30: Hit on “Search icon” from top corner, and search there “Mode”, and tap to “Service Mode”.
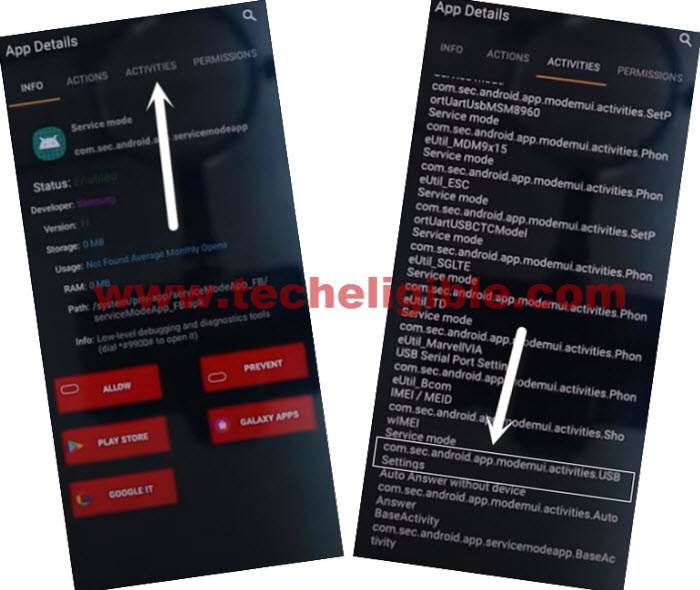
Step 31: Tap to “Activities”, and then scroll all the way down, and tap to (com.sec.android.app.modemui.activities.usb.settings).
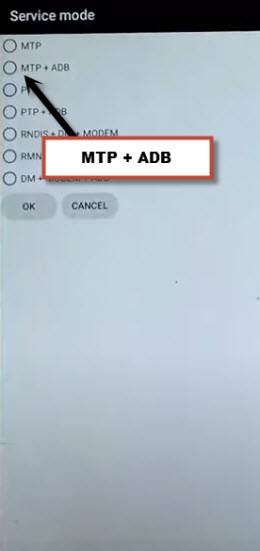
Step 32: Tap again on (com.sec.android.app.modemui.activities.usb.settings), and again hit on “OPEN”, and then select (MTP+ADB).
Final Step:
Step 32: Open “SamFirm tool” in PC, and then connect your Galaxy device with PC.
Step 33: From (Samfirm tool), tap to > Android Tool > Bypass FRP > Scan.
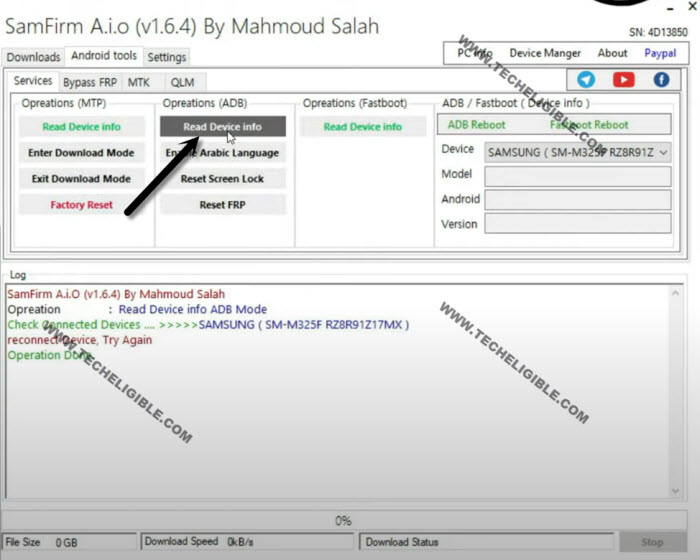
Step 34: Go to > Services > Read Device info.
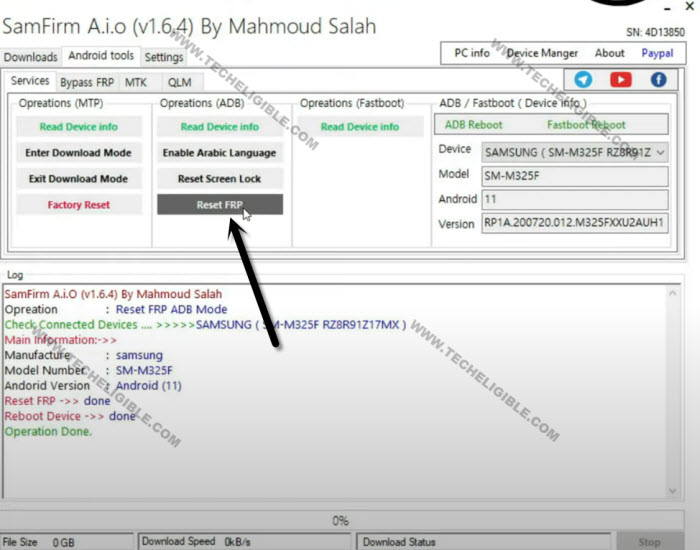
Step 35: Once the info reading process completes, just hit on “Reset FRP” button from there.
Note: You will also receive a popup window (Allow USB Debugging) in your Galaxy device, just tap to “Allow”.
Step 36: Now you this device Galaxy S20 will be reboot, the method has been completed, you are all done, Thank You.
Method 2: Remove Google FRP Galaxy S20 Ultra, S20 Plus, S20
This method will work like a charm on Samsung Galaxy S20 Series (Android 11) version, also you can try on updated security patch android 10, if you want, but before applying this, you should go for below 3 methods, if you have android 10 device, if you fail, then try this method.
Arrange Tools First:
⇒ SamFirm Tool V1.3.1 [Download]
⇒ Latest Samsung USB Driver [Download]
⇒ Other Android Device.
⇒ OTG + USB Cable.
Note: Above 2 tools (Driver + Samsung FRP Tools) will be used for PC.
How to Bypass frp:
-first of all, install (USB Driver + SameFirm) tools in your computer.
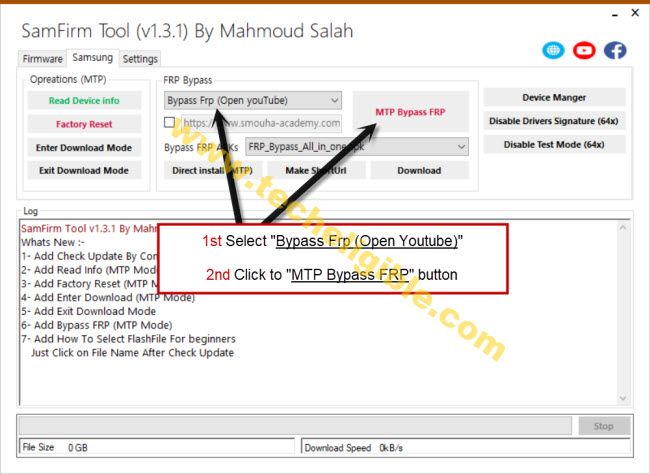
-Open “SameFirm Tool”, and click on “Samsung” tab.
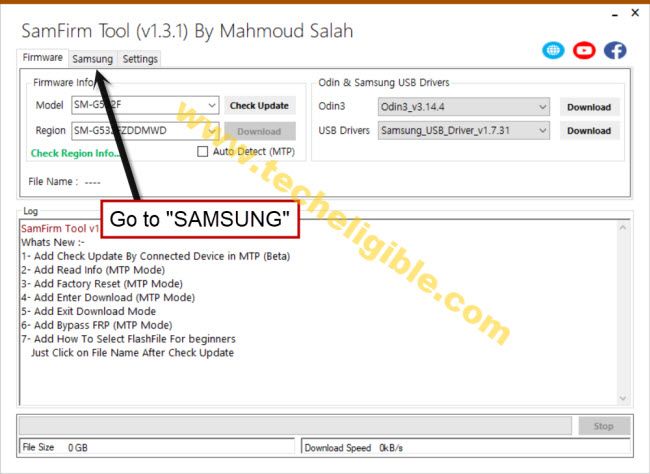
-Connect WiFi & Connect with PC through Data Cable.
-Select “Bypass frp (Open Youtube)”, and then click on “MTP BYPASS FRP” button, and from popup window, hit on “OK”.
Note: You may have to try 2-3 times to open “Youtube” in your device, you will receive popup window in your phone, if you don’t receive such window, and you get failed error in SameFirm tool, so try again by connecting and disconnecting device, and click again on “MT Bypass FRP” button to Bypass FRP Galaxy S20.
-Tap on “View” from Galaxy phone, this will show you chrome window, so go to > Accept & Continue > Next > No Thanks.

Go to Device Settings:
-Download frp removal tools, for that search in top search area “Download Samsung FRP Tools“, and go to our website searched result. (For help, see below image).
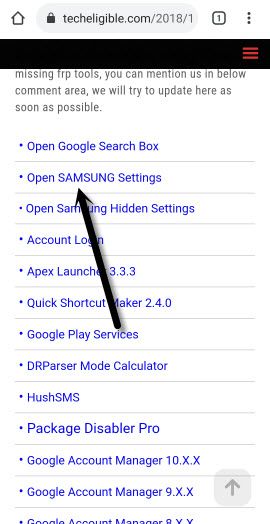
-Tap on “Open Samsung Settings” to your phone settings.
Lets Add Gmail ID:
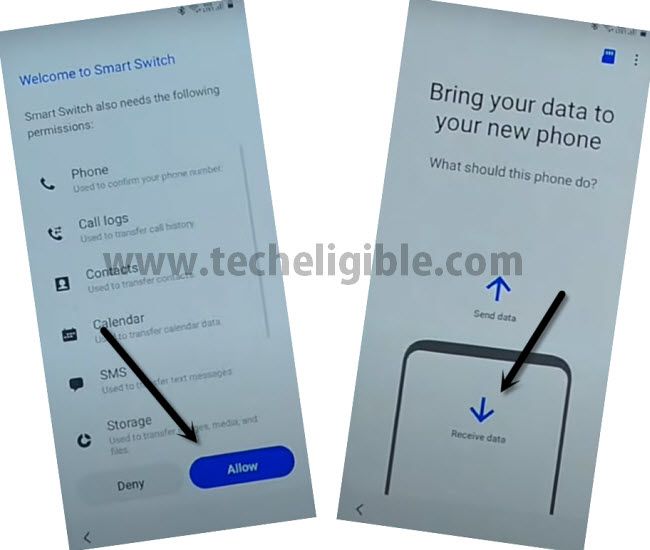
-Go to > Accounts & Backup > Bring Data from old device > Download > AGREE.
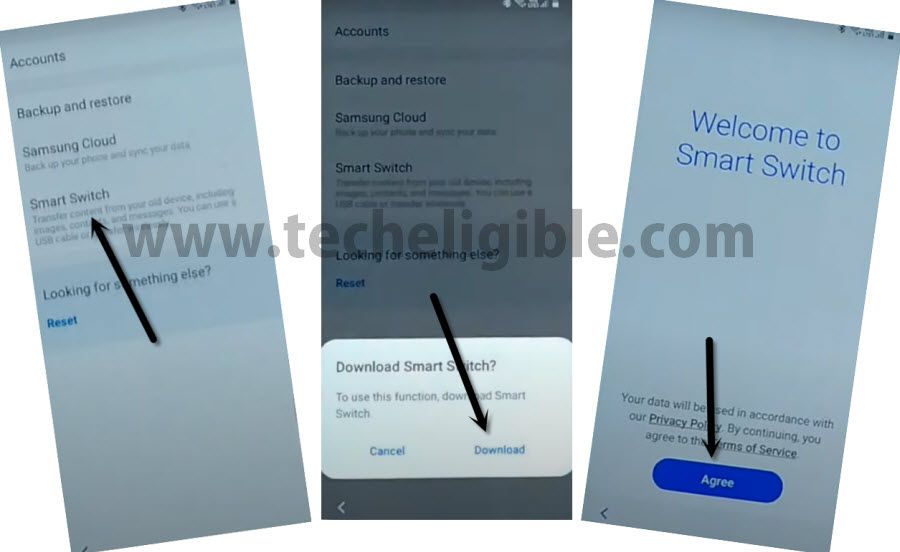
-Go to > Agree > Allow > Receive Data > Cable.
Open Smart Switch in Other Smartphone:
-Install & Open (Smart Switch) App in other phone through google play store, to do this, just Open “Galaxy Store”, download & open “Smart Switch” app from there.
Note: If your other smartphone is of Samsung Brand, so you don’t need to install this app, you can open this app directly by going to > Settings > Accounts & Backup.
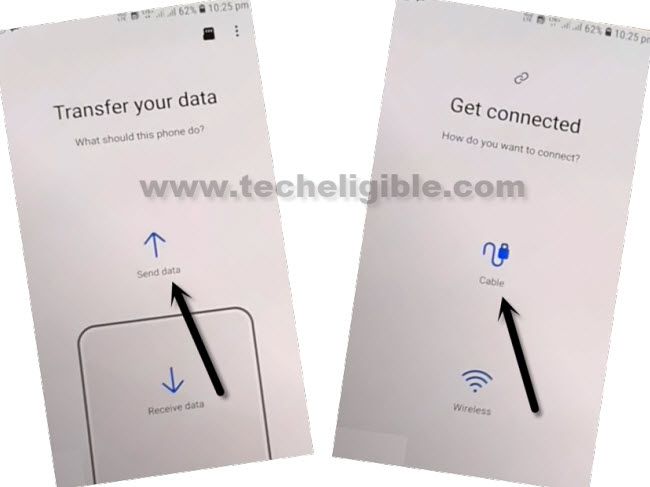
-Tap on > Send Data > Cable.
Connect OTG to S20 Ultra:
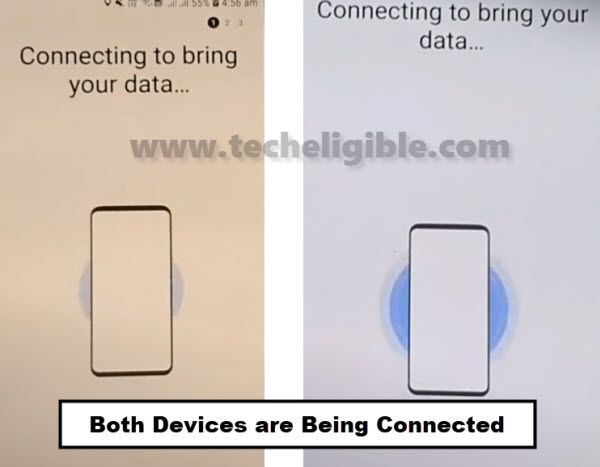
-Connect OTG to the Samsung S20 and other end of USB to other android phone.
-Hit “Allow” on both smartphones.
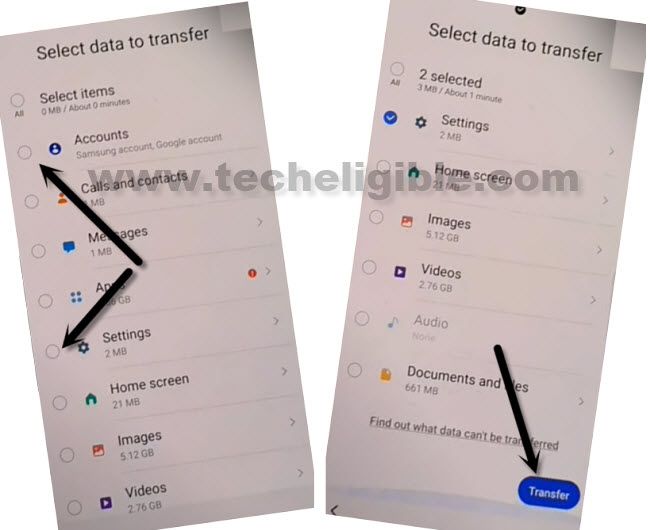
-Choose only (Accounts and Settings).
-Afterwards, tap on “Transfer” to Bypass FRP Galaxy S20.
-Hit on “COPY” from other Android phone.
-You may be asked for verify identity in your other android phone, after that this will start transferring its (Account & Settings) to the Samsung device.
-The Sign in window will popup in Samsung device, so enter your Gmail Account password to sign in.
-After you signed in successfully in your device, by tapping several times on back arrow, get back to first (Welcome) screen.
-Finish initial setup wizard from there, that’s it.

