Bypass FRP Samsung Galaxy Android 13 (Updated 2023 Method)
This process is the best one and can now be applied to Bypass FRP Samsung Galaxy Android 13 device without using any FRP applications, there is a free Android Services Tools, Samfw too & ZeroKnox Tool. These tools are working perfectly on Samsung devices, we will use these tools in PC only, and connect FRP locked Samsung Android 13 device with PC using USB cable.
We have added 3 updated methods on Samsung Android 13 FRP bypass, you can start with (Method 1), that is recently updated, and working fluently on almost all Samsung Android 13 phones.
Everything has been explicitly described, so you don’t need to worry about anything, both free software links are available in this post, download both tools and use into your FRP protected Samsung device to bypass frp.
Method 1: Bypass FRP Samsung Galaxy Android 13 (By ZeroKnox Tool)
-Turn on Samsung Android 13 device & Connect WiFi.
-Go back on first (Welcome) page.
-Connect phone with PC using proper USB Cable.
⇒ Install Samsung USB Drivers [DOWNLOAD].
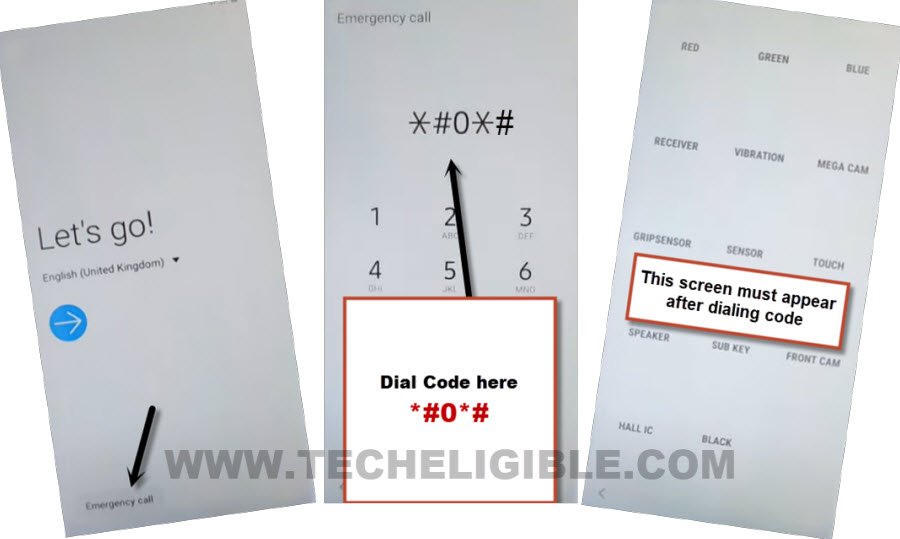
-Lets enable adb first, to do this, just go to “Emergency Call” option from there.
-Dial code on screen *#0*#, once you have a (Blank Boxes) screen, that means, the code has just worked know, and we can easily bypass frp by Zero Knox Removal tool.
Use Zero Knox Tool:
⇒ Zero Knox Removal 1.0 Tool [DOWNLOAD]
Pass: MobileTeam
-Before extracting this tool, just turn off your active @ntivirus tool for a while until you finish up process with this tool.
-Extract tool by giving password.
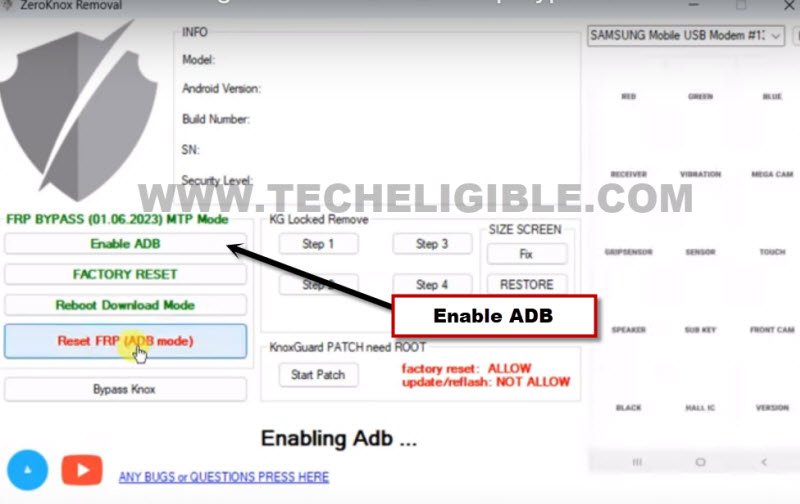
-Let’s run Zero Knox tool as administrator, and hit over “Enable ADB” option. After that, tap to “Ok” from popup of (is phone connected to WiFi). Do make sure, your device is properly connected to WiFi.
-As, we’ve already dialed code in our device, so just tap to “Ok” from dialing code popup.
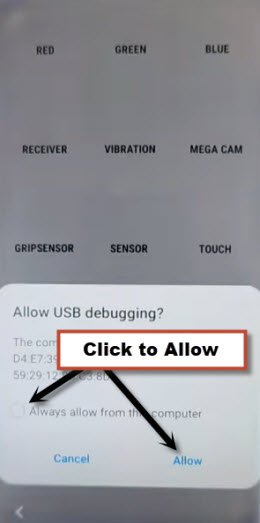
-You will receive another popup in your Samsung galaxy device screen saying (Allow USB Debugging?), just check mark option (Always allow from this computer), and then hit on “Allow”.
-You will see (Enabling ADB Mode) on your screen, just wait for few minutes.
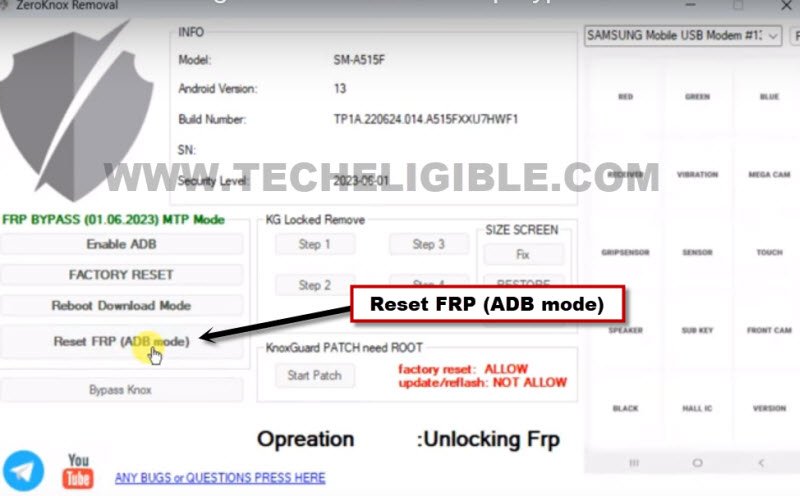
-Click over “Reset FRP (ADB Mode)” option to Bypass FRP Samsung Galaxy Android 13.
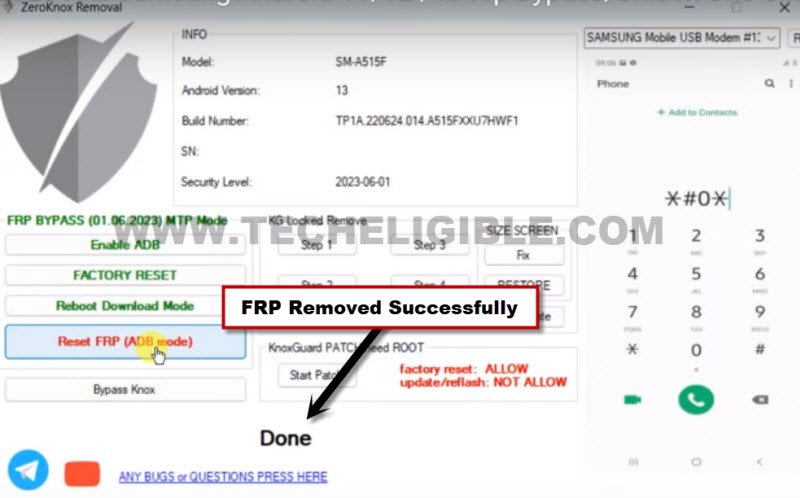
-This will take time to be finished, once its done, you will see there a (Done) message in your tool screen.
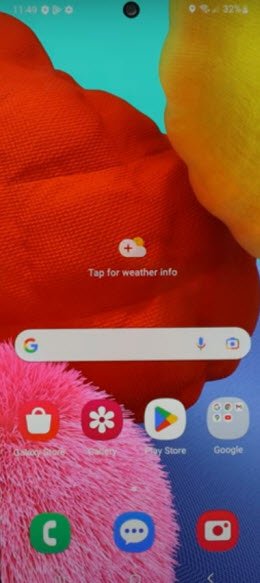
-Samsung phone will auto restart, and you will be redirected inside device home-screen without completing initial setup wizard.
Method 2: Bypass FRP Samsung Galaxy Android 13
This is a awesome method, that we’re gonna use to bypass frp Samsung Galaxy Android 13 without using any paid service, and without package disabler pro. There is a free tool with the name of (Android Service tool), through this tool, you can easily bypass frp without using any FRP bypass application in your Samsung Galaxy device.
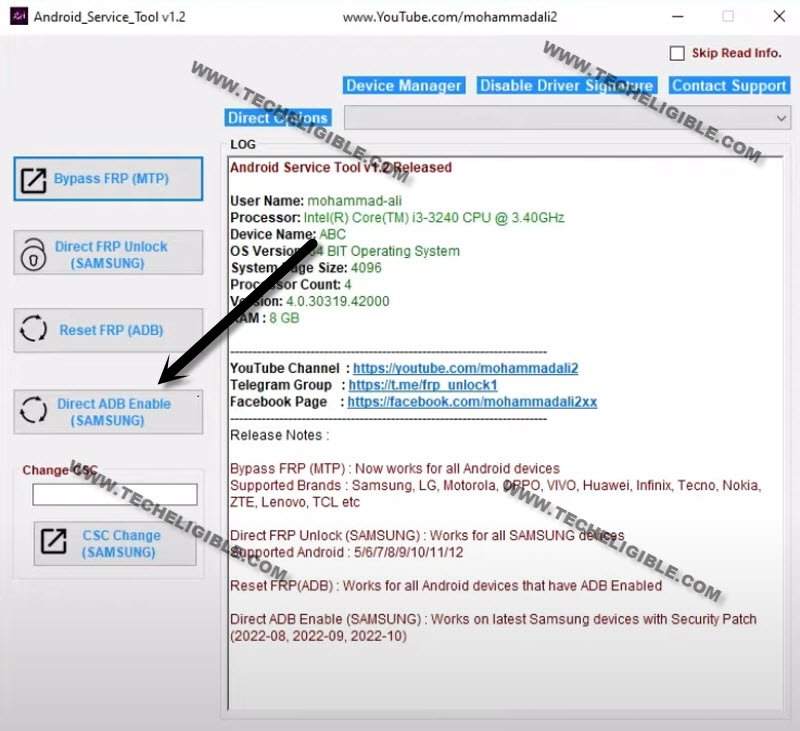
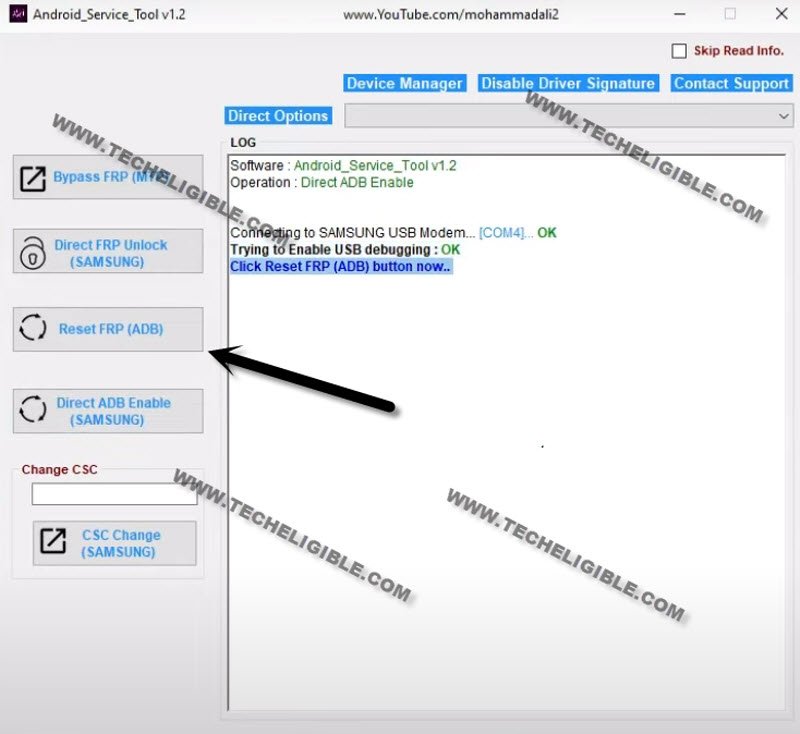
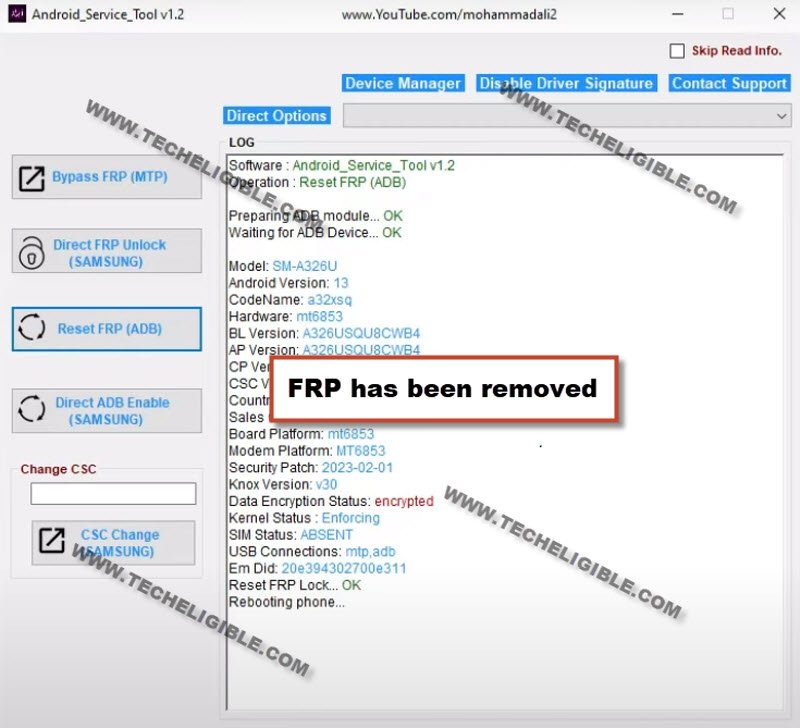
We just have to connect our device with PC, and download and install that (Android Service Tool) in our PC, after that open that tool and click to “Direct ADB Enable (Samsung)” button. And, hit on a “Reset FRP (ADB)” button, that will completely remove old frp account.
Let’s Follow easy steps from below to apply this procedure completely on your any Samsung Galaxy Android 13 device.
Download Android Service Tools First:
-First of all download below tool in your PC.
| ⇒ Android Service Tool V1.2 [DOWNLOAD] ⇒ Winrar Pass: techeligible.com |
Note: Don’t forget to turn off your @ntivirus software before extracting and running this tool, otherwise you won’t be able to use this tool freely, once you used this software, you can enable back your @ntivirus software.
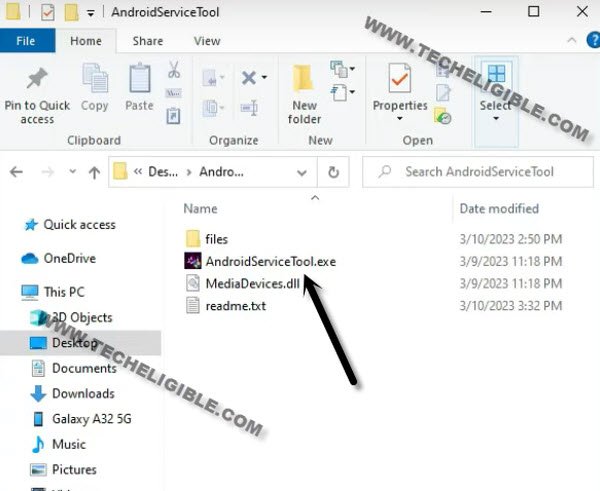
-Let’s run “Android Service Tool” as administrator in your PC.
-Turn on Samsung Galaxy Device & Connect with PC using USB or Data cable.
-Do make sure, WiFi is also connected into your FRP locked Samsung device.
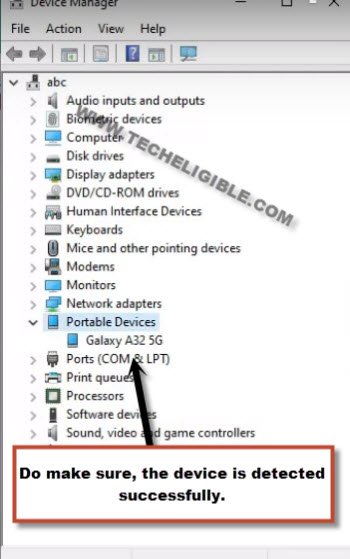
-Open your computer (Device Manager), and check your connected Samsung device name there, if the device name is appearing up, that means, your device has been detected by PC successfully.
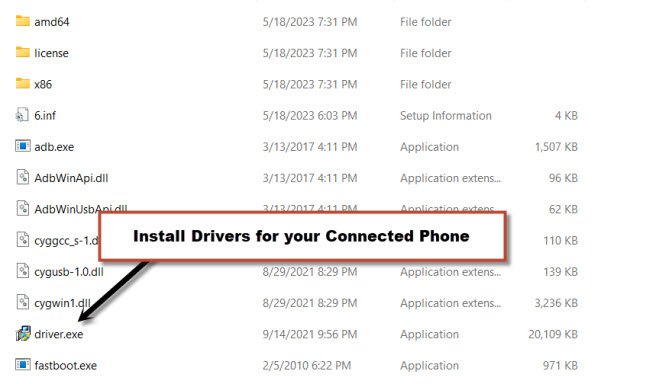
-If your device name is not being shown in device manager, that means, the device is not being detected, Don’t worry about this, just install drivers from downloaded tool folder name “Files”, and run “Driver.exe” from there. After that, try again to connect your device with PC and check your device name in device manager.
Let’s Bypass FRP on Samsung 2023:
-Let’s get back to (Android Service tool) screen, and tap over “Direct ADB Enable (Samsung)” button.
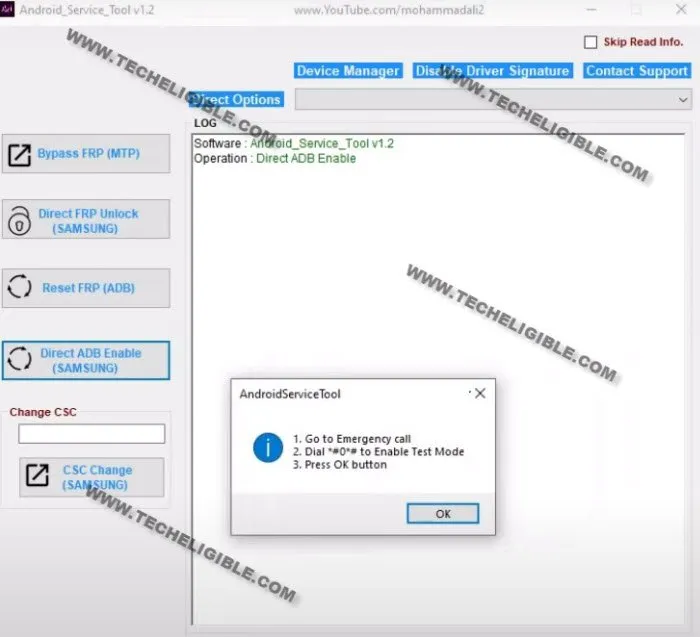
-You will have a popup window along with some instructions of dialing code in your device.
-Put your Samsung device back on first (Welcome) screen.
-Tap to “Emergency Call” option, and dial this code there (*#0*#).
-Some blank boxes screen will be displayed, that means, the code has just worked.
-Let’s get back to the PC software screen, and click on “OK” from popup, after that, the software will start enabling USB debugging mode, you may check your device (ADB Interface) from device manager.
Note: Android service tool will try to enable USB debugging mode few times, if it does not, then click again on “Direct ADB Enable (Samsung)” button.
-Once your tool has successfully enabled (USB debugging) mode, you will be instructed to click on “Reset FRP (ADB)” button.
-Tap (Allow) from the phone to allow usb debugging.
-After that, Android service tool will take few seconds to complete its task, and then, your FRP will be deleted completely without any extra effort. This is a very short and effortless method to easily bypass frp Samsung Galaxy Android 13.
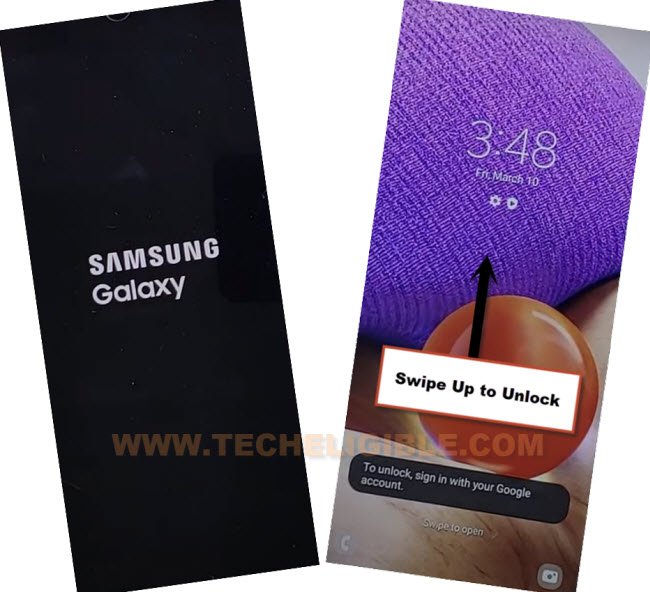
-Your Samsung device will auto restart, after that, we have to reset device from settings.
Let’s Reset Samsung Device from Settings:
-Once restarting process is done, you will be redirected to your device (Homescreen), wait over that, till all apps load successfully.
Note: Factory data reset will delete all data from your device, if you don’t want to perform this task, you first try to add your new google account, and setup new pattern lock or pin lock, if you did that all successfully, then most probably you won’t require to perform factory data reset task.
-Swipe up screen to unlock.
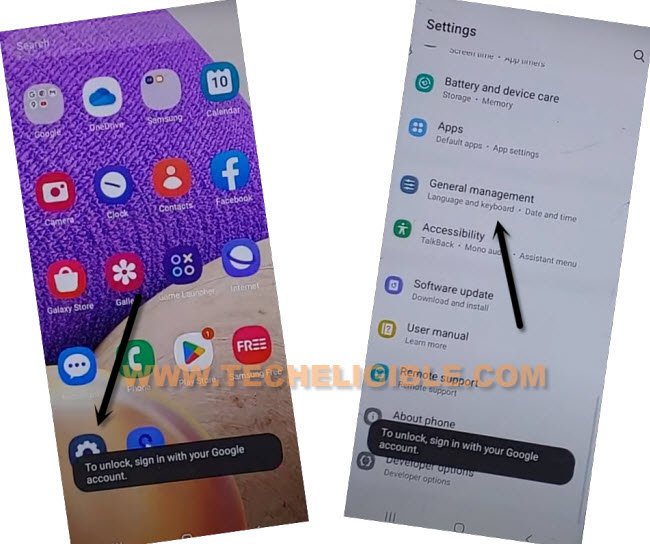
-Go to > Settings > General Management > Reset > Factory Data Reset > Reset > Delete all.
-After that, the device will be completely free of FRP, and there will be none account signed in currently.
-Finish Setup wizard and access to device homescreen. Thanks for visiting us.
Method 3: Bypass FRP Samsung Galaxy Android 13
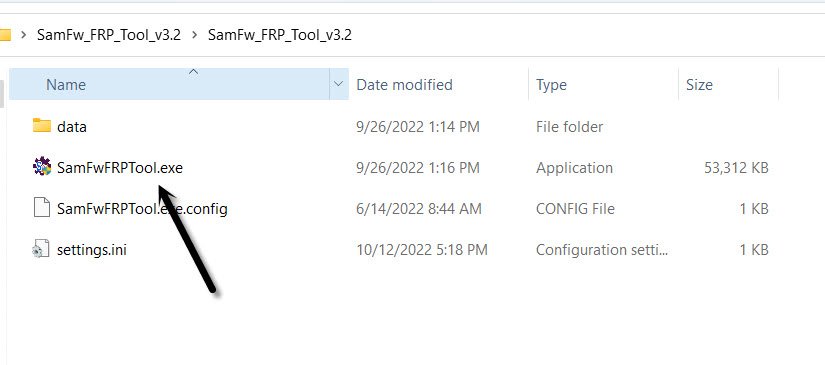
-First step is to Download SamFw tool V3.31 in PC [DOWNLOAD], after downloading finish, open this software in your PC same as shown in below image.
-Lets get back to Samsung Galaxy device, and connect this device with PC, do make sure the device is switched on.
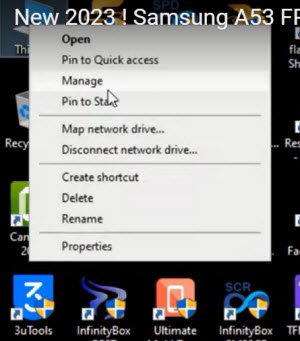
-First of all, we will make sure our device has been detected by PC, to know this, right click on (This PC / My Computer), and click to “Manage”.
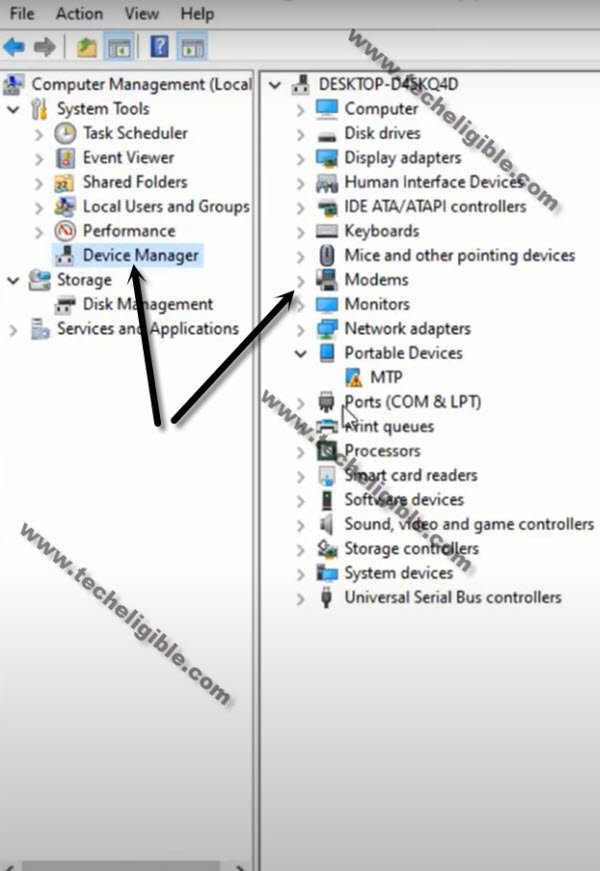
-After that click to “Device Manager”.
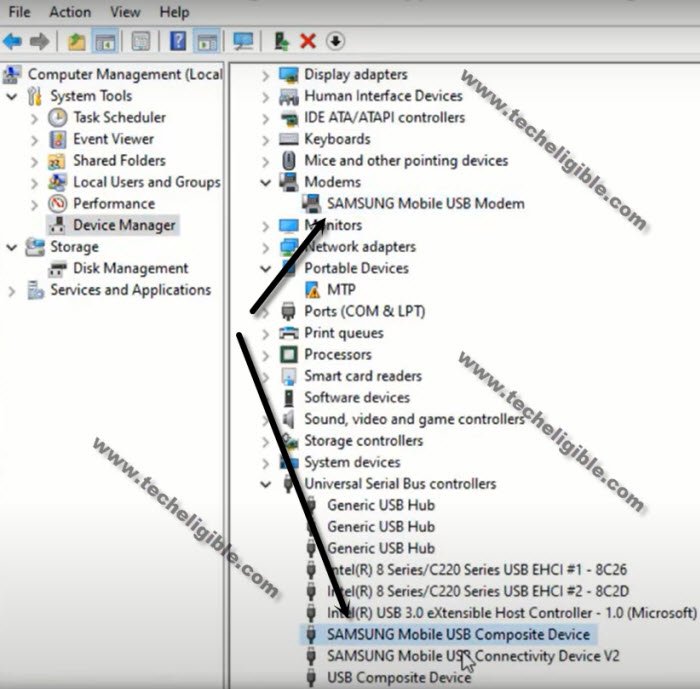
-There you will be able to see your device connected detail same as shown in below image.
Note: If you see there any (Exclamation Sign) on your Samsung USB modem hardware, that means your computer is required to install proper Samsung USB drivers, well, while opening (SamFw) tool, you must receive a popup message of installing Samsugn USB driver, so you can install those drivers from there easily.
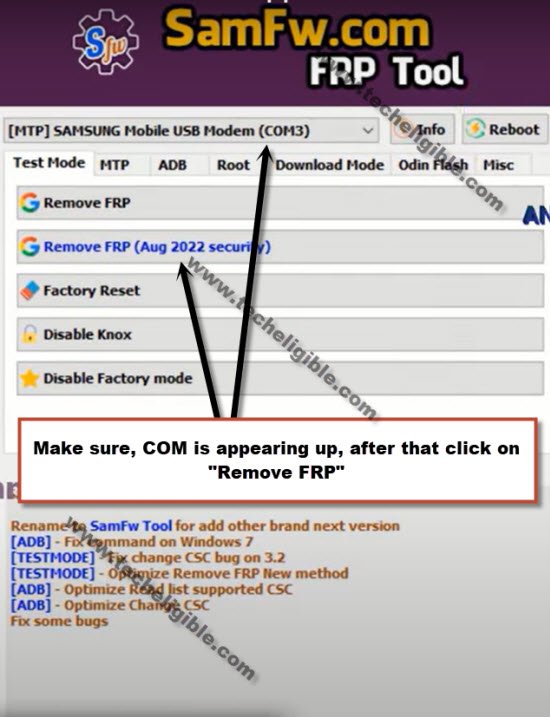
-After successfully connecting device with PC, just open your (Samfw) tool, and there you will have a proper Samsung com port appearing up, that means the device is detected by PC and tool successfully, and you can now easily bypass frp Samsung Galaxy Android 13.
-Click on button from tool “Remove FRP (Aug 2022 security)” button.
-You will be shown a popup message saying (Enable Test Mode), but do not click on “OK” button from that popup message, we will click this later on after turning on test mode from Samsung Galaxy device.
-From your Samsung Galaxy Android 13 device Hit on “Emergency Call”, and dial this code there “*#0*#“, after that you will have there a blank box screen, that means the code is working perfectly and you have successfully enabled test mode.
-Go back to your PC screen, and click on “OK” from enable test mode popup, after that you will receive another popup in your Samsung galaxy device screen saying (Allow USB Debugging?).
-Select option “Always allow from this computer”, and after that, tap to “Allow”.
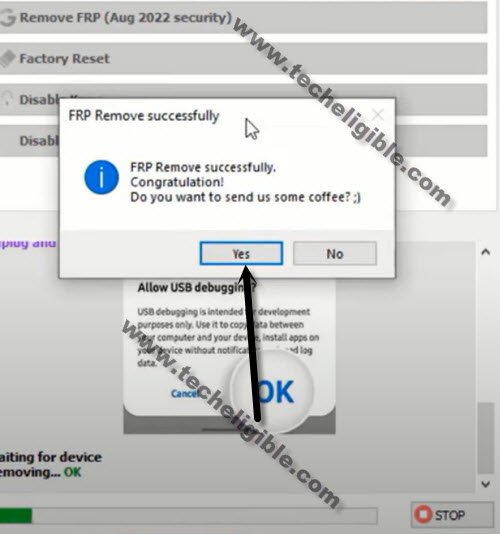
-Within few seconds or few minutes, you will receive popup in your PC screen saying (FRP Remove Successfully), just hit on “Yes” button.
-Your device will auto restart, after that, you will get inside your device homescreen without finishing up any setup wizard, just go to your device settings, and setup new Pattern or PIN, and also sign in with new google account, thanks for visiting us.
Read More FRP Ways on Samsung Galaxy:
⇒ Bypass Google FRP All Android 12
