FRP Remove Moto E7 / E7 PLUS [Android 10] Bypass Google Account
Are you still stuck on (Google Sign in) page?, follow this latest guideline from here for FRP Remove Moto E7, E7 Plus (Android 10). We’ve updated here 2 best methods for you. Both methods can be applied one by one. You don’t need any paid tool or PC. Factory reset protection is the best feature to keep your personal data in secret and do not let anyone to use your device. But this feature lock sometimes owner devices too. That is why, we sharing with you this post is only for device owner for educational purpose only.
| Method 1: Remove FRP Account MOTO E7 | E7 Plus (New) |
| Method 2: Remove FRP Account MOTO E7 | E7 Plus (Old) |
Method 1: FRP Remove Moto E7 / E7 PLUS (New)
-Let’s begin this guideline by turning on MOTO device & Connect WiFi.
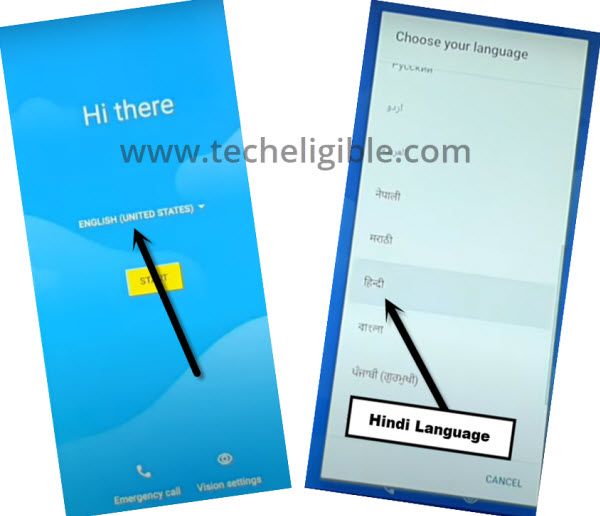
-Put your device back on first (Hi there) page.
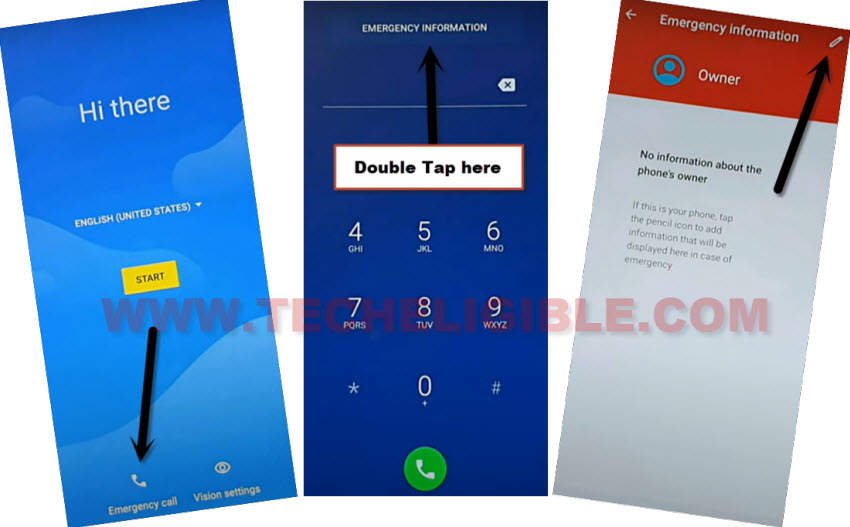
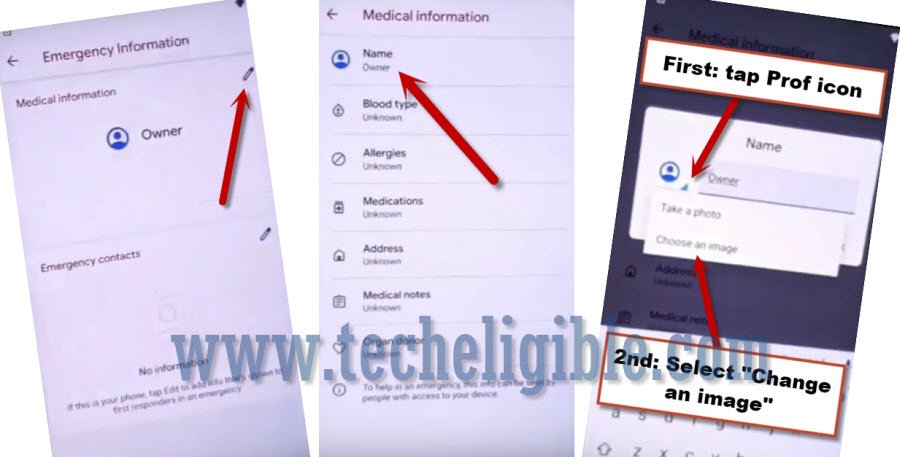
-Hit over “Emergency Call”, and then double hit over “Emergency Information”.
-After that, tap to “Pencil icon” from up-right corner.
-From next screen, just go to > Name > Down Arrow > Choose an image. (See below image).
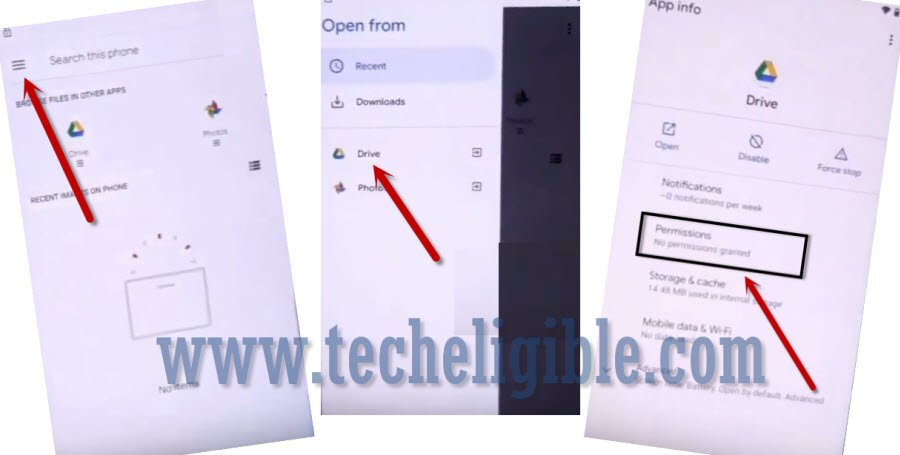
-We’re gonna tap over (MENU) icon from up-left corner, after that, go to > Drive > Permissions.
Search & Access to Accessibility MENU:
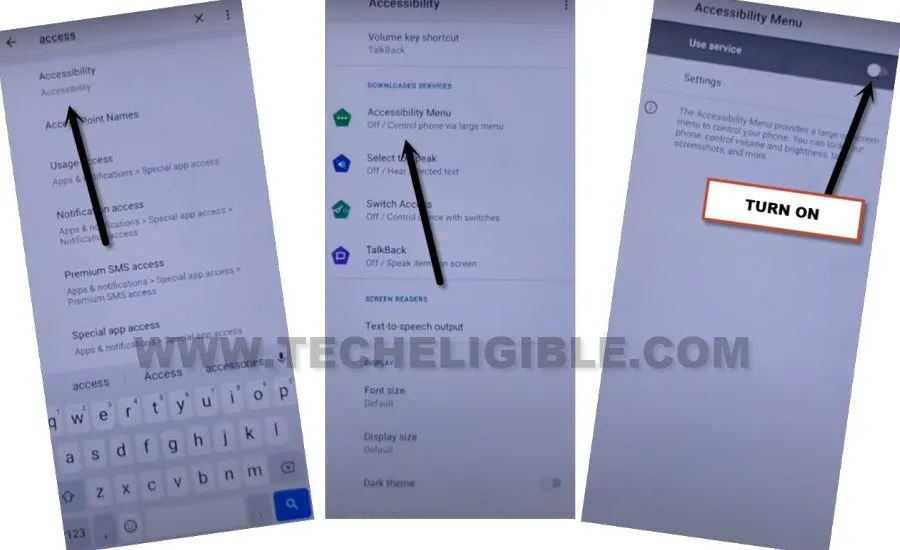
-Search and tap over “Accessibility” same as shown in below image.
-Now go to > Accessibility MENU > Turn on (Use Service) option.
-Tap to > Allow > Got it.
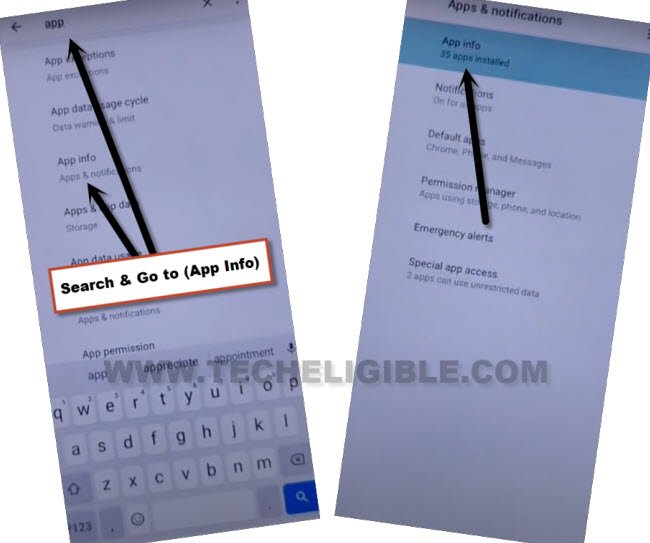
-Tap over “Back Arrow” 2 times to get back on searched result page again, from there search “App”, and hit over > Apps info > App info.
Disable 3 Apps to Remove FRP:
-Tap to “3 dots” from top corner and select “Show System”.
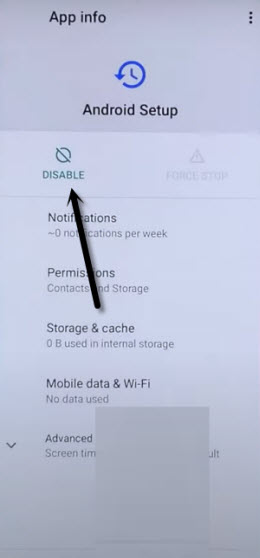
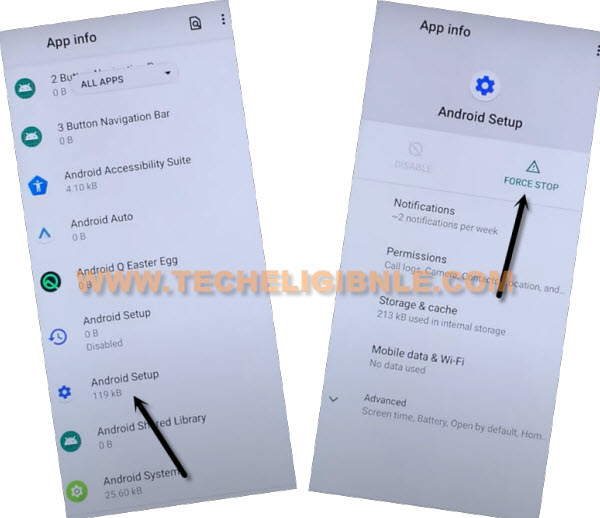
-Hit on clock icon > Android Setup > Force Stop > OK.
-Hit on > Disable > Disable App.
-Go back to (App info) page by tapping over “Back” arrow from bottom.
-Find and tap to > Android Setup > Force Stop > Ok.
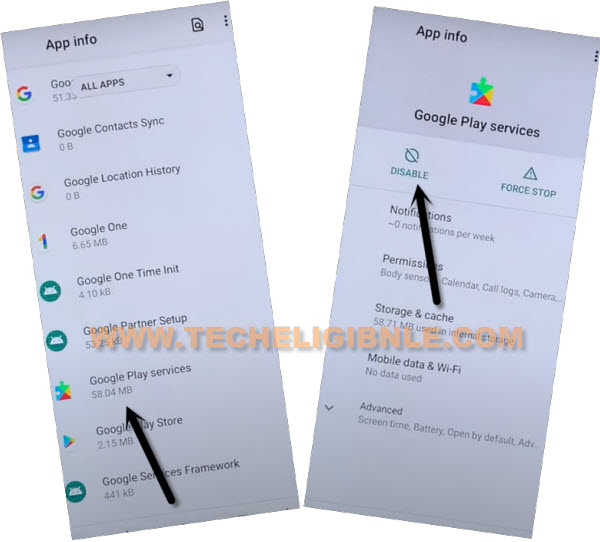
-Go back to (App info) screen, from there tap to > Google Play Services > Disable > Disable App.
-By hitting over back arrow multiple times, just go back to first (Hi there) page to finish setup wizard.
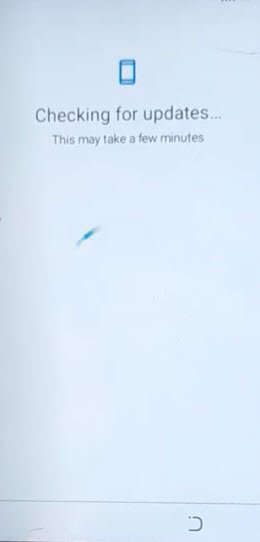
-Access to (Checking for update…) loading screen by tapping over > Start > Skip.
-You will have there a loading screen, just wait for 20-30 seconds, after that follow steps very quickly to enable google play services app.
Follow Steps Too Quickly:
-Quickly hit over > Human icon > Assistant > Settings.
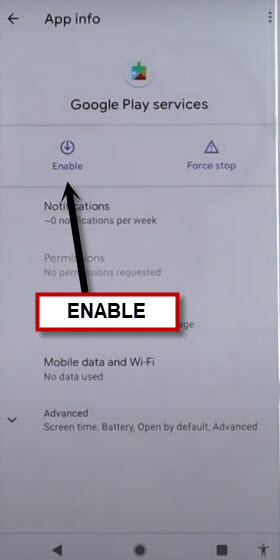
-Quickly tap to “Enable” button to turn on google play services application.
-Now go back to (Checking for update…) loading screen by hitting over back arrow 2-3 times cautiously.
-As soon as, you see there a (Checking for update..) screen, just wait there, and this screen will be done shortly.
-Now, tap to > More > More . Setup.
-Finish other initial setup wizard remaining steps, thanks for visiting us.
Method 2: FRP Remove Moto E7 / E7 PLUS:
This method is for FRP Remove Moto E7 / E7 Plus (Android 10) without PC, just change language to any URDU/HINDI/CHINESE, after that follow process from below, you can’t bypass google sign in screen until you follow this process or enter your already signed in Gmail account.
-Connect WiFi first, and go back to (Hi there) screen, after that, change device language to Hindi / Urdu / Chinese.
-Tap to > Yellow Option > Bottom Left option.
-From loading screen, tap to “Back Arrow”.
-From the WiFi screen, tap to very last > + Option > + Option.
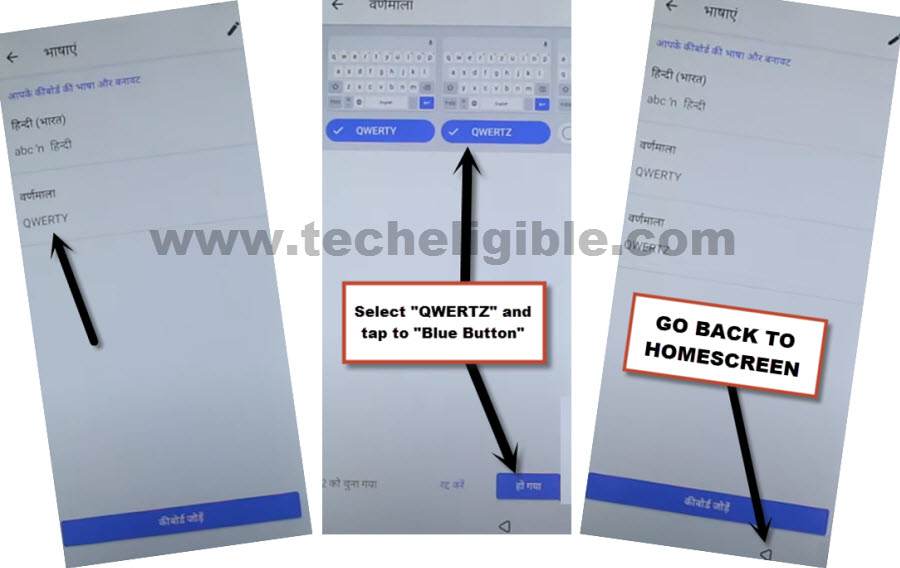
-Long hit on “World icon” from keyboard, and tap on “Very Last Option” from popup window.
![]()
-Tap on “Qwerty”, and select “Qwertz”, and then tap to bottom right “Blue Option”.
-By tapping on back arrow, go back to first “Start UP” screen,
-Change device language to “English” again.
-Tap to > Start > Skip > Don’t Copy.
-By tapping on “Back Arrow” few times, go back to “WiFi Setup” screen.
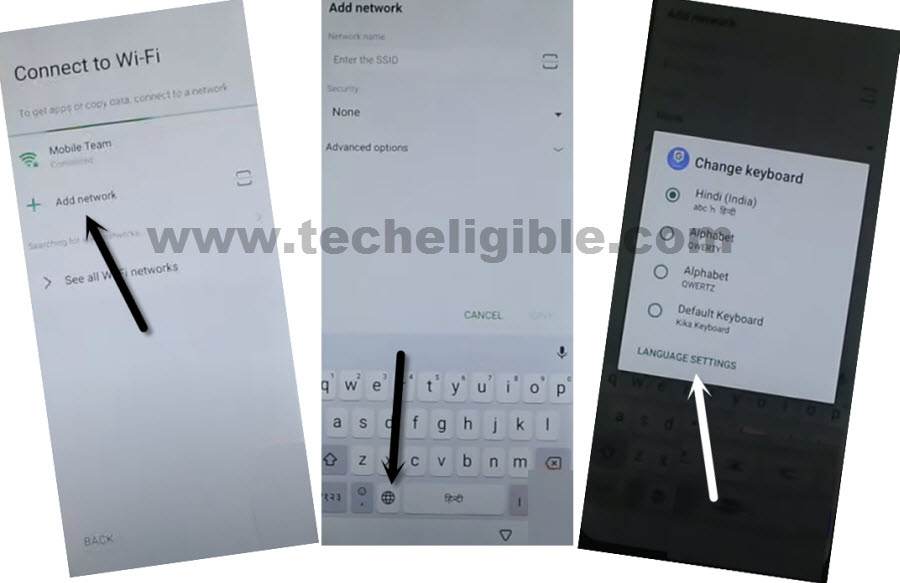
-Go down and tap to > All WiFi Network > Add New Network.
-Long press on “World icon” from the keyboard, and then tap to “Language Settings” for FRP Remove Moto E7 / E7 Plus.
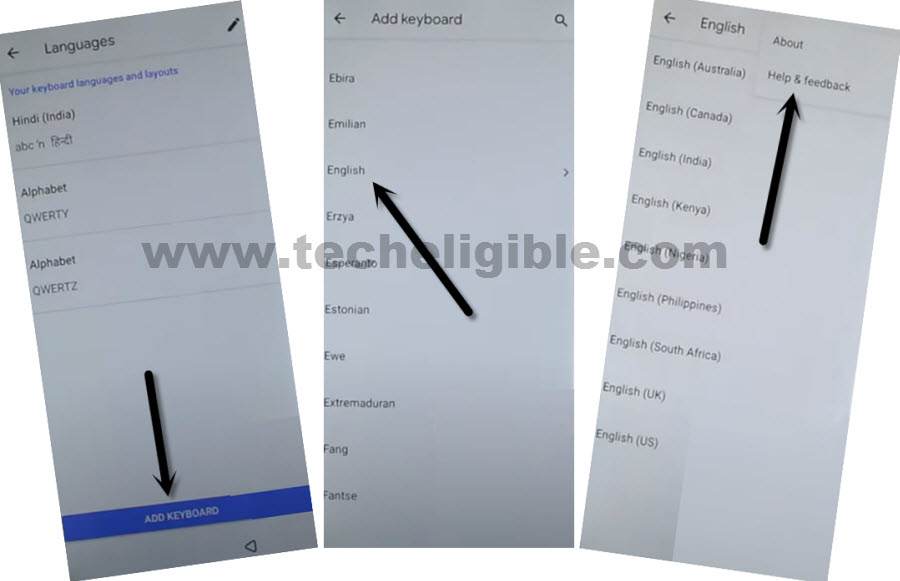
-Tap on “Add keyboard”, and select “English Language” which contains an arrow.
-Tap “3 dots” from top corner, and then tap to “Help & Feedback”.
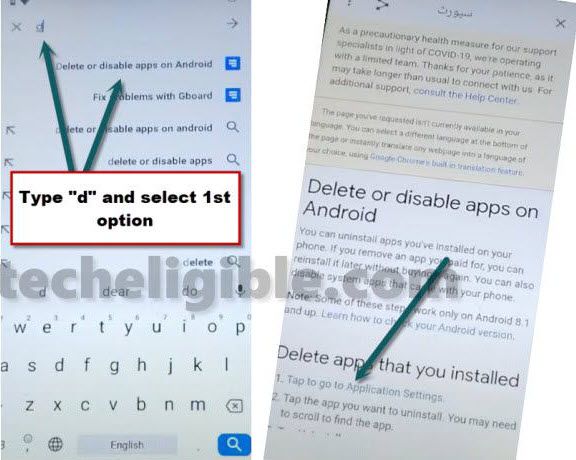
-Go to > Delete or Disable Apps on Android > Tap to go to application settings.
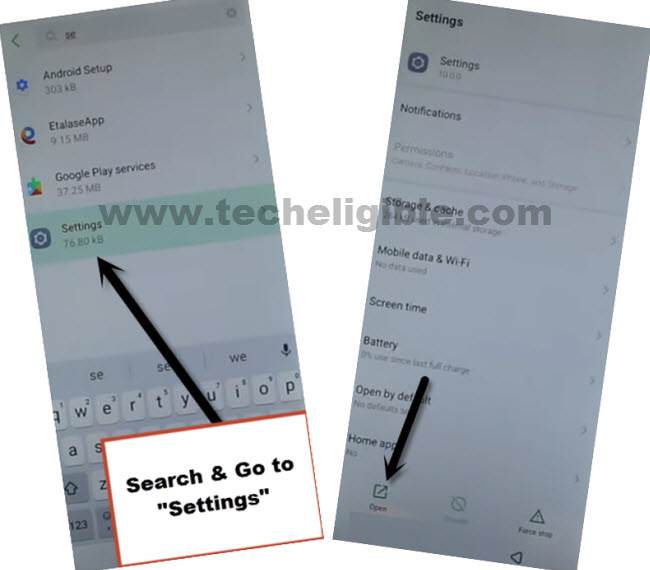
-From the app list, go all the way down, and tap to > Settings > Open.
-Go to > Security > Screen Pinning > Turn on.
![]()
-Turn on also “Lock Device when unpinning”.
-Tap on “Fingerprints + Pattern”, and then setup your new Pattern lock there for FRP Remove Moto E7.
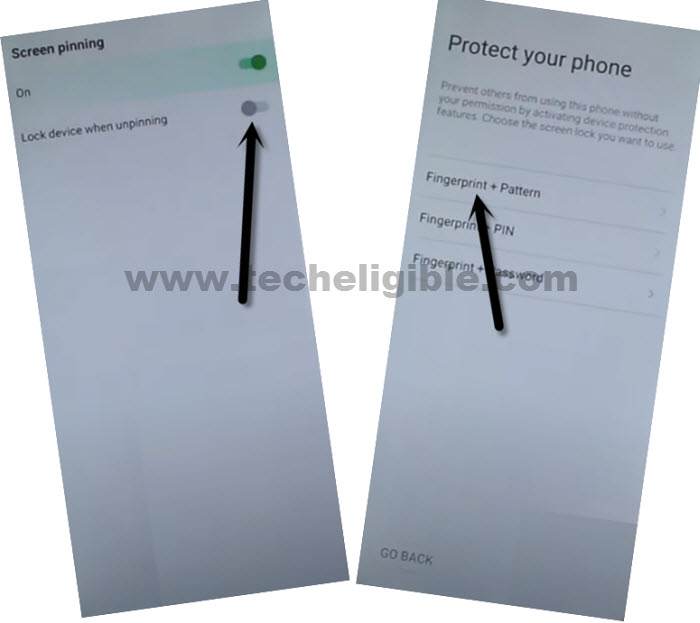
-Congrats, we are done from bypassing frp completely, just finish setup wizard by going to first “Hi There” homescreen.
Note: You will see (Verify PIN) screen, just enter your already setup PIN code there to remove frp successfully.
-After entering the PIN code, you will see “SKIP” option on (Google Sign in) screen, just tap to > SKIP > SKIP.
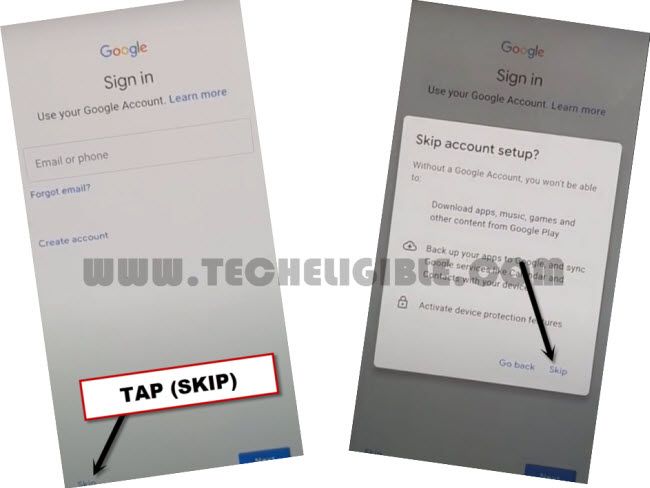
Thanks for visiting us, if you have any question, feel free to comment us in below comment session.

