3 Methods to Bypass frp Redmi Note 9, 9 Pro, 9s MIUI 13, 12.5, 11
You can easily Bypass frp Redmi Note 9, Redmi Note 9 Pro, Redmi Note 9s MIUI 13, MIUI 12.5, MIUI 11 by following below 3 methods. Follow any one method that is relevant to your device MIUI version. We hope this will work on your device to easily bypass FRP Account permanently, and you could setup new FFRP lock with your new google account.
Warning: This Article is only for educational purpose, try this frp method only to bypass frp your Own Phone.
| ⇒ Method 1: Bypass Google FRP Redmi Note 9, 9s , 9 Pro (MIUI 13) |
| ⇒ Method 2: Bypass Google FRP Redmi Note 9, 9s , 9 Pro (MIUI 12.5) |
| ⇒ Method 3: Bypass Google FRP Redmi Note 9, 9s , 9 Pro |
Method 1: Bypass frp Redmi Note 9 | 9 Pro | 9S [MIUI 13]
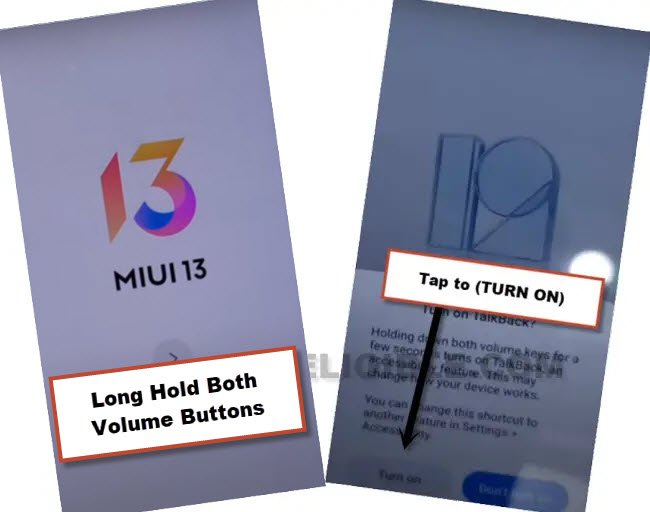
-Let’s being process of FRP bypass, just connect WiFi, and then put your device back on very first MIUI 13.
-Long press both buttons (Volume UP + Down) at the same time, and then double hit on “Turn on” button.
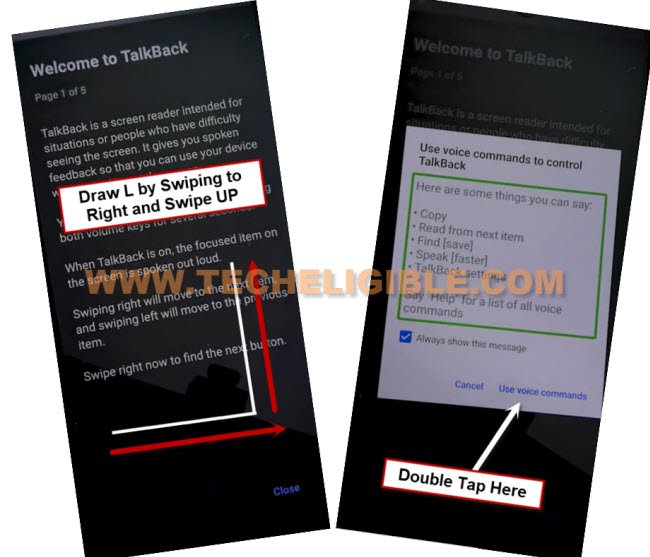
-Let’s long hold again both both buttons (Volume UP + Down), and this time, the talkback screen will come up. We’ve to make (L) shape on screen just by swipe right and then swipe up.
-Double tap on > While using the app > Use Voice Command.
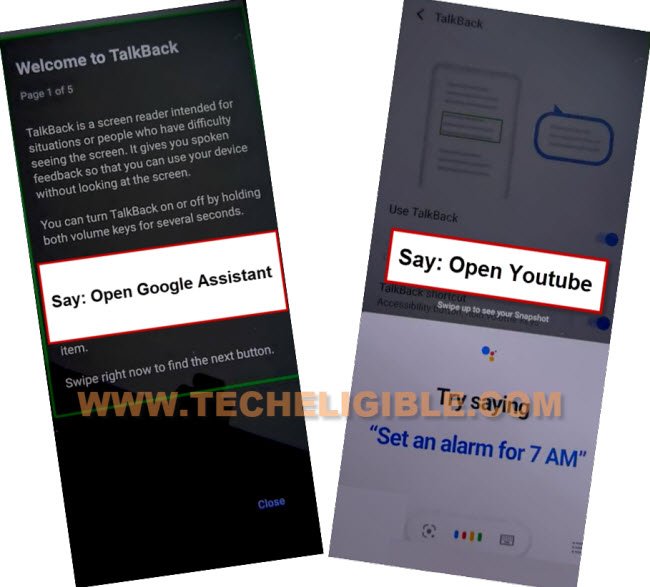
-You will be shown a green boarder around screen, just say loudly “Open Google Assistant” to Bypass FRP Redmi Note 9.
-As soon as new (Try Saying) box will come up, just disable talkback by long press again both (Volume UP + Down) keys.
-Lets access to Youtube.com site, hit over (Mic icon) from popup window, and say loudly “Open Youtube”.
Note: The Youtube can also be launched by hitting over “Keyboard” icon, and type there “Open Youtube”, select (Open Youtube) searched result.
-Hit over (Profile icon) from top corner, and go to (Settings).
![]()
-Go to > About > Youtube Terms of service > Accept & Continue > No Thanks.
Go to Redmi Note 9 Settings:
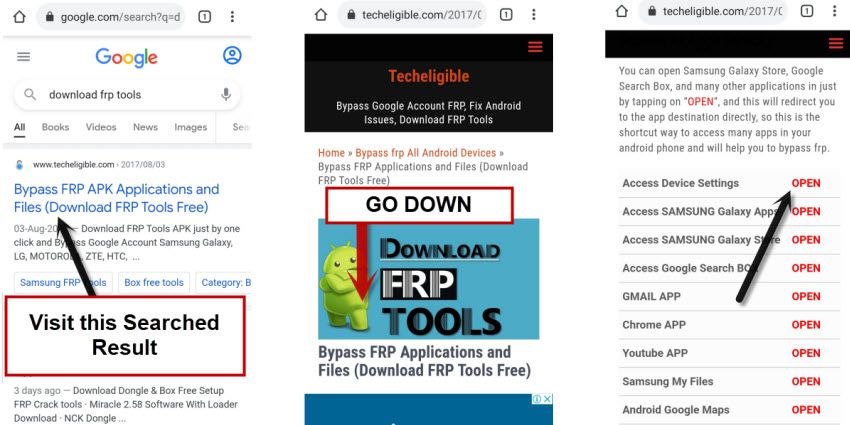
-Search in browser , and go to our website result.
-In chrome browser, just type there “Download FRP Tools“. You will be displayed our website searched result frp tools page, just tap on that result to access our download frp tools page easily.
-Scroll down and tap on “Access Device Settings“.
Access Device Home Screen Directly:
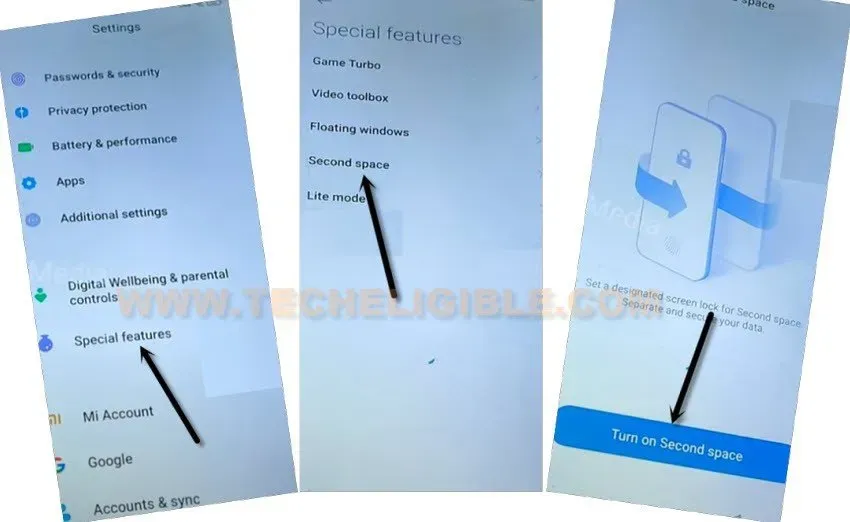
-Go to “Special Feature” function from settings, after that, hit on > Second Space > Turn on Second Space.
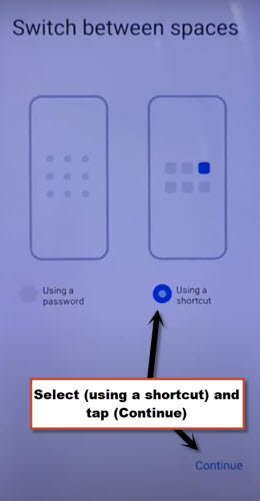
-Tap to “Continue”, and then choose option “Using a shortcut”.
-Go to > Continue > Skip.
-Congrats, now you are inside your device (Home Screen) display, the FRP has been bypassed completely.
-Restart your device by long press (Power) button, and tap on “Restart” option to restart device. Now you can easily setup your google account and setup new password.
Method 2: Bypass frp Redmi Note 9, 9 Pro, 9s:
-Turn on Phone.
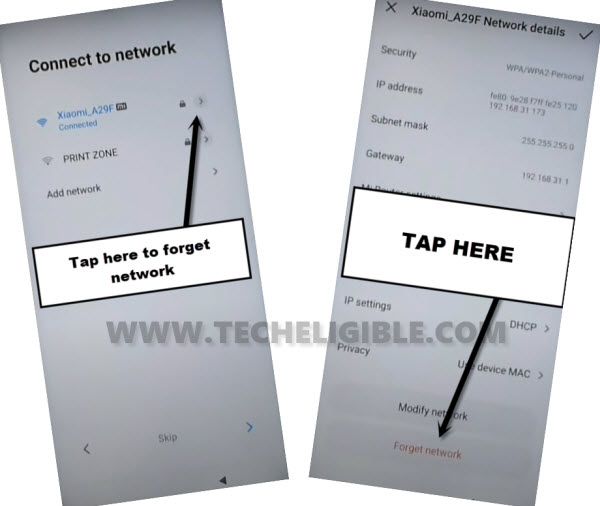
-Forget WiFi Network if it is connected.
-To forget the WiFi network, just tap on your WiFi SSID, and then tap on “Forget Network”.
-Now Remove SIM card also if it is inserted.
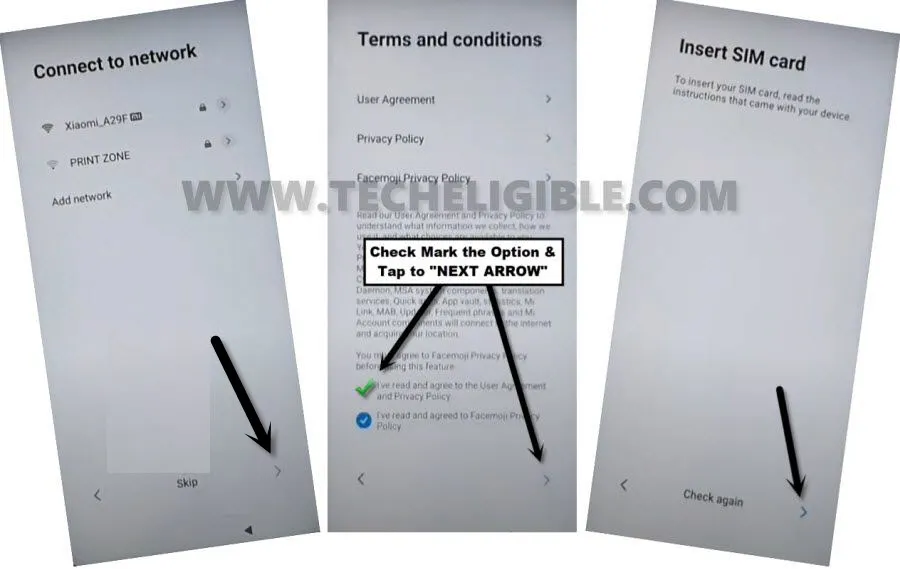
-After that tap to “SKIP” option.
-Check mart the option, and then tap “Next Arrow”.
-Now again tap on “Next Arrow” from Insert SIM Card screen.
-Tap to > More > Accept.
Draw New Pattern:
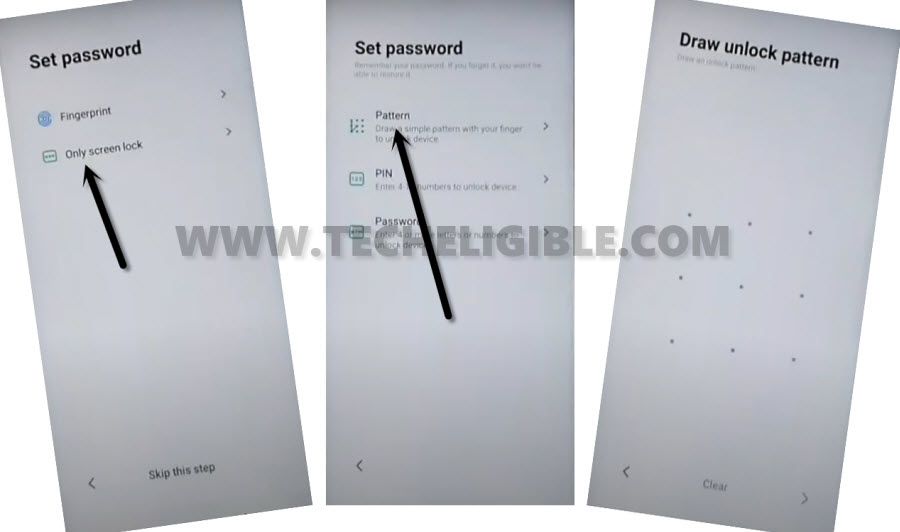
-Here is the main option, that will help us to Bypass frp Redmi Note 9, and that is “Pattern Lock”, we will setup new pattern lock here.
-Tap on > Only Screen Lock > Pattern.
-You will receive a popup window, just wait few seconds, and then tap on “Got it” button.
-Now draw your any easy and remembered Pattern lock there twice time, and after that, tap on “Next Arrow”.
-Tap to > Next Arrow > Next Arrow > Next Arrow.
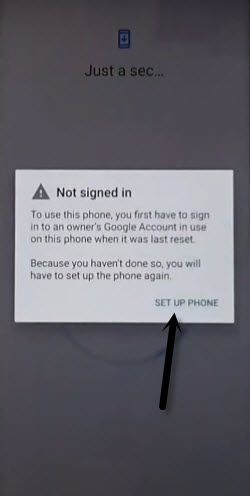
-It will ask you to wait, and after that it will show a popup window of “Not Signed in”, just tap on “SET UP PHONE” from there.
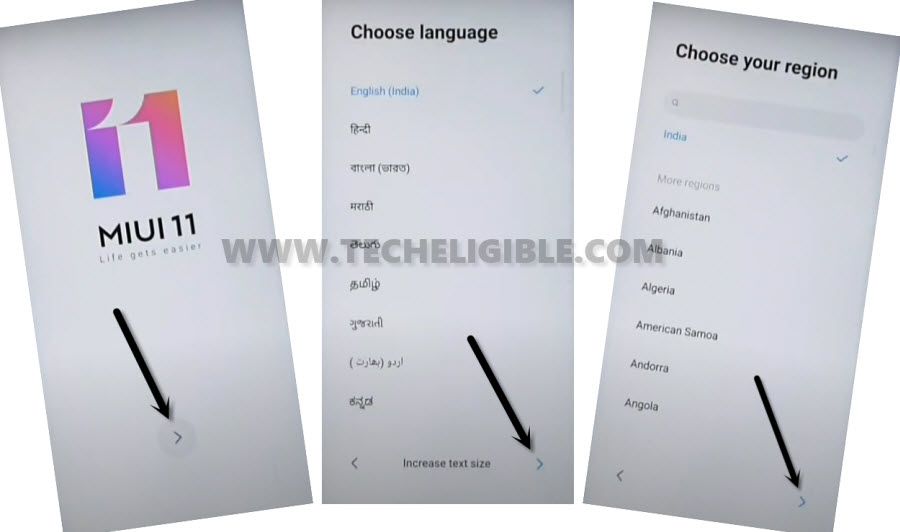
-It will redirect you to back to the EMUI 11 screen.
-From there, just tap to > NEXT > Next > Next.
-Now connect with your WiFi Network.
-Tap to “Next”, and then check mark the option, and then tap again > Next > Next.
-Afterwards, tap to “Don’t Copy”.
-Here you go, you will be asked to draw Pattern lock, so just draw your already setup pattern lock there to Bypass frp Redmi Note 9.
-After that, it will show you “Checking info…” screen, so just wait there.
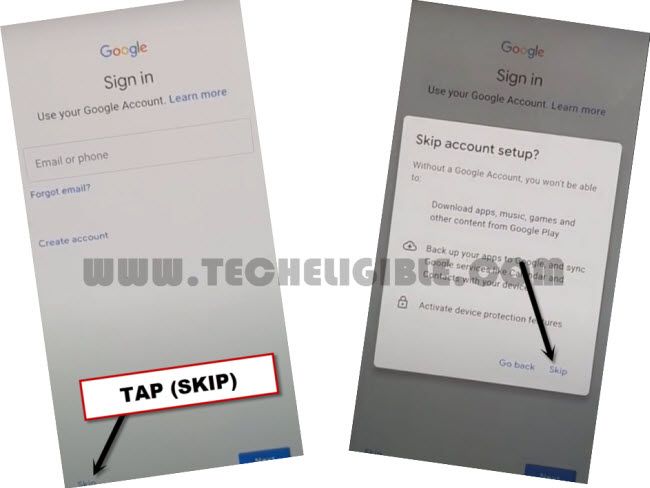
-Now tap on “SKIP” from the google sign in screen, from the popup window, tap again “SKIP”.
-Now tap to > More > Accept > Skip.
-Tap “SKIP” again from the popup window.
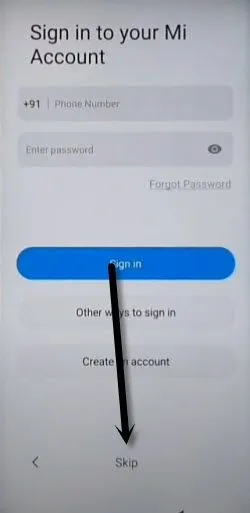
-This will bypass the screen of (Sign in to Mi Account).
-After that tap to > Next > Next > Skip > OK > Next.
-Congratulation, you have got your Redmi Note 9 phone back, and successfully bypass frp Xiaomi Redmi Note 9, Note 9 Pro, Note 9s.
Method 3: Bypass Google FRP Redmi Note 9, 9 PRO, 9
-Firstly we are gonna Turn on Redmi Note 9 & Connect WiFi.
-Go to “Connect to Network” screen, swipe down, and tap to “Add Network”.
-You can type there any random text in “SSID” field tab, and then long tap on your typed text, and tap to “Download icon”.
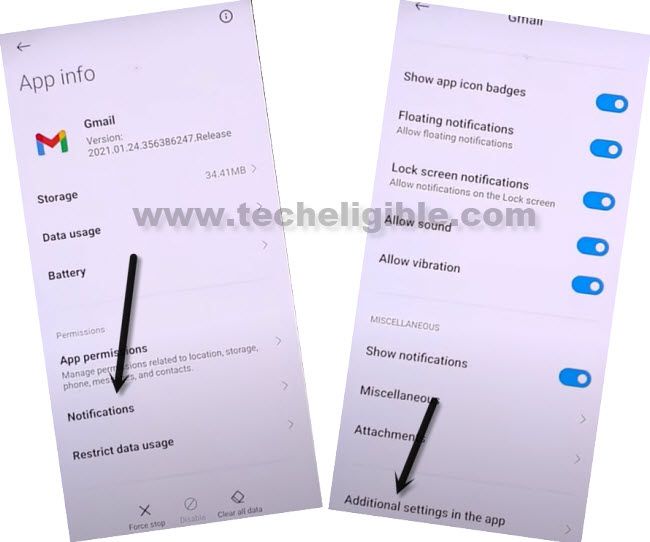
-Long tap at “Gmail icon”, and you will be redirected to the Gmail App info screen.
![]()
-Go to > Notification > Additional Settings in the app.
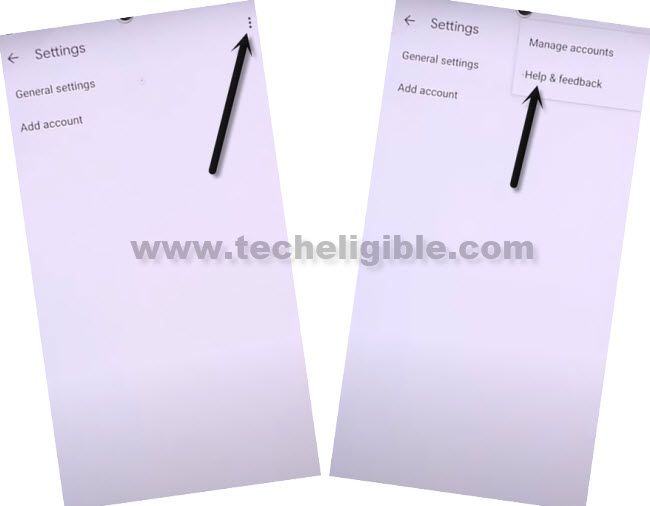
-From the top corner, hit on “3 Dots”, and tap to “Help & Feedback”.
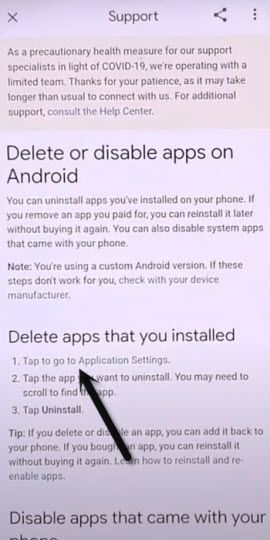
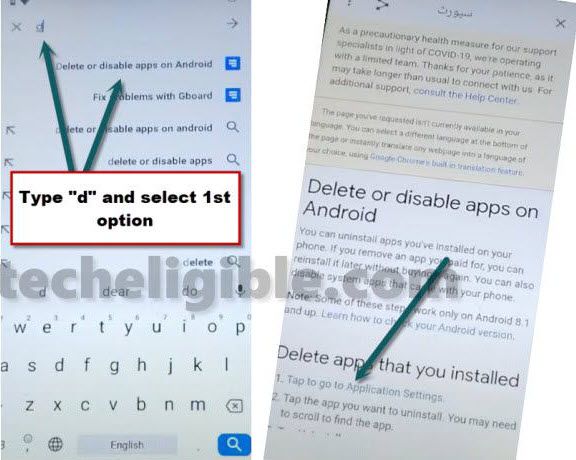
-Search and open “Delete or disable apps on Android”.
-Hit on hyperlink “Tap to go to Application Settings”.
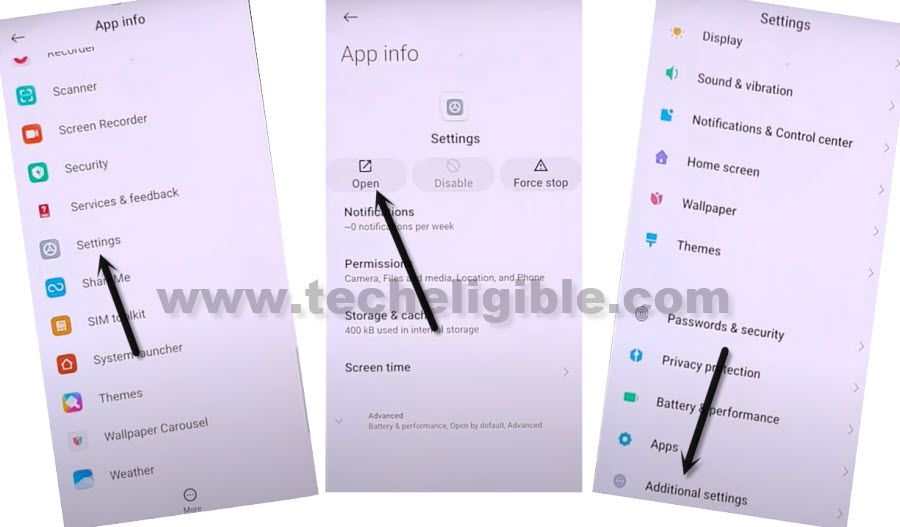
-Go to > Settings > Open > Additional Settings.
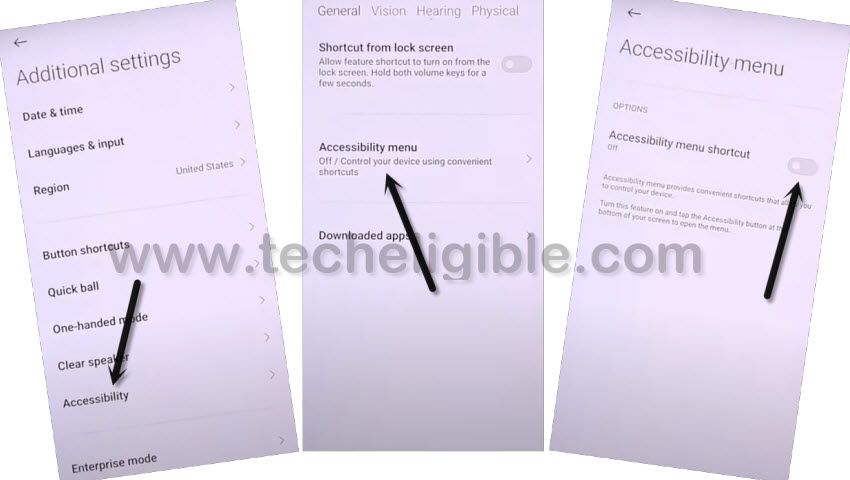
-Go to > Accessibility > Accessibility MENU > Turn on (Accessibility Menu Shortcut) > Allow > Got it.
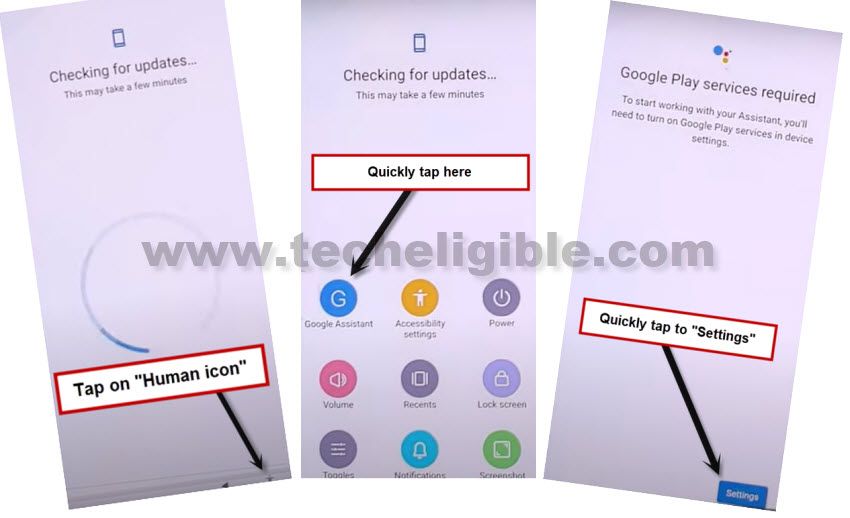
-Right of turning on this option, you will see a small (Human icon) at the bottom right corner.
-Tap to back arrow multiple times to get back to (Delete or Disable App on Android) screen.
-Hit again on a link of “Tap to go to Application Settings”.
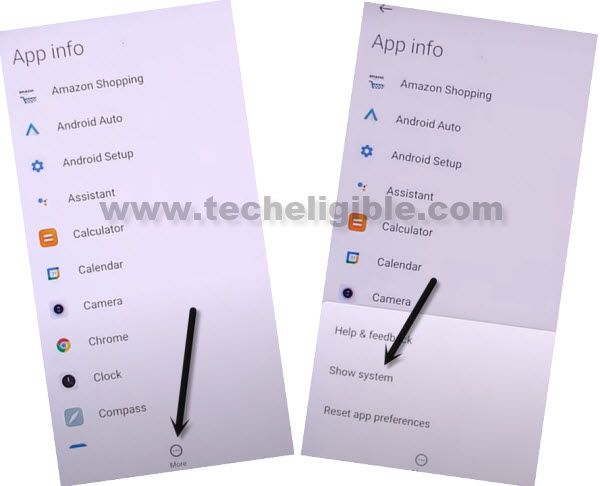
-Now hit on “More”, and tap to “Show System”.
Disable Apps to Bypass FRP:
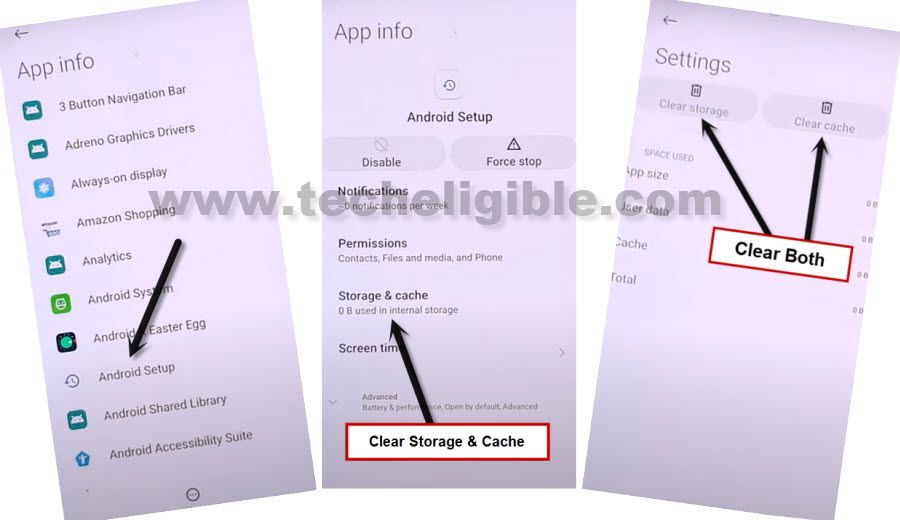
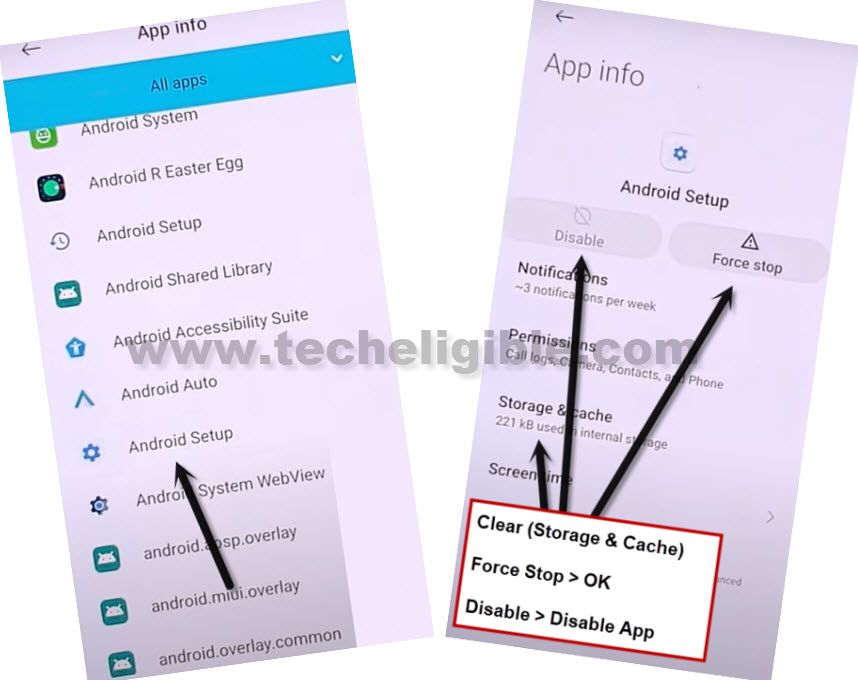
-Go to > Android Setup > Storage & Cache > Clear (Both Storage & Cache).
-Go back, first of all, tap on > Force Stop > OK, and then tap on “Disable > Disable APP”, again tap on “Force Stop > OK”.
-Get back to App list, from there tap on another “Android Setup”, and do same thing with that also, clear storage and cache, and then force stop, and Disable app. (See below image).
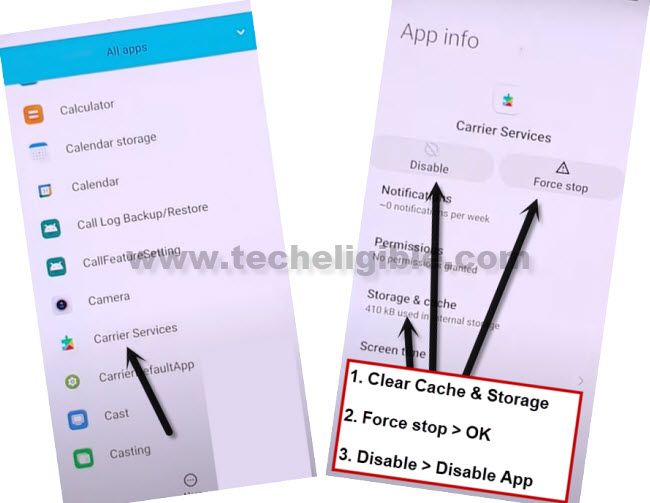
-From app list, find and tap on “Carrier Services”, and clear cache and storage, and afterwards, tap on > Force Stop > OK, and then tap on “Disable > Disable APP”, again tap on “Force Stop > OK”.
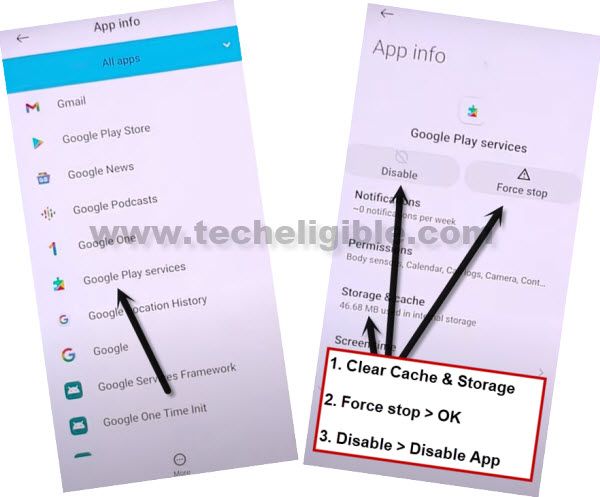
-Go to > Google Play Services > Storage & Cache > Clear (Both).
-Tap on > Force Stop > OK, and then tap on “Disable > Disable APP”, again tap on “Force Stop > OK”.
-We have successfully disabled and force stop, and also clear cache and storage of total 4 apps from here to Bypass FRP Redmi Note 9, 9 Pro, 9s.
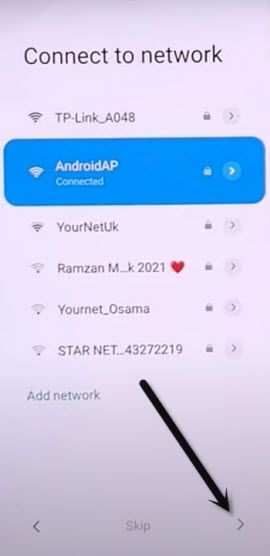
-By tapping at back arrow multiple times, go back to (Connect to Network) screen, and from there hit on “Next Arrow” icon.
-Now wait until you see (Checking for update…) screen, quickly tap on > Human icon > Google Assistant > Settings.
Note: You will have to do this very fast and quickly, and you will be able to access (Google Play Services) homscreen at 3-4 attempts.
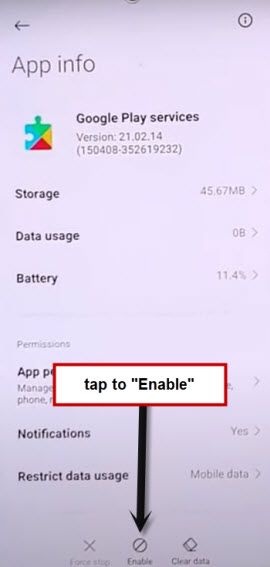
-Quickly tap on “Enable” to enable google play services.
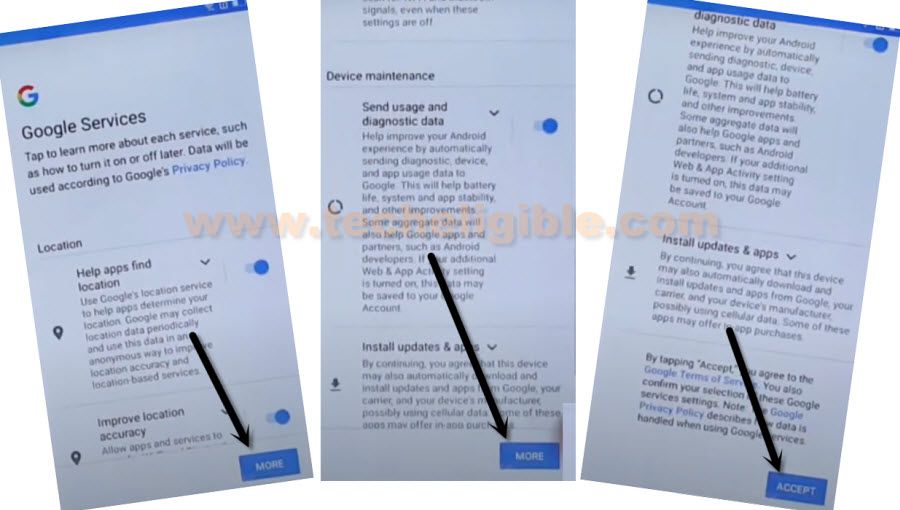
– Tap one time on “Back Arrow”, and there you will see (Google Services) screen.
Note: If you see “Pattern Lock” screen, just don’t worry, hard reset your device, and repeat all steps.
-Go to > More > Accept.
-From (Sign in to your Mi Account) screen, just Hit on > SKIP > SKIP
-Hit on > Skip this step > Next Arrow > Next Arrow > Next Arrow.
The has been accomplished successfully, and we hope the frp lock has successfully been removed from your Xiaomi Redmi Note 9.
Related Methods:

