Bypass FRP All ZTE 2023 Android 12, 11 Without PC [Updated]
With this educational tutorial, you can fix up FRP issue in your device, and can easily Bypass FRP All ZTE 2023 Android 12, 11 (Without PC). If you purchased used Phone, and incautiously hard reset device without knowing current signed in google account, in this case, you may face google sign in screen. That means the device has been set to a FRP lock. Follow steps from below to fix this issue easily without any paid services
Note: This method is just for device owner and for educational Purpose only.
Let’s Start to Bypass FRP All ZTE 2023:
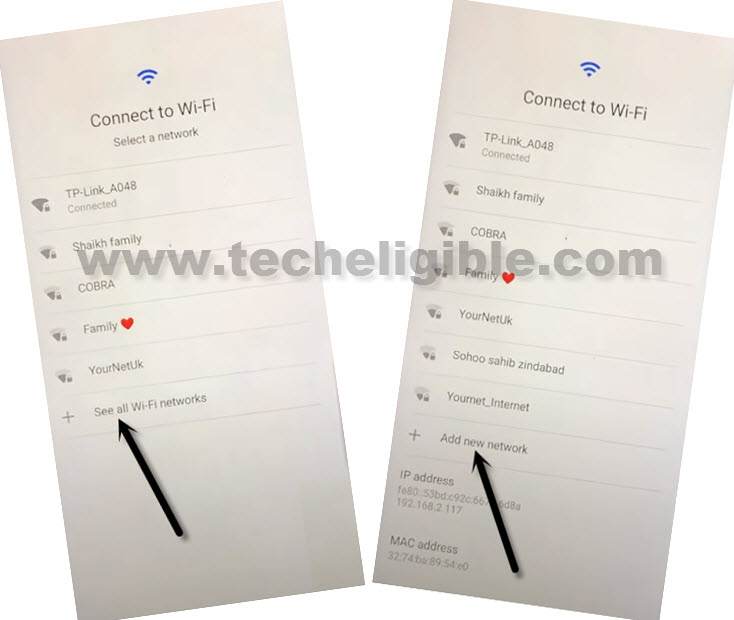
-Startup your device by turning on, and go to (Connect to WiFi) screen, after that, connect WiFi, and then tap over > See All WiFi Network > Add New Network.
–Tap to > Mic icon > Deny.
–Tap to > Mic icon > Deny & Don’t Ask Again.
–Tap to > Mic icon > Allow.
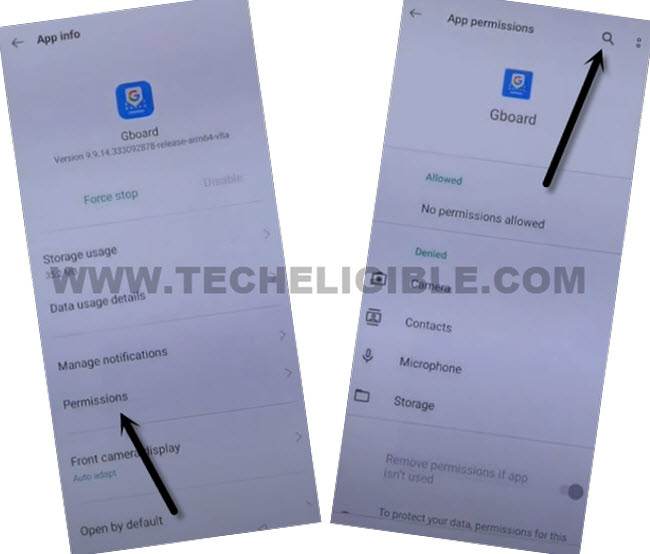
–Go to “Permission”, and hit over “Search icon” from top corner.
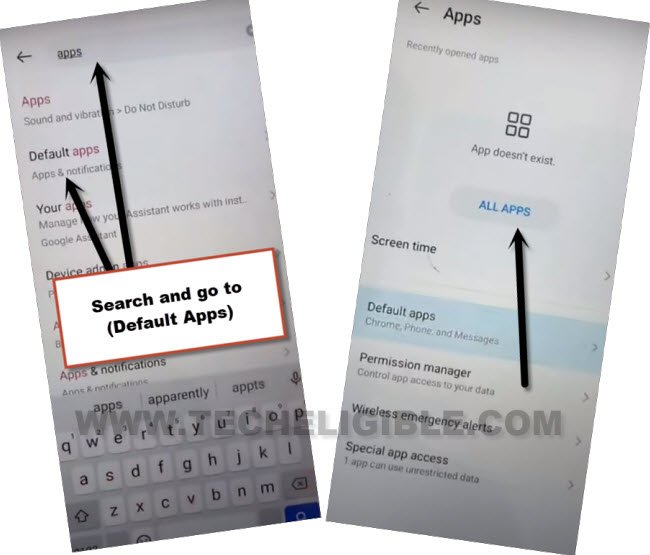
-Type in search area “Apps”, and tap on “Default Apps” from searched result.
-After that, go to “All Apps” to get inside app list.
-From here, we have to disable two main applications (Android Setup & Google Play Services).
Disable & Force Stop 2 Apps:
-There you will have a huge app list, find and tap on “Android Setup”, and hit on “Force Stop” to Bypass FRP All ZTE 2023.
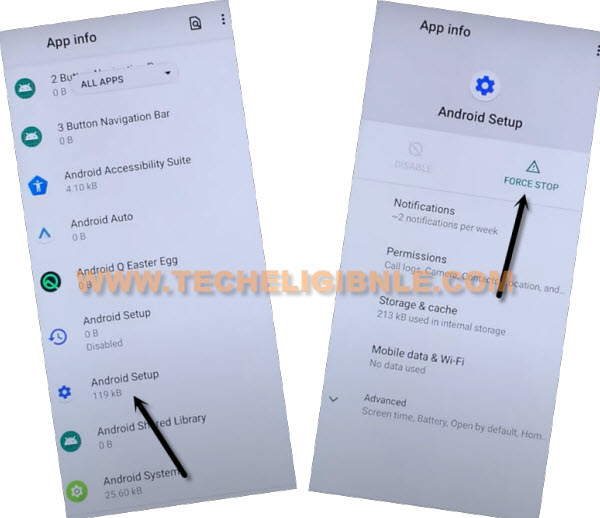
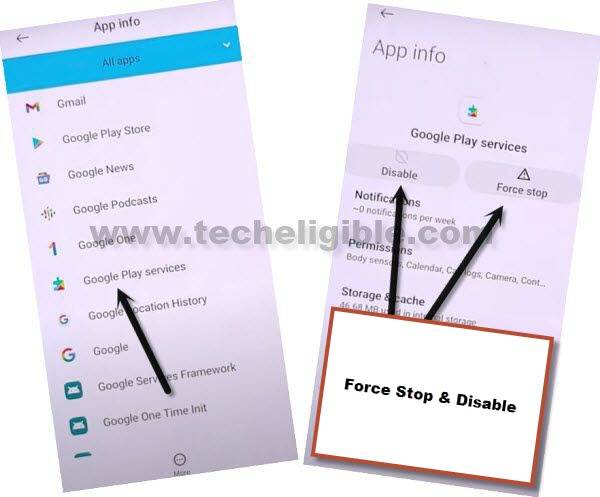
-Afterwards, find and tap on > Google Play Services > Force Stop > Ok, after that, hit on > Disable > Disable App.
-Go all the way back on first start up screen, that usually appear right after turning on device.
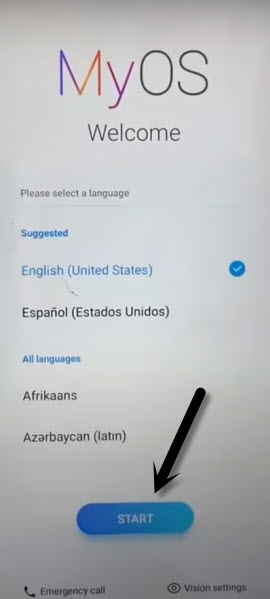
-Tap to > Start > Skip > Don’t Copy.
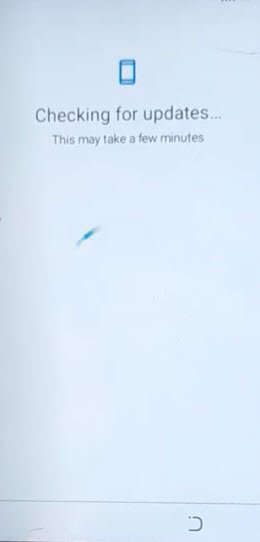
-The device will hang on (Checking for update…) loading screen, wait on this screen for almost 30 seconds.
-Afterwards, go back on (Connect to WiFi) screen by tapping on back arrow 2-3 times.
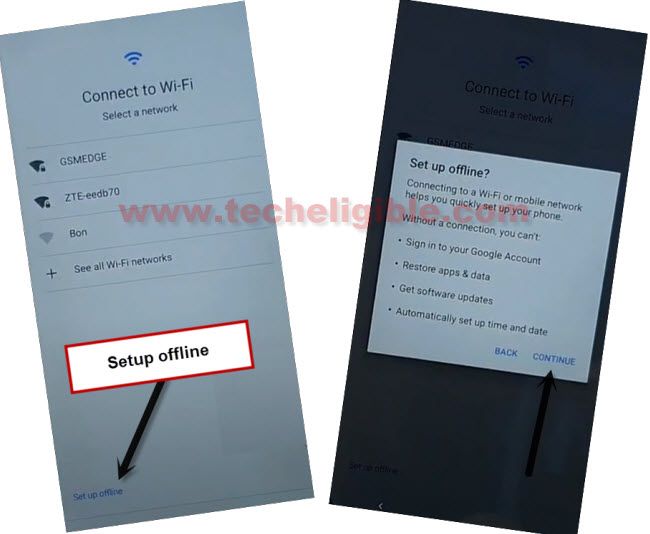
-There, you will’ve an option of (Setup offline), just hit over this option, and tap to “Continue”.
-Now you will have a (Just a sec..) loading screen, just on that screen for 15-20 seconds, after that, go back again on (Connect to WiFi) screen.
-Connect WiFi again in your device, and now we have to reach back to (App list) to enable back (Google Play Services) app, lets do that now.
Repeat Steps to Enable Back Google Play Services:
–Tap to > See All WiFi Network > Add New Network.
–Tap to > Mic icon > Allow.
–Go to “Permission”, and hit over “Search icon” from top corner.
-Type in search area “Apps”, and tap on “Default Apps” from searched result.
-After that, go to “All Apps” to get inside app list.
-Let’s find and enable back (Google Play Services), so that we could easily finish up setup wizard.
Note: If you’re unable find out google play services app, just hit over (All Apps) from, and tap on “Disabled App”, this option will show you all disabled apps there.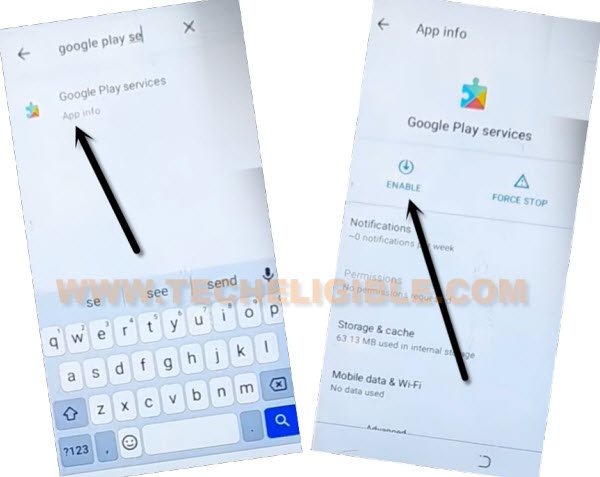
Let’s Go back to Connect to WiFi screen to Finish Setup Wizard:
-Go back again on (Connect to WiFi) screen by hitting on back arrow several times.
-There, you will’ve an option of (Setup offline), just hit over this option, and tap to “Continue”.
-After that, the (just a sec…) loading screen will complete, and you will reach on google services screen.
-Hit on > More > More > Accept.
-Tap to > Next > More > Agree > Skip > Next > Get started.
-This is how you can Bypass FRP All ZTE 2023, Now you will be displayed your device homescreen. Just setup your own new google account from settings.

