2 Ways to Bypass FRP Moto G Pure Android 12, 11 Without PC
Deleting FRP is now very easy on Moto G Pure, you can do this without wasting money and time. To Bypass FRP Moto G Pure Android 12, Android 11, you are supposed to connect WiFi, and then follow all steps from below. Good thing is that, you don’t need any other tool to accomplish this method. We are showing you 2 best methods in this single tutorial, you can follow up any one of them that relevant to your device android version.
Disclaimer: We highly recommend you to apply this method only on your own device, if you are not owner of this device, or you found this from some where, you must return to its real owner.
| Method 1: FRP Unlock Moto G Pure (Android 12) |
| Method 2: FRP Unlock Moto G Pure (Android 11) |
Method 1: Bypass FRP Moto G Pure (Android 12)
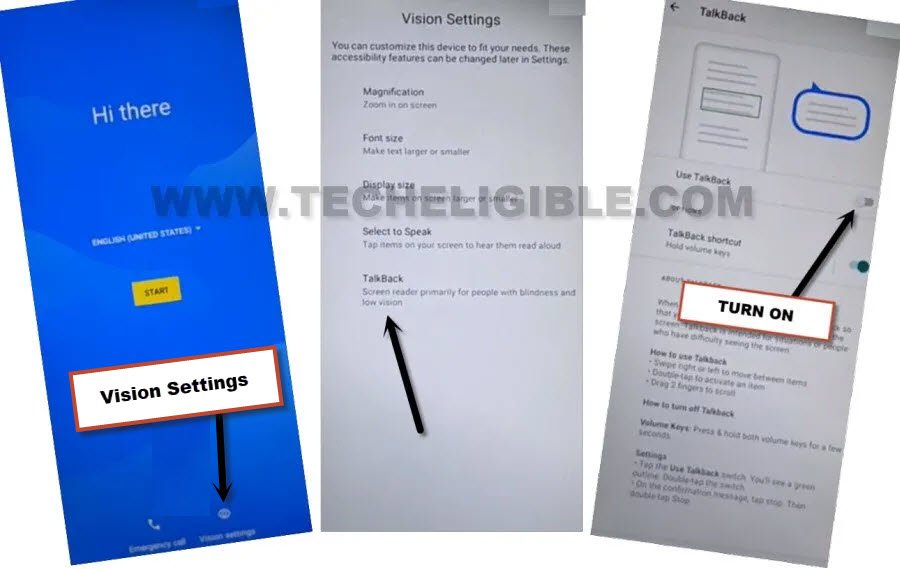
-We will enable talkback by connecting WiFi first, after that, go back to (Hi there) first homescreen, from there, tap to > Vision Settings > Talkback > Turn on talkback from there successfully.
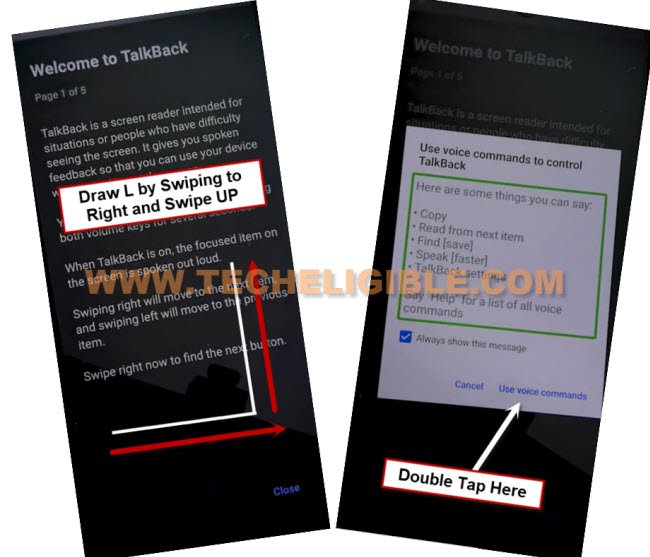
-From welcome to talkback page, just Swipe right and then UP, see below image.
-From accessibility popup window, just Double tap > While using the app > Use Voice Command.
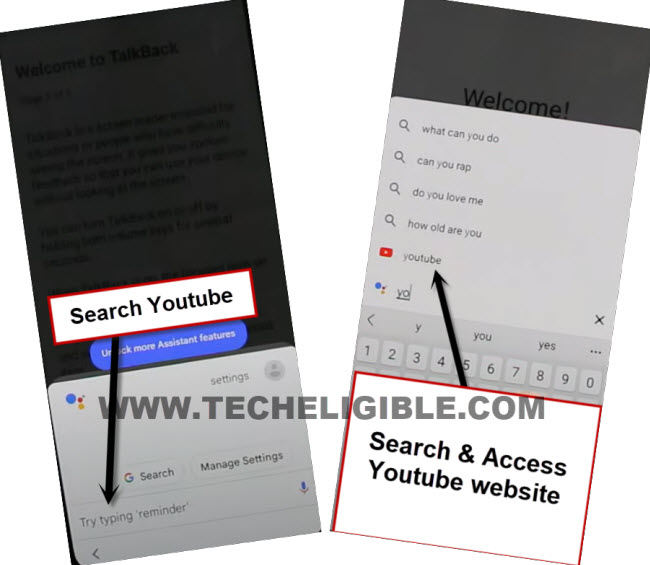
-Lets launch google assistant by speaking loudly “Open Google Assistant” as soon as you see (Green border) on screen.
-This will bring for you (Try Saying) popup window, just double hit over “Keyboard” icon.
-We don’t need talkback anymore now, lets disable this feature by long press both (Volume UP + Down) keys. and double tap to “Turn on” option from popup.
-Long press again both (Volume UP + Down) keys, and this time, the talkback feature will be off completely.
–Search there “Open Youtube”, and tap to “Youtube” icon from searched result to be redirected inside youtube app directly.
-Tap on “Profile icon” from top corner, and go to > Settings > About > Google Privacy Policy.
-From chrome window, tap to > Accept & Continue > Next > No Thanks.
Setup Pattern Few Times until Its Setup:
-Search in browser with this “Download FRP Tools“, and visit our website searched result.
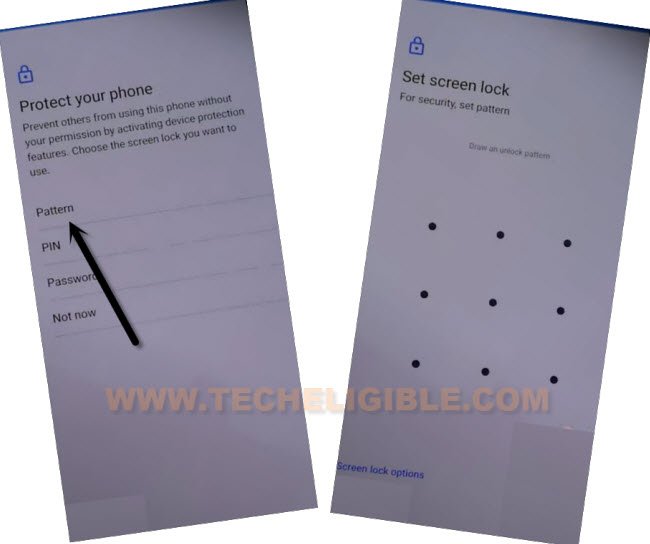
-Go down and tap on “Setup Pattern Lock” to Bypass FRP Moto G Pure Android 12.
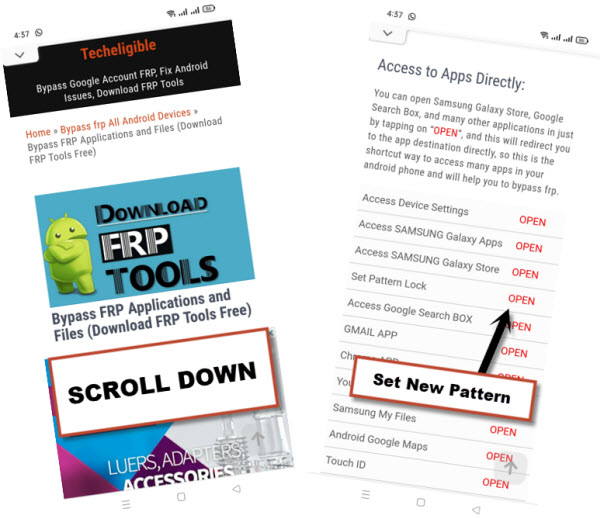
-Below steps we have to try many times until pattern is setup successfully, and you have screen of (Unlocked Device While its on you).
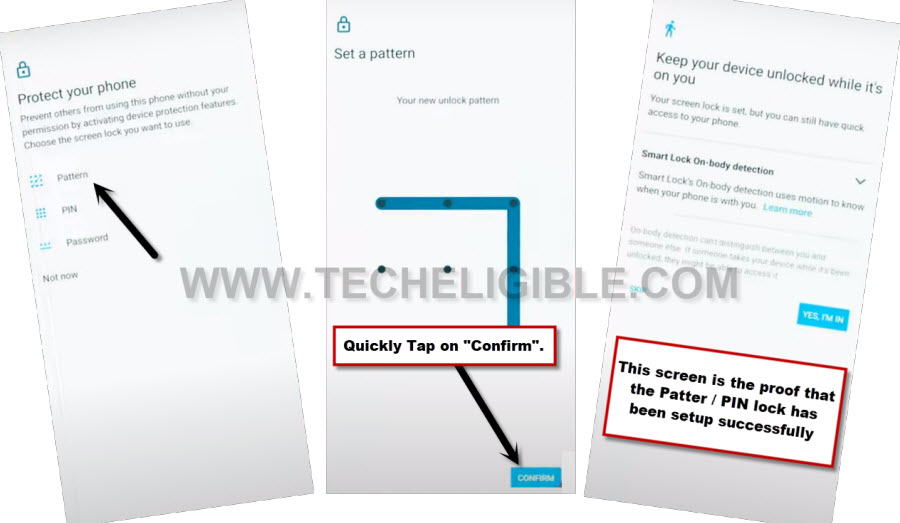
-Quickly tap to > Pattern > Draw Pattern > Next.
-Quickly draw Pattern again, and quickly tap over “Confirm”.
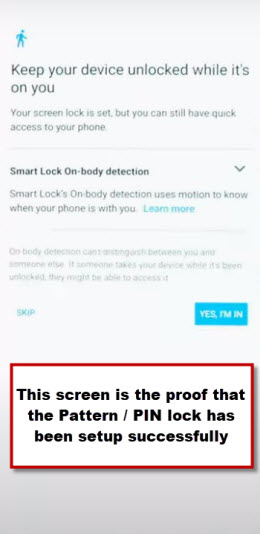
-If after hitting on “Confirm” button, you see next screen of (Keep your device unlocked….), that means the pattern lock has successfully been setup in your device.
-If you don’t see (Keep your device unlocked while its on you) screen, that means the pattern lock is not setup, just go back and keep repeating below steps few times very fast and quickly.
-Repeat this until you see (Keep your device unlocked….) screen: Tap > Pattern > Draw Pattern > Next > Draw Pattern Again > Confirm.
-After the device has been setup to Pattern lock successfully, you must have a below scree (Unlocked Device While its on you).
-Hit from there > Yes, I’M IN > Got it.
Finish Setup Wizard:
-Go all the way back on first (Hi there) setup wizard page, and finish setup wizard accordingly as shown below.
-Tap over > Start > Skip > Accept & Continue > Don’t Copy.
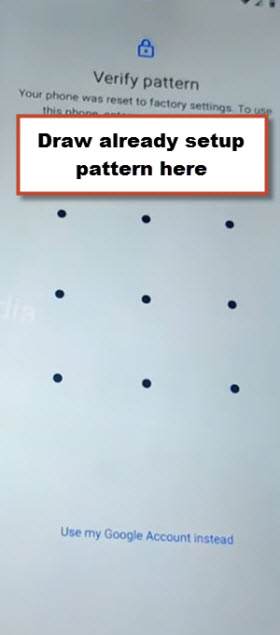
-Give your already setup pattern lock from verify pattern screen.
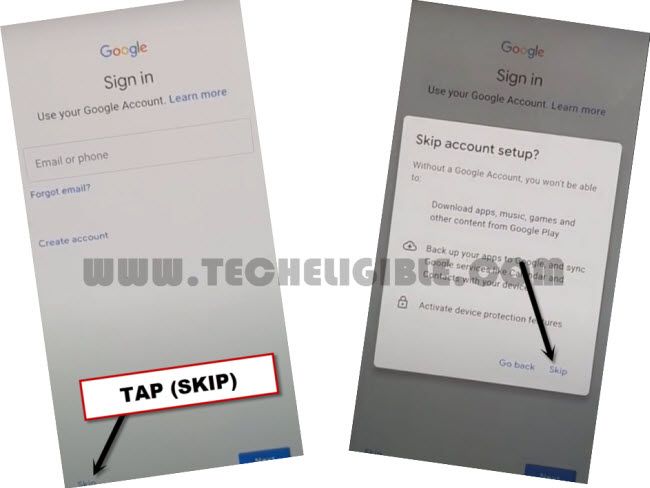
-From google sign in screen, tap on > Skip > Skip.
-Tap to > More > More > Accept.
-Confirm your pattern again, after that, tap to > Skip > Ok,
-Turn off email option, and tap to > More > Next > Done, after that, you will access to your device home-screen successfully.
Method 2: Bypass FRP Moto G Pure (Android 11)
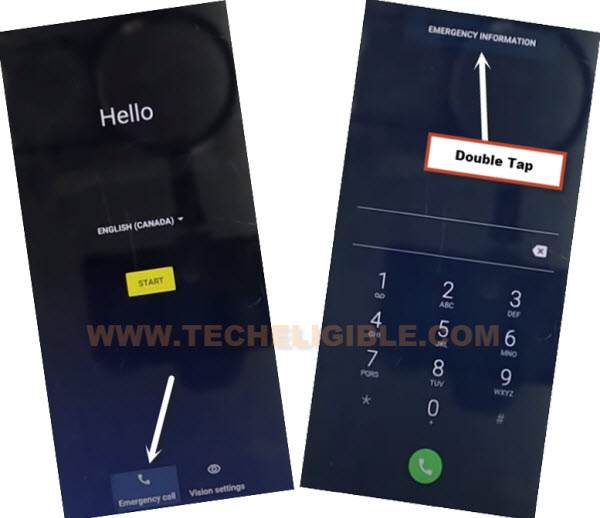
-Connect WiFi first & Go back to (Hello) setup wizard page, from there go to “Emergency Call”, and double hit on “Emergency Information”.
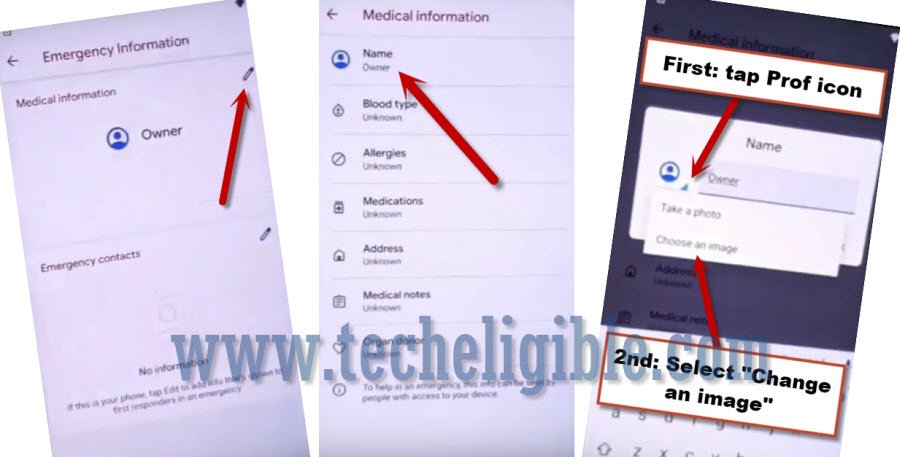
–Tap > Pencil icon > Name > Profile icon corner > Choose an image.
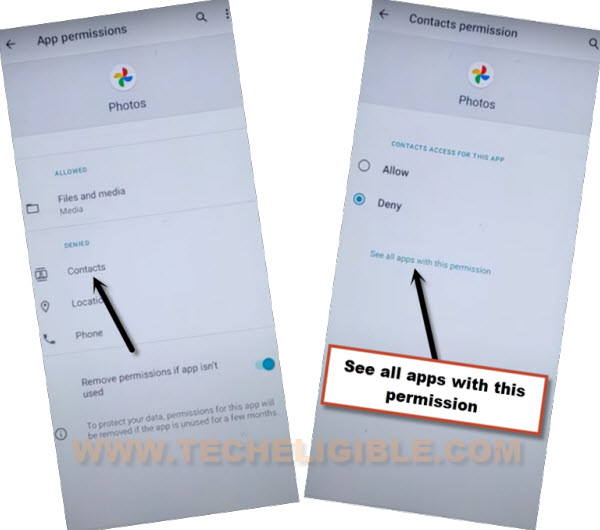
–Tap to “Menu icon”. Afterwards, just long hold at > Photos > Permissions.
![]()
–Contacts > See All apps with this permissions.
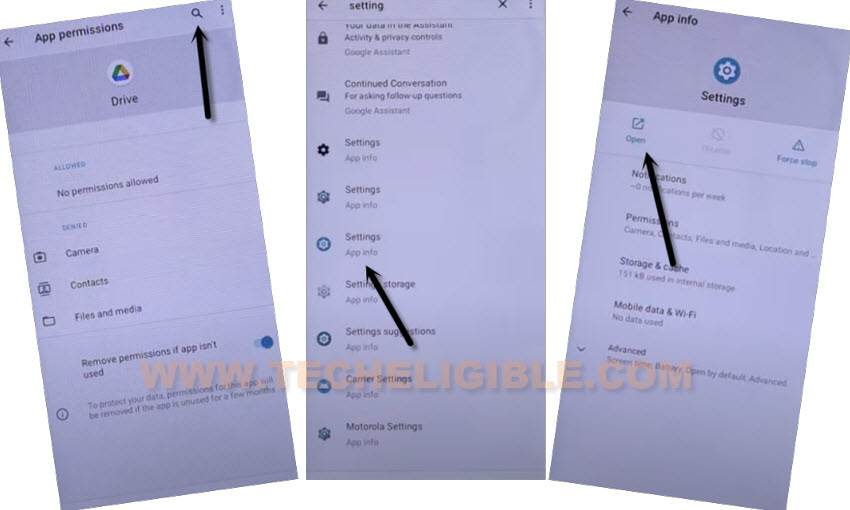
–Hit on “Search icon”, and search there “Settings”, afterwards, tap to “Settings App info“, now hit on “Open”.
Enable Shortcut Menu in Moto G Pure:
–Go to > Accessibility > Accessibility Menu > Turn on.
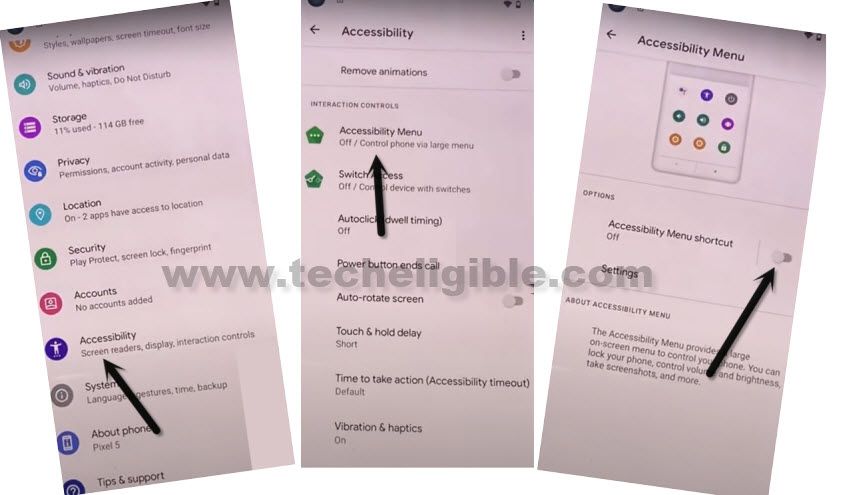
Note: Just for verification, swipe from bottom to top using two fingers, and the MENU Shortcut will appear, that means you have successfully turned on this option. this will assist us to Bypass FRP Moto G Pure.
–Go back to (Settings), from there tap to > Apps & Notification > App info.
–Tap on > 3 dots > Show system Apps.
![]()
Turn off 2 Apps from App List:
–Tap on settings icon > Android Setup > Force Stop > Ok.
![]()
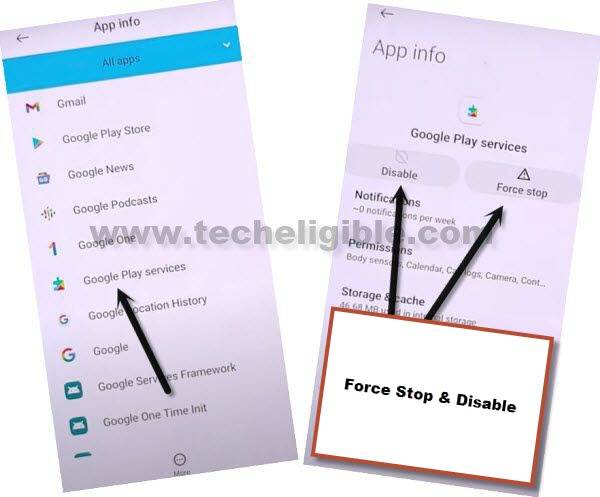
–Tap to > Google Play Services > Disable > Disable App.
–Go back to “Hi There” screen by tapping on “Back Arrow” several times, from there tap to > Start > Skip > Start & Continue.
–There you will see a loading screen (Just a sec…), this won’t disappear until we enable (Google Play Services).
–Go back to (Connect to WiFi) screen by tapping on back arrow.
–Swipe up from the bottom of the screen with 2 fingers to get shortcut menu.
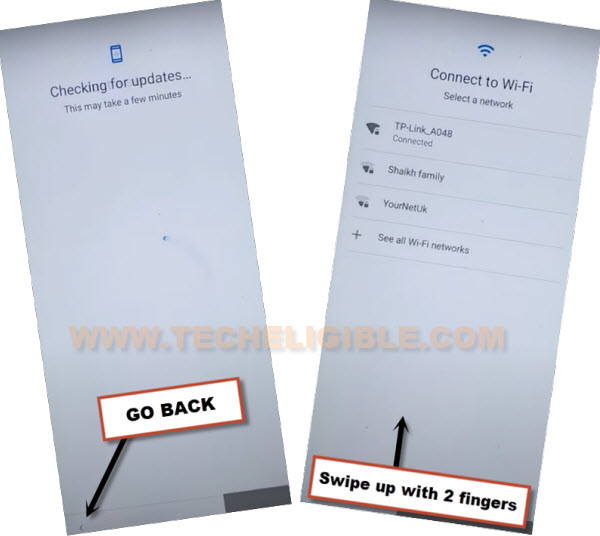
Follow Below Steps Fastly:
–Quickly tap to > Assistant > Settings > Enable (Google Play Services).
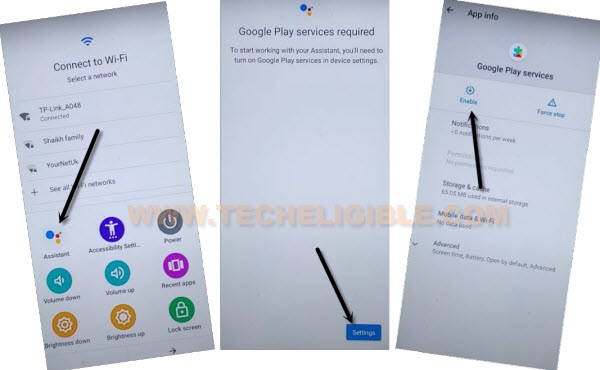
–Go back to (Connect to WiFi) screen, and tap to > Skip > Continue.
-Go to > Accept & Continue > Next > More > More > Accept.
-Now you can easily finish remaining steps on your own to reach the device homescreen, because you are all done from Bypass FRP Moto G Pure Android 11, just add new google account to setup new FRP protection on your device.
