Bypass FFRP TCL Ion Z Android 12 By Free Working Method
Have you got a FRP protection on your own device ?, you can Bypass FFRP TCL Ion Z Android 12 with the help of some easy steps from below without using any apk frp app. just through setup new Pattern lock in this device from settings, we can easily skip (Google Sign in) screen, that comes while completing setup wizard.
This method has been applied successfully on a device TCL Ion Z (T501C) Cricket July Android 12.
Disclaimer: We highly recommend you to apply this method only on your own device, if you are not owner of this device, or you found this from some where, you must return to its real owner.
Let’ Start to Bypass FRP TCL Ion Z:
Step 1: Let’s Start method by turning on TCL phone & Connect to proper WiFi network.
Step 2: Go back to first (Hi there) screen.
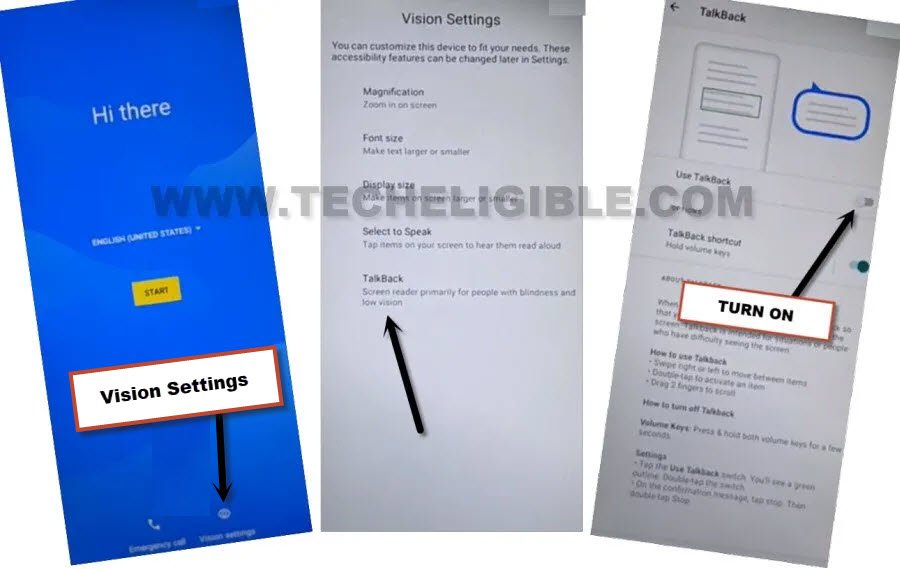
Step 3: We can now easily enable talkback feature, through this feature, we will be able to reach to pattern lock screen, where from, we will setup latest pattern for bypassing google account frp, to enable talkback, just hit over > Vision Settings > Talkback.
Step 4: We’ve to turn on both options from there (Talkback Shortcut + Use Talkback), after that, hit over > Allow > Got it.
Step 5: The talkback shortcut icon will appear up at the right side corner of the screen.
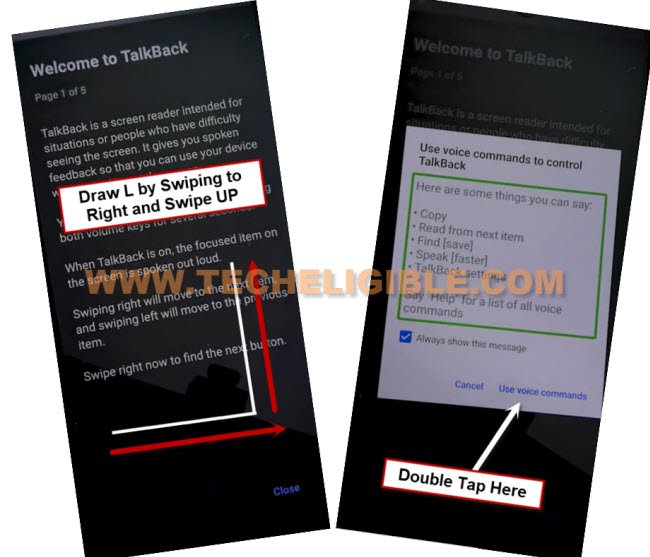
Step 6: From (Welcome to Talkback) page, lets make reverse “L” shape on screen by swipe right and swipe up.
Step 7: A new popup window will appear up of (Use voice commands to control talkback), just double hit over > While using the app > Use Voice Command.
Step 8: Enable google assistant feature, as soon as, you see green boarder on screen, just speak loudly “Open Google Assistant”.
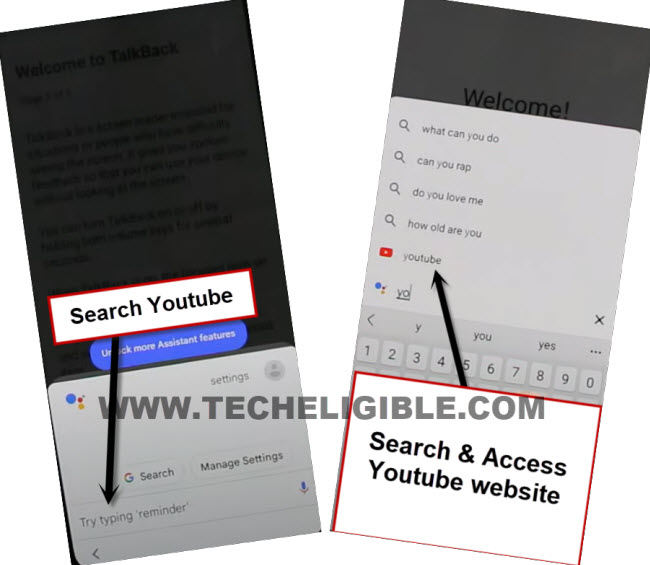
Step 9: Once you have a (Try Saying) popup window. just double tap to “Keyboard” icon from there same as shown in below image.
Step 10: We don’t need this talkback anymore now, lets disable this, tap once over “Talkback” icon, and then, double tap over the same “Talkback” icon, by doing this, the talkback feature will be disabled.
Step 11: Search and access to youtube website.
Step 12: Go to > Profile icon > Settings.
Step 13: Double tap to > About > Youtube terms of services > Accept & Continue > Next > No Thanks.
Create New Pattern Lock in TCL 30 Ion Z:
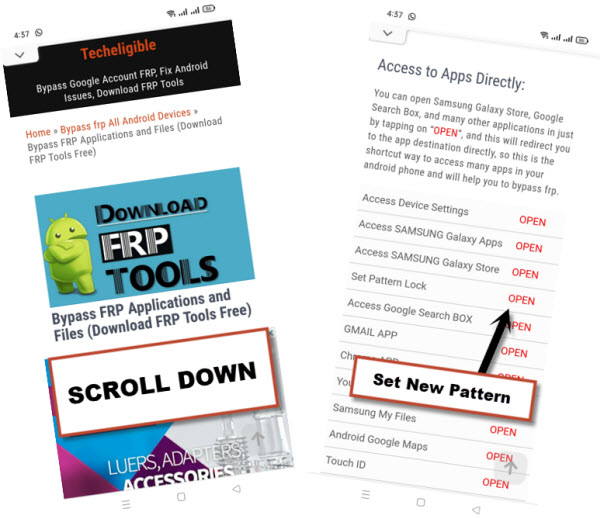
Step 14: Search in browser “Download FRP Tools“, visit our website searched result.
Step 15: Go down and tap on “Setup Pattern Lock“.
| Note: To successfully setup new Pattern / PIN lock in our TCL device, we have to follow below steps few times as quick as possible, because at first 5-10 attempts, you won’t be able to add new patter lock until we follow below steps too quick in our device. The more fast you follow below steps, the higher chances are there, that the device accept your pattern / Pin lock. You could face some below trouble while setup new Pattern lock: -May return back to our (FRP Tools) page. -May return back to (Protect your Phone) screen page. -May have a popup window of (Setting keeps stopping) etc. |
Step 16: You have to quickly and repeatedly follow below steps as much as possible until you see screen of (Keep device unlocked while its on you).
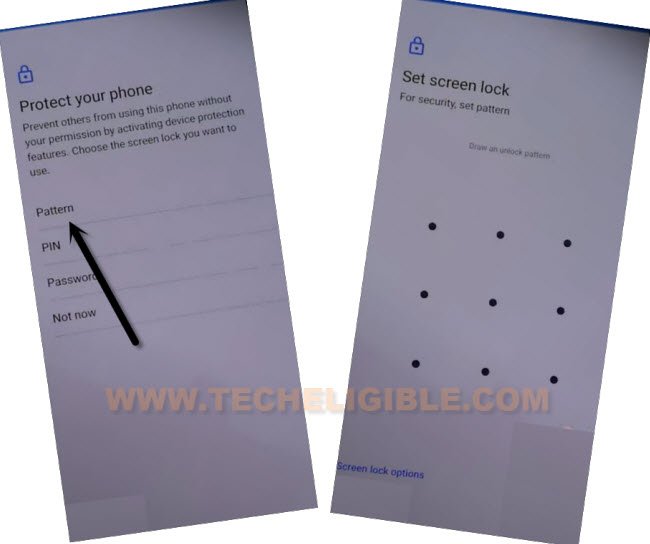
Step 17: Tap to > Pattern > Draw Pattern quickly > Next > Draw again same pattern quickly > Confirm.
Step 18: If you get back automatically on (Protect your Phone) screen, that means, the pattern lock is not setup yet, you have to repeat steps again.
Step 19: If you see (Keep device unlocked while its on you) or (All Set) screen after tapping over “Confirm”‘ button from pattern screen, that means the pattern has been setup successfully.
Step 20: Congrats, the pattern lock has been setup successfully now, and you are almost done from Bypass FRP TCL Ion Z.
Step 21: Tap to “Skip” option from there.
![]()
Finish Setup Wizard After Pattern is Setup Successfully:
Step 23: Go all the way back to first (Hi there) screen by tapping over back arrow several times, and hit on > Start > Skip.
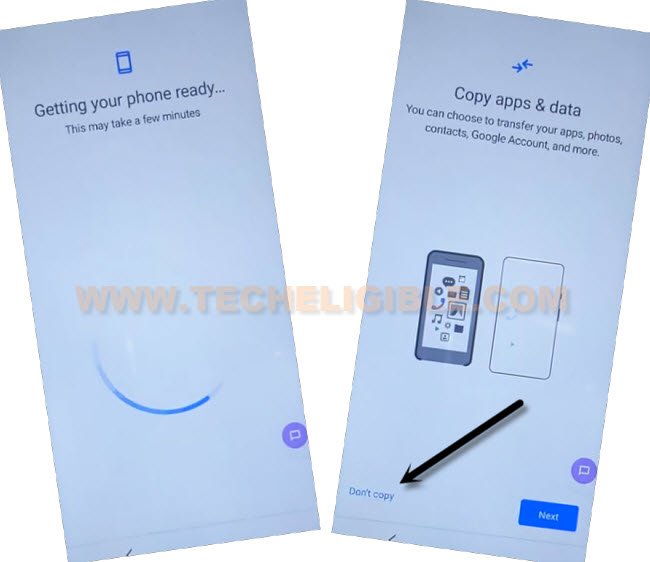
Step 24: We’ve to wait for a while on loading screen, after that, just hit over “Don’t Copy” option.
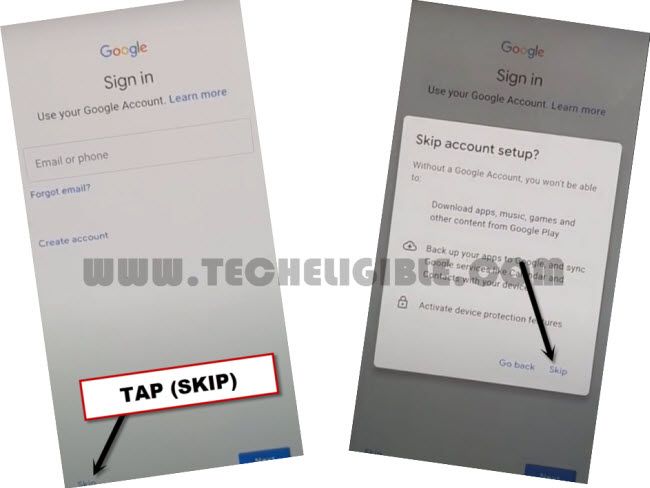
Step 25: From google sign in screen, you can now easily skip this option just by hitting over > Skip > Skip, after that, you can easily finish all remaining steps on your own without any help.
| Note: If you wanna turn off talkback completely, and wanna remove (Talkback icon), that stick to the edge of screen, you can disable talkback from > Settings > Accessibility > Talkback, now turn off (Talkback Shortcut and water mark) option from there. |
