3 Ways to Remove FRP Realme 9i Android 13, 11 (Updated)
We’re going to show you top 3 best methods on Bypass FRP Realme 9i (Android 13, Android 11) without using any PC and paid frp tool. you can follow up any method from below that is relevant to your device android version.
Warning: Do not try this frp method on a stolen phone, this is a serious crime, if you are trying to bypass frp on a stolen phone, you may also be jailed, this process is for device owner and for educational purpose only.
| Method 1: Delete FRP Realme 9i MIUI 14 (Android 13) |
| Method 2: Delete FRP Realme 9i with Talkback (Android 11) |
| Method 3: Delete FRP Realme 9i With SIM Card |
Method 1: Bypass FRP Realme 9i (Android 13)
-Start process by turning on device, and connect WiFi. Afterwards, go back on (Connect to WiFi) screen.
-From there, go over > Exclamation icon > Share > Nearby.
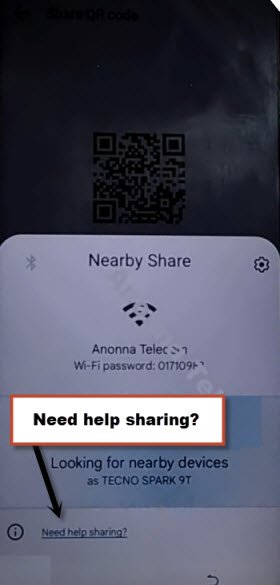
-Let’s go to > Continue > Allow > Need help sharing.
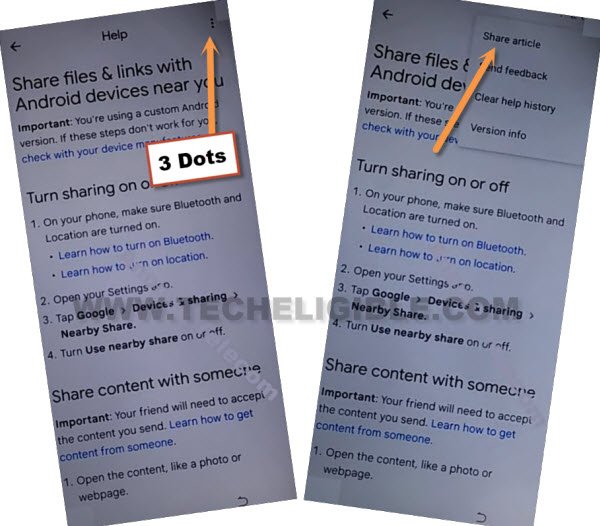
-Once you reach on (Help) screen, just hit on > 3 dots > Share Articles.
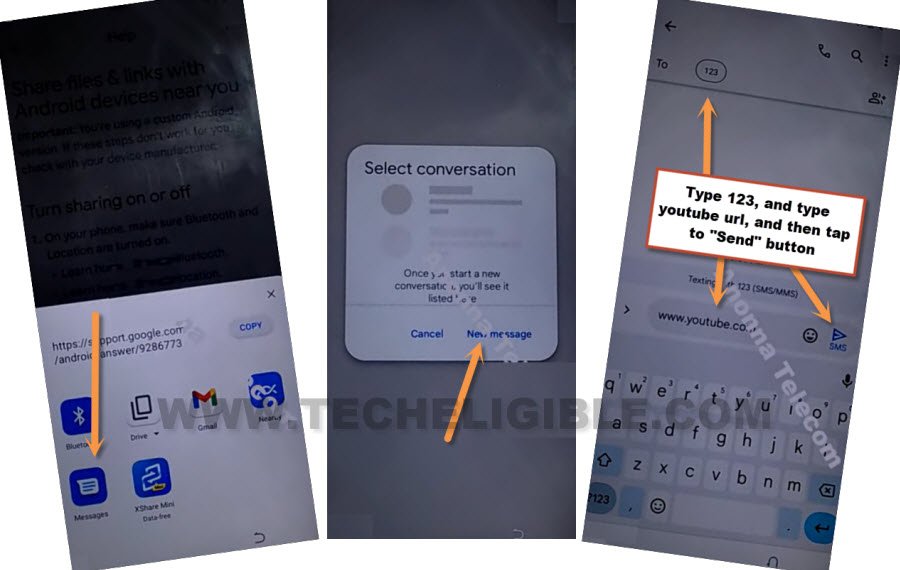
-Access on youtube website, just tap on > Message > New Message.
-Type youtube url there “www.youtube.com“.
-Send this youtube link as text message to any random number (See below image).
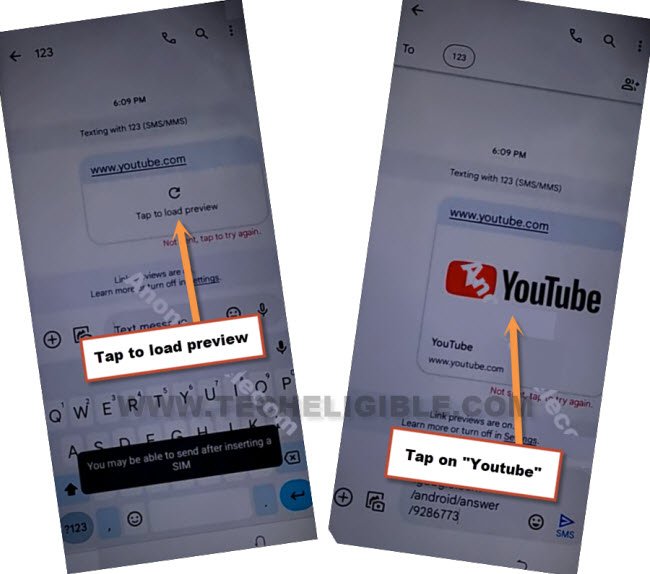
-After sending youtube url as text, this will convert to a hyperlink automatically, hit on “Tap to load preview”.
-Hit again on “Youtube” thumbnail image.
-Go to > Profile icon > Settings.
-Tap on > Youtube terms of services > History and Privacy.
-Tap to > Use without an account > No Thanks.
Let’s Launch Clone Phone App:
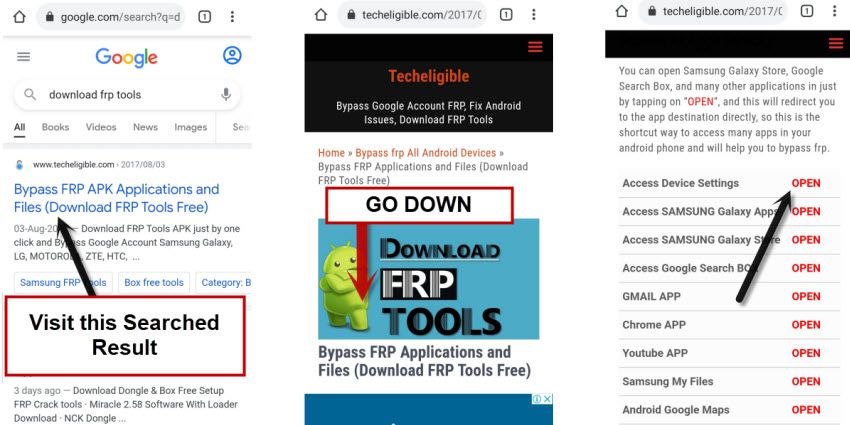
-We can easily access to techeligibe website frp tools, search in browser . And, visit our website 1st searched result from there.
-Once the google chrome browser is launched successfully, just search there with “Download FRP Tools“.
-Go to our website frp tools page, and then hit on “Access Device Settings“.
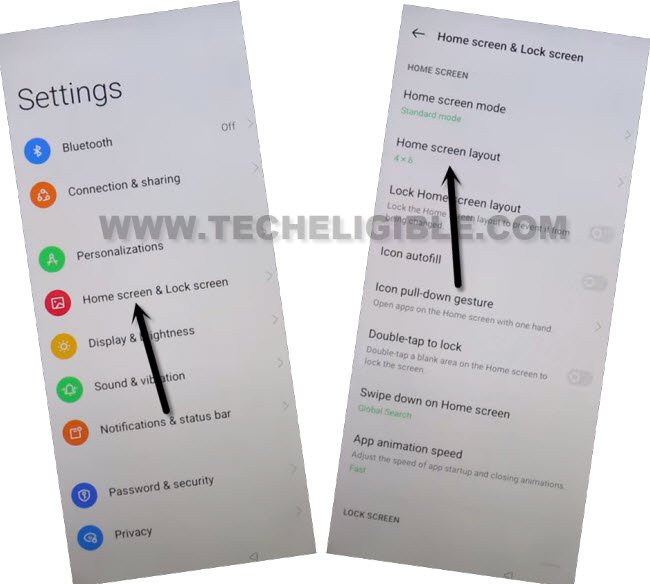
-Tap to > Home screen & Lock Screen > Home Screen Layout.
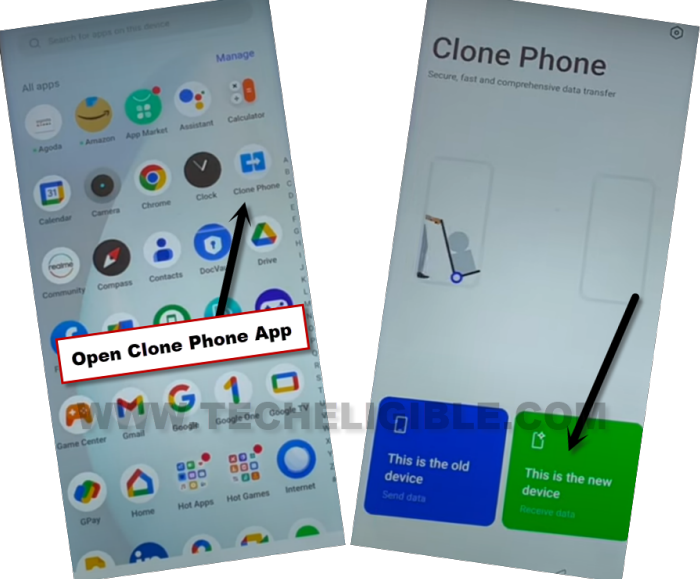
-Open > Clone Phone > This is the new device (See below image).
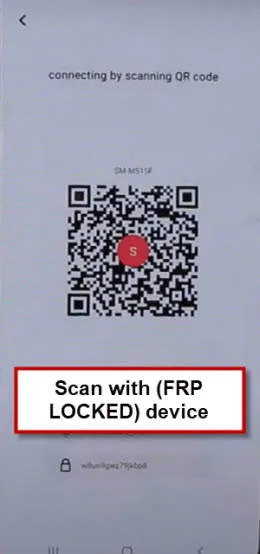
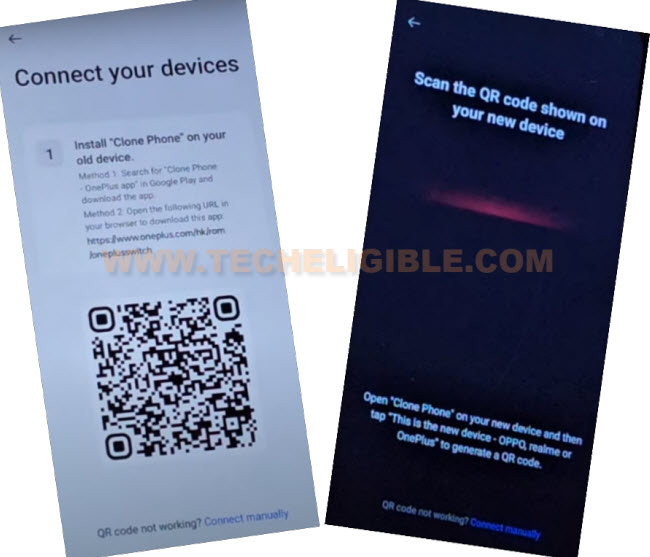
-Hit on > Allow > Other Android. The QR code will be in front of your screen. We’ve to scan this code from any other android phone through this same app (Clone Phone). Follow steps from below.
Use Any Other Android Phone for Installing Clone App:
-Use any other android device, whether of your any Sibling, parent, or friend. The device must be android one.
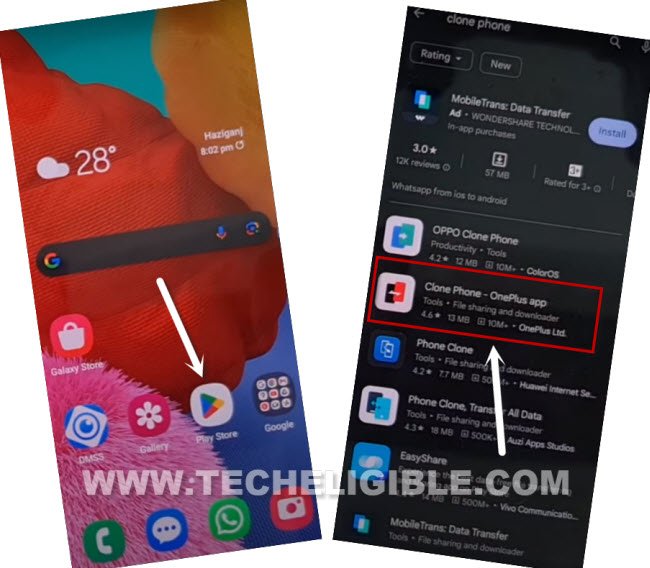
-Download & Install “Clone Phone – Oneplus App” in other android phone from google play store.
-Launch your installed app (Clone Phone – Oneplus), and hit on “Agree & Continue”.
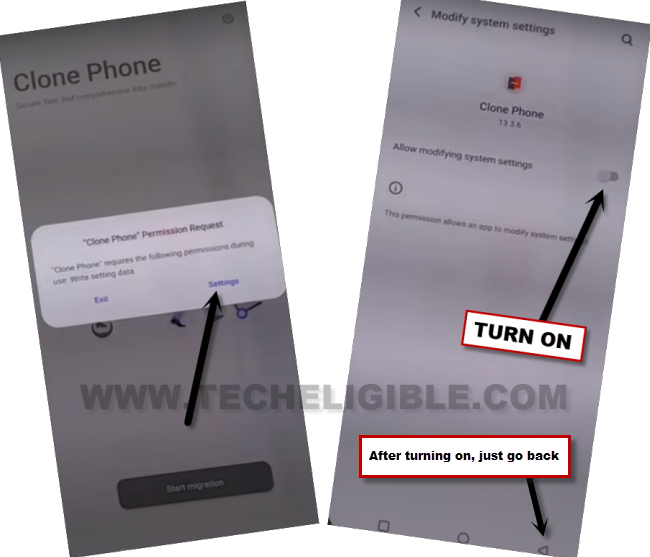
-You will be displayed a popup window of (Clone Phone Permission Request), just hit on “Settings”, and toggle on option of (Allow modifying system settings).
-Tap on “Back Arrow” from bottom to go back.
-You will see another popup, just hit on “Settings”, and turn on (Allow access to manage all files) option from there too.
-Go back by tapping on “Back Arrow” from bottom.
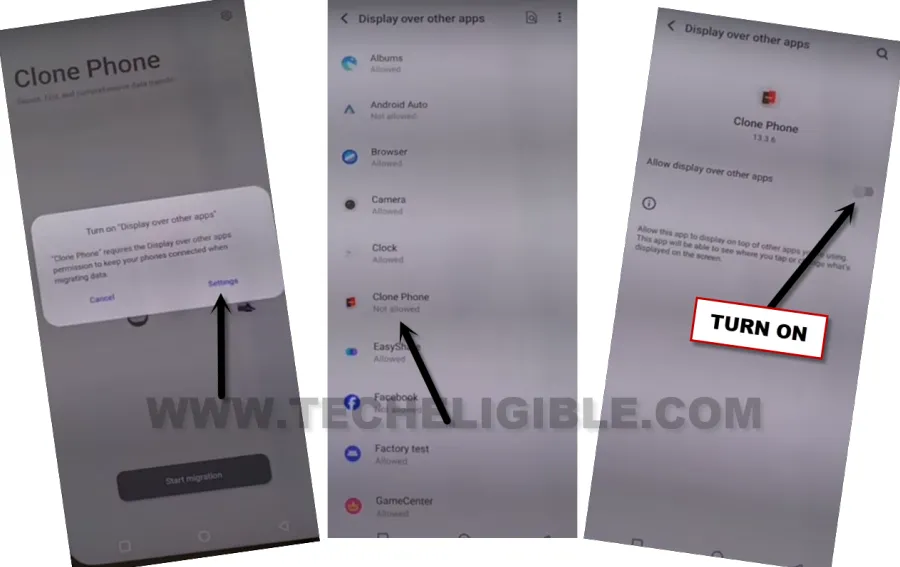
-Hit on “Start Migration”, and you will be shown another popup window, just tap to “Settings” from there.
-From app list, go to “Clone Phone”, and turn on (Allow display over other apps).
-Hit on “Back Arrow” from bottom to back to (Clone Phone) screen.
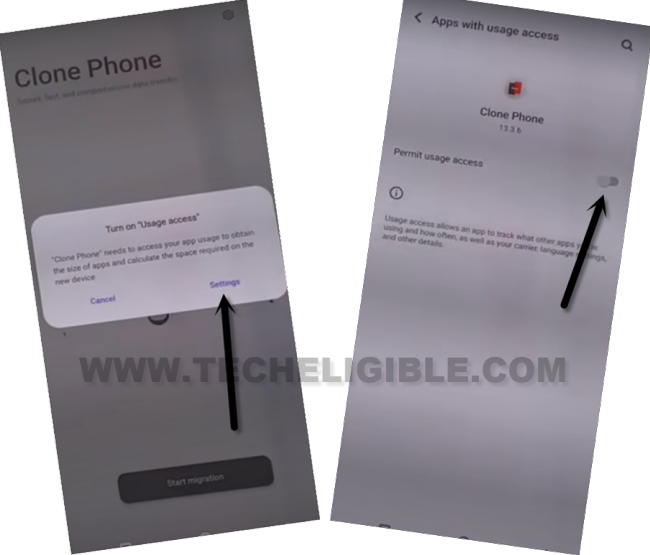
-You will see one more popup of (Turn on “Usage access”), just hit on “Settings”, and toggle on “Permit usage access”.
-Hit on “Back Arrow” from bottom, and then tap to “While using the app”, and hit on “Allow” few times, after that, tap to “OK”.
Note: Above 7-8 steps we did just to launch (Clone Phone) app, you may have different options, all you have to do is, allow and turn on access each time when you see any popup window. After that, QR Code scanner will come up.
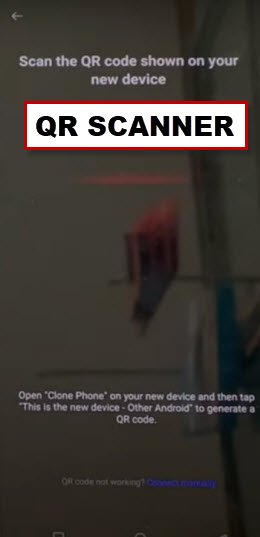
-Finally, we will see (QR Scanner) on screen. That means the app has been launched successfully, and now ready to be connected with Realme 11 5G.
-Let’s scan QR Code of Oneplus device from other device QR Scanner to connect both devices together to Bypass FRP Realme 9i.
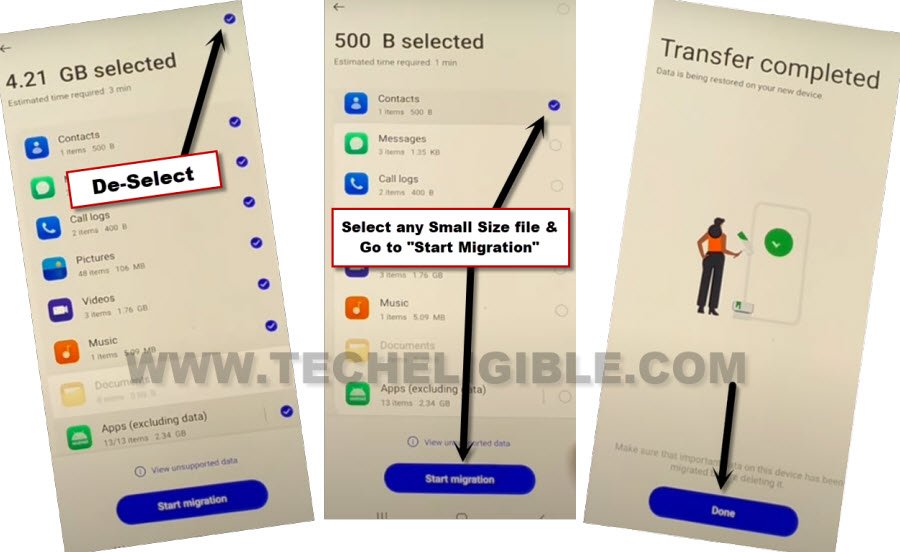
-Once your other android device is connected successfully, just deselect all selected apps by uncheck option from top right corner.
-Select any one Small MB Size file, and hit on “Start migration” button.
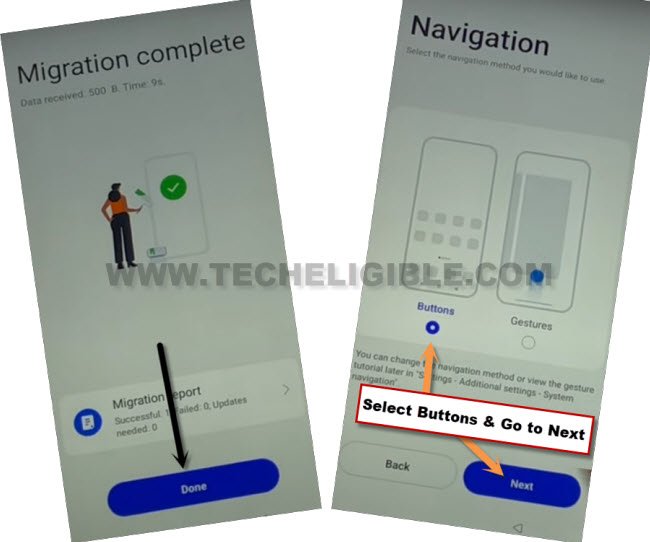
-Within few seconds or minutes, transferring process will be completed, after that, just hit on “Done”.
-From Realme 11 5G device screen, tap to “Done”, and select “Button”, and then, hit on “Next”.
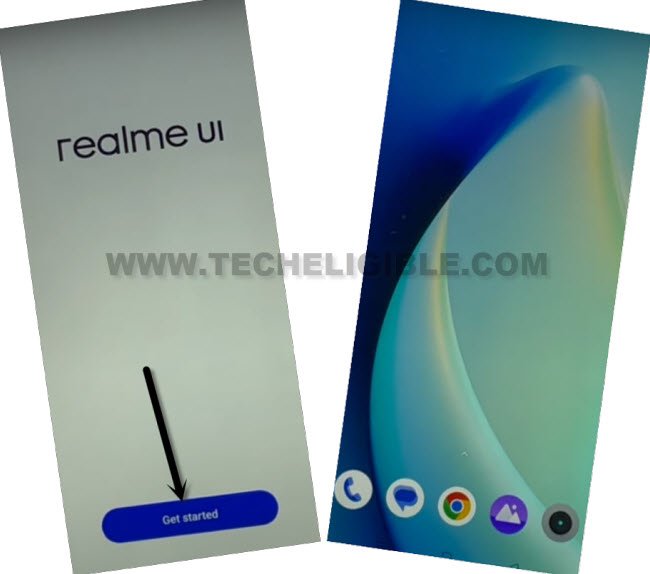
-Go to > Skip > Done > Get Started. You will be taken inside your Realme device main home screen without signing in with any google account and without complete setup wizard. You are all done from bypassing frp on this phone, now you can easily setup new google account and new security lock.
Method 2: Bypass FRP Realme 9i With Talkback
-Start the process by connecting WiFi, and go all the way back to first (Select Language) homepage, from there hit on “Human” icon from top right corner of the screen.
-Turn on “Accessibility”, and then tap on option “You can also turn on select to Speak”.
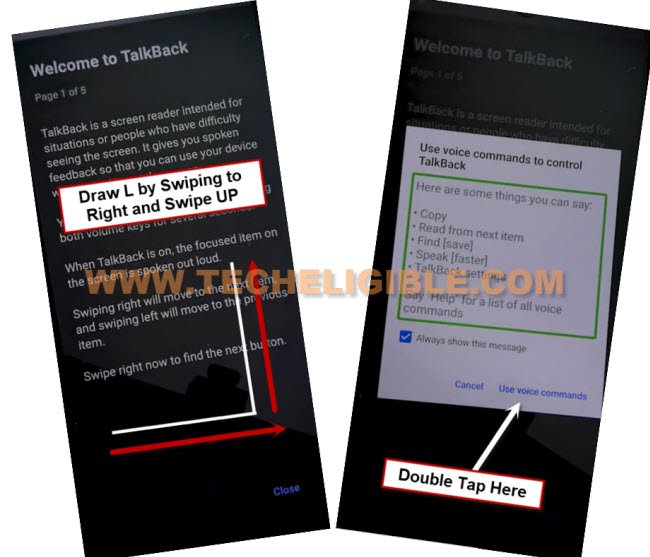
-You will have a (Welcome to Talkback) screen same as shown in below image, if you don’t see this image, just long press both (Volume UP/DOWN) keys, this will also enable talkback feature.
-Make a reverse “L” alphabet on screen by swiping from right to left and then swipe Up, and then double tap on “While using the app”.
-Tap once on “Use Voice Command “, and then again double tap on “Use Voice Command “.
-We have to Speak loudly “Open Google Assistant” as soon as you see green boarder on screen.
Note: If you see this screen “Sign in to make the google assistant yours”, so don’t worry, just restart your device and repeat all steps again.
-After speaking loudly, a popup window will be displayed.
-Now we will tap on “Mic” icon, and speak loudly “Open Youtube”, this will launch a youtube website.
Note: If you are unable to launch youtube by speaking, then simply tap on “Keyboard icon”, which is in the popup of google listening, and then type there “Youtube”, and then open youtube app from there.
-Turn off talkback feature now, just long press both (Volume UP/DOWN) keys at the same time to just turn off talkback option.
-From youtube website, just tap on “Profile” icon from up-right, and then tap on “Settings” icon.
![]()
-Go to > History & Privacy > Youtube Terms of Services.
-Tap on > Accept & Continue > No Thanks.
-An internet browser will be launched, just tap on “Allow” from popup window.
Access Realme 9i Settings to Erase Data:
-We will reach inside device settings, and reset device completely to Bypass FRP Realme 9i.
-Search in top search bar “Download FRP Tools“, and visit our website searched result, from there tap to “Access device settings” option.
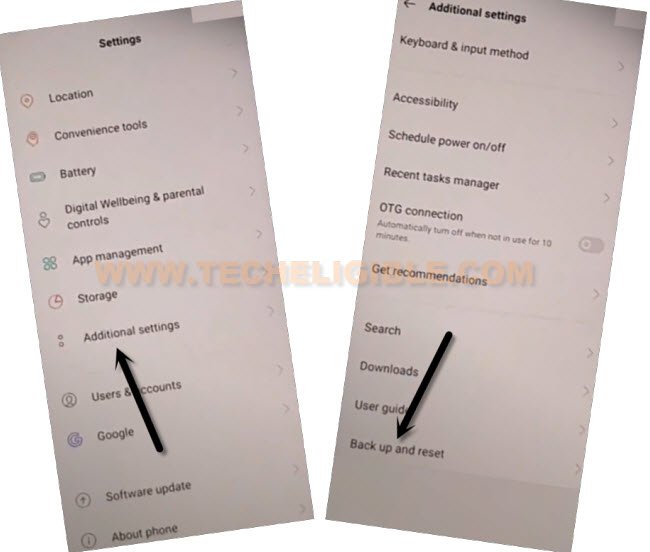
-Go to > Additional Settings > Backup & Reset > Erase all data (Factory Reset).
-Tap on > Erase System Settings only > Erase System Settings only > Erase System Settings only.
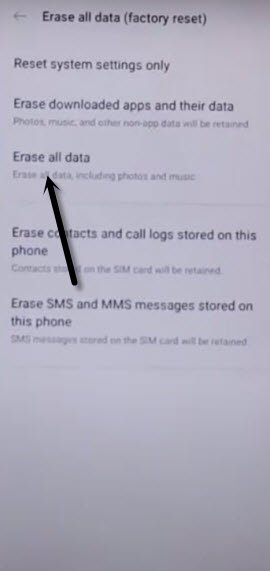
-Now hit on > Erase all data > Erase data > Erase Data.
-The device will restart to complete its erasing data process, and frp will also bypassed, because the old signed in google account and security lock will also flushed complete with erasing data process.
Method 3: Bypass FRP Realme 9i by SIM Card
-Connect WiFi, and then go back to first (Select Language) homescreen.
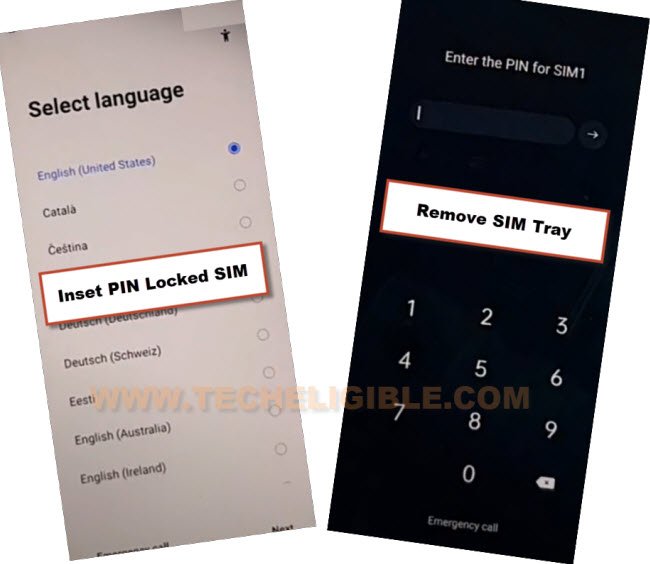
-Prepare a PIN locked sim card, you can setup 4 digits PIN in your SIM using any other android device, this will not damage your SIM any more, we are using this way just to bypass frp from Realme 9i.
-Now, insert a PIN locked SIM card, and then wait for the screen of (Enter the PIN for SIM 1).
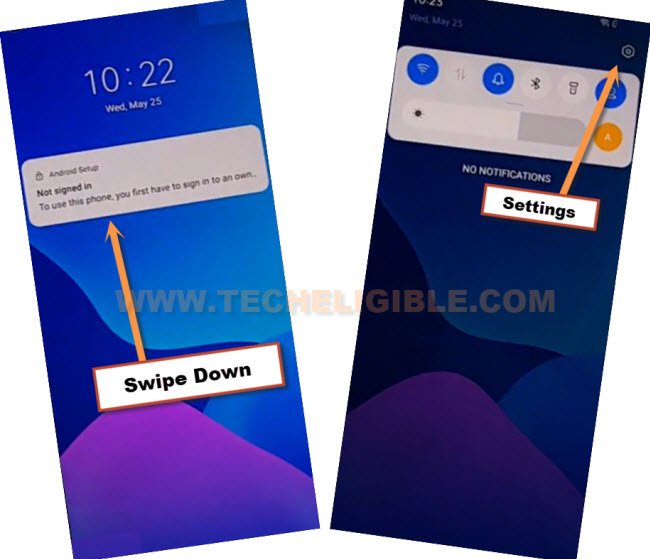
-Remove your SIM tray, and then you will have a (Not Signed in) popup message.
-Swipe down the (Not Signed in) message, and then tap to “Settings” icon from top right corner, and then you will get into your device settings easily without using any frp tools.
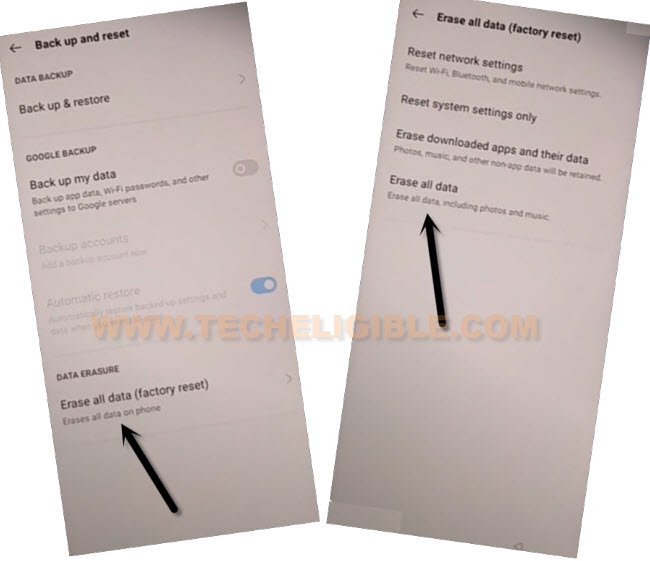
-Go all the way down and tap to “Additional Settings”, and then go to “Erase all data (Factory Reset)”.
-Hit again on > Erase all Data > Erase Data > Erase Data.
Note: Wait on wipe data screen for 4-5 minutes, this takes several minutes to be completed.

-The device will auto restart and you will see there a process of (Wipe Data…), just wait there till this process finishes completely, and after that, you can easily finish setup wizard without having a google verification screen.

