Remove FRP Infinix Smart 8 HD Android 13 by Google Assistant
If you don’t aware of your device signed in google account. And, unable to complete initial setup. Follow this easy and free guideline to Remove FRP Infinix Smart 8 HD (Android 13) without using any PC and paid service. You can fix all issues easily and setup new google account with the help of (Google Assistant) option. We will show you all steps, how you can get back infinix Smart8 HD phone.
Remember: Do not try this frp method on a stolen phone, this is a serious crime, if you are trying to bypass frp on a stolen phone, you may also be jailed, this process is for device owner and for educational purpose only.
Let’s Start to Remove FRP Infinix Smart 8 HD:
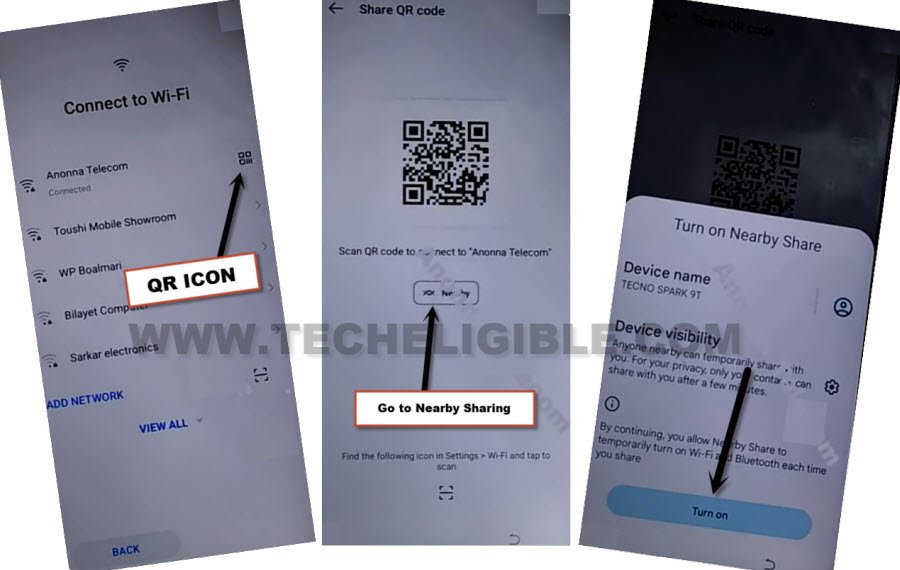
-To fix FRP issue on this phone, just connect WiFi first. After that, from the same WIFI page, hit on “‘QR Code” icon same as shown in below image.
-Tap on > Near by Share > Turn on.
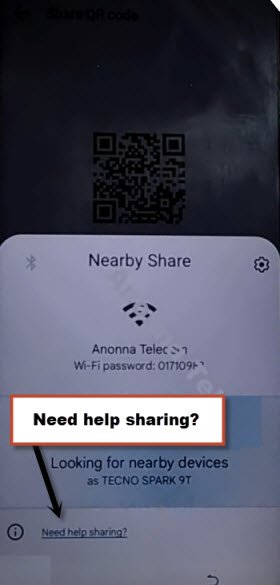
-Hit on a blue link “Need Help Sharing?” to access on a help page.
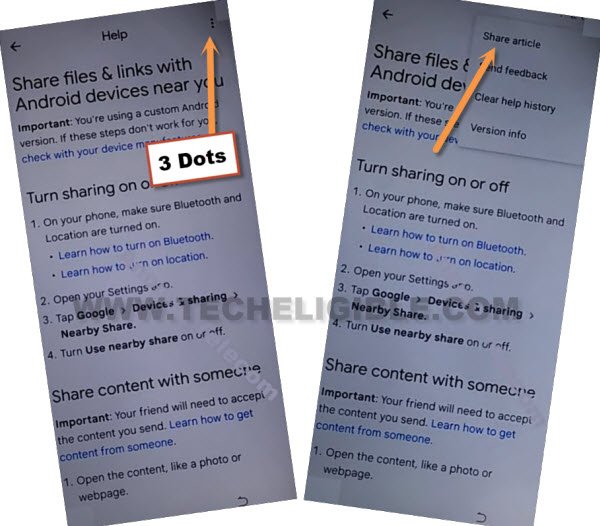
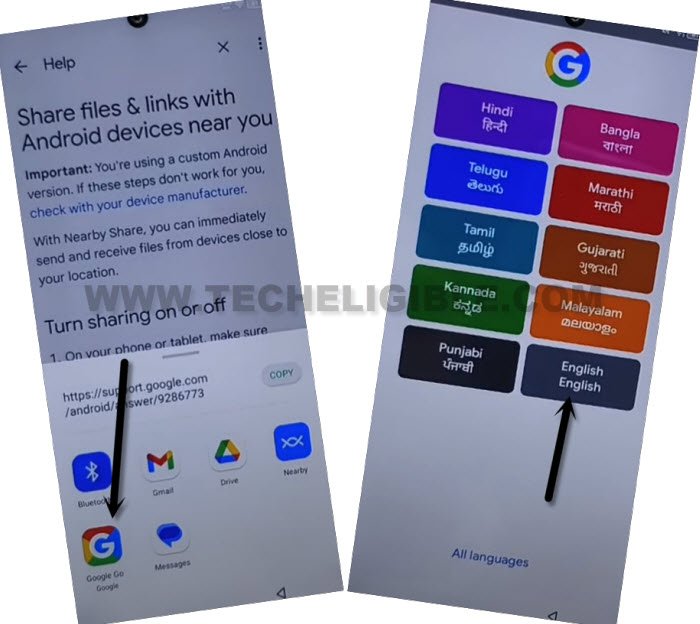
-Go to > 3 Dotes > Share Articles.
-You will be shown a popup window, just tap on “Google Go”, and hit on “Use without google account” option.
-Tap to “Next Arrow” icon, and select “English” language. And tap to “Done”.
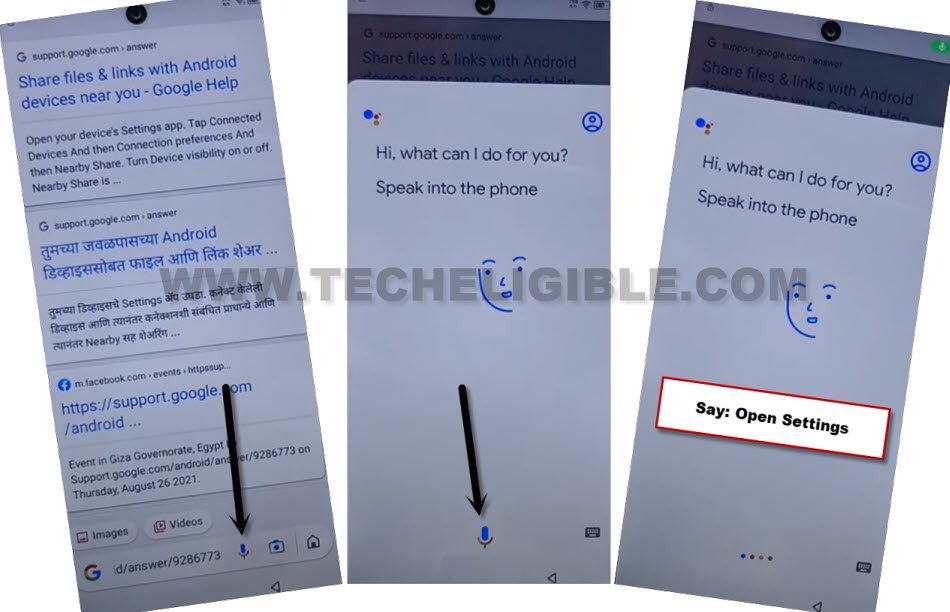
-Hit on “Mic”‘ icon from bottom, hit again on “Mic” icon. Say loudly, “Open Settings”. Within few seconds, you will redirected inside the device settings.
-Congrats, you are on your device settings page. From there, go to > Special Function > Accessibility > Accessibility MENU.
-Turn on “Accessibility MENU Shortcut”, and hit on “Allow” from popup window.
-After enabling accessibility shortcut option, the (3 dots) icon will stick at the bottom right corner of your device screen.
-The green colored “3 dots” icon will stick at right edge corner of the screen. Later on, we will use these 3 dots to enable google play services app.
-Lets get back to “Settings”.
-Go back on “Settings” page, after that, tap on > App Management > App list.
-Hit on “3 dots” from top right corner, and then tap on “Show System”.
Disable Few App Infinix Smart 8 HD Settings:
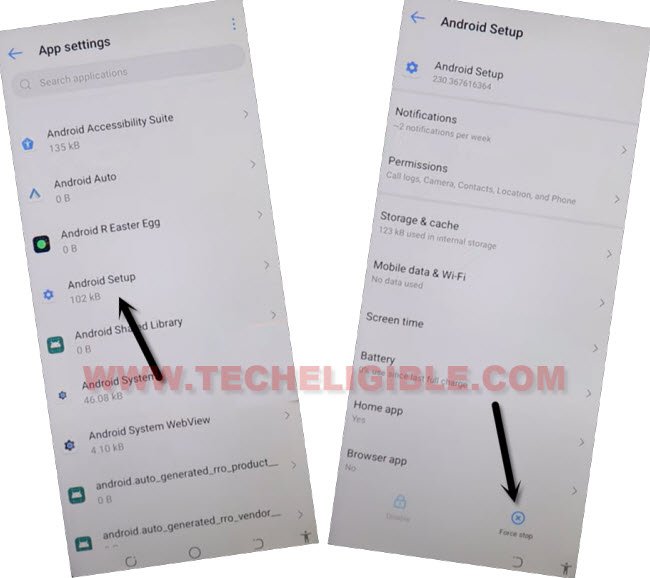
-Find and tap to > Android Setup > Force Stop > OK.
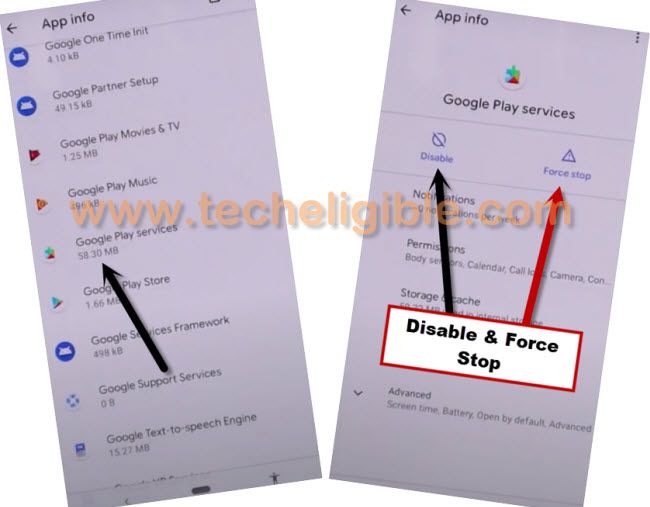
-Go back to APP List, and tap on > Google Play Services > Disable > Disable App, and also tap on “FORCE STOP”.
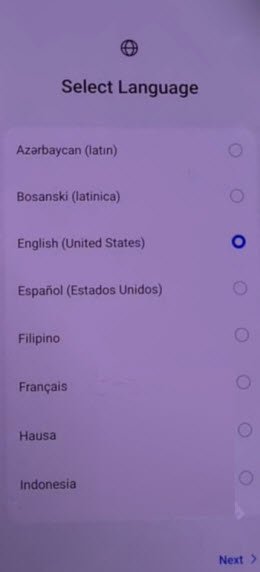
-Go all the way back on (Select Language) page. From there, tap to > Next > Skip.
-You will access back to (Connect to WiFi) screen, from there, long tap over “Connected WiFi Name”, and then, tap to “Forget” to disconnect WiFi completely.
-Go all the way back on (Select Language) screen again, from there, hit again on > Next > Skip. You will get back on (Connect to WiFi) screen again.
-Connect WiFi again. After that, you will be taken on (Use Agreement and services) screen.
-From there, hit on “Next”, wait on (Loading) screen, after that, go to “Don’t Copy”.
Repeat Steps Several times to Enable Google Play Services App:
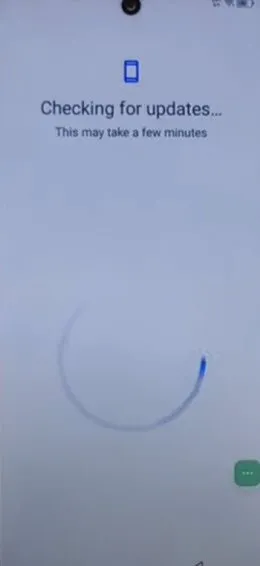
-The device will stuck on (Checking for update…) screen. This will not finish until we enable back (Google Play Services) app.
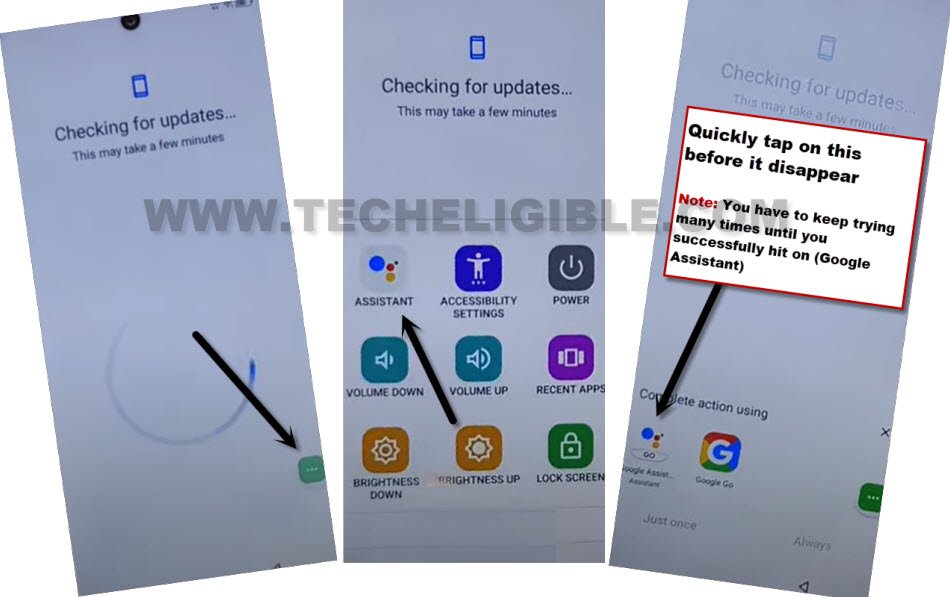
-You have to follow below step as quick as possible, and keep repeating below steps for around 20-30 times until you hit on (Google Assistant Assistant) from popup window.
-If you fail hitting on (Google Assistant Assistant), so you will be taken back to (Checking for update…) loading screen, and you have to repeat steps again.
Quickly & Repeatedly Follow 3 Steps: Quickly tap over > 3 dots > Assistant > Google Assistant Assistant.
Note: You will have to repeat above 3 steps multiple times, around 20-30 times to successfully access on (Google Play Services) screen.
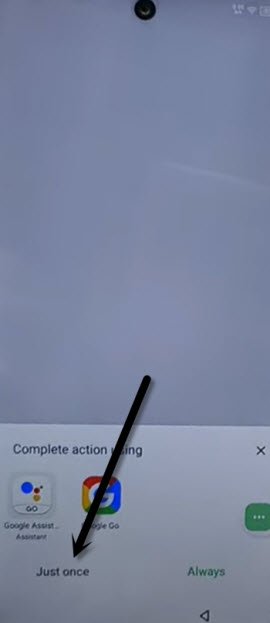
-After hitting on (Google Assistant Assistant) successfully, the popup window will stick on screen, just hit on “just once” option from there.
-Tap to “Profile” icon from popup window top corner, and then, go to “Help”.
| Note: You may be redirected to a (Google Chrome browser) after hitting on a (Help) option, from there, tap to “Home icon” from bottom bar, after that, tap to “Turn on” option. |
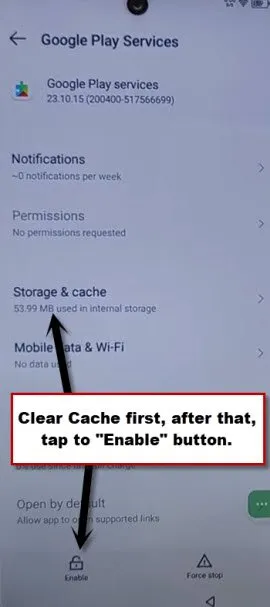
-Clear “Storage & Cache” from google play services screen.
-After that, tap to “Enable” button.
-After that, go back on (Checking for update) page, and wait on that screen, the loading screen will go away, and you will reach to next (google services) page.
-You are all done from Remove FRP Infinix Smart 8 HD, finish setup wizard now to access device main home-screen. Thanks for visiting us.
