
Remove Google FRP VIVO Y02t Android 13 Without Reset Option
With the help of some easy steps, you can easily get fixed your device (stuck on google verification screen) problem. That happens just because you forget your already signed in google account. And, your device get signals as if, you are not a real device owner. That’s the reason, you have to follow up this guideline to Remove Google FRP VIVO Y02t (Android 13) without using any paid service.
Warning: Do not try this frp method on a stolen phone, this is a serious crime, if you are trying to bypass frp on a stolen phone, you may also be jailed, this process is for device owner and for educational purpose only.
Let’s Start to Remove Google FRP VIVO Y02t:
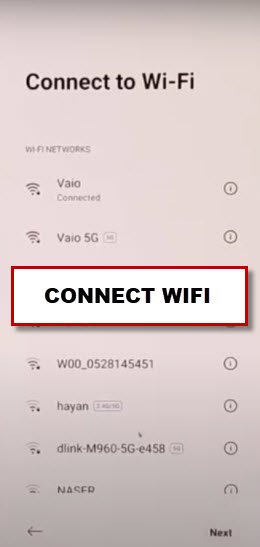
-Lets begin this process through turning on phone and connect WiFi first.
-Enable talkback feature just through long hold both buttons (Volume UP + Down). From popup window, just hit on “Turn on” option.
-You have to long hold again both buttons (Volume UP + Down). After that, talkback will be enabled completely.
-You will be shown (Welcome to talkback) page, from there, just swipe “L” on screen by swipe right and then, swipe up.
-From popup window, just double hit on “Screen Search” option.
-Tap twice over > World icon > Next.
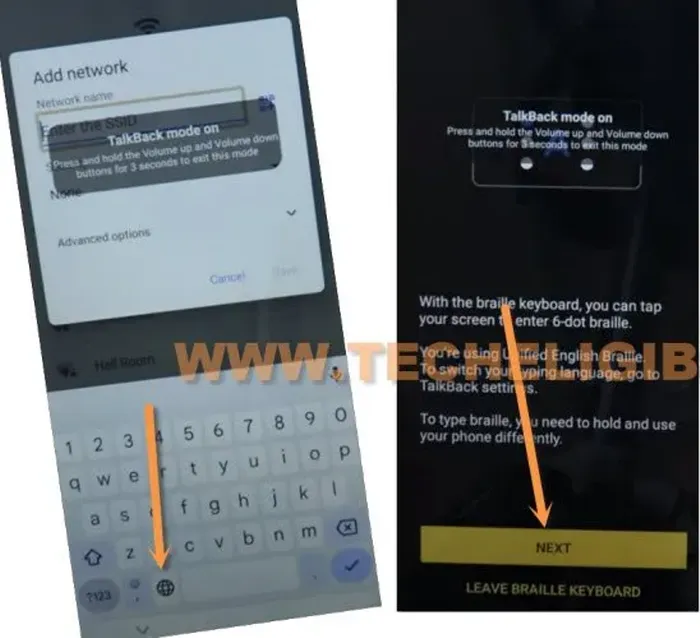
-Let’s swipe from right to left with (3 fingers). From popup window, go to “Settings”.
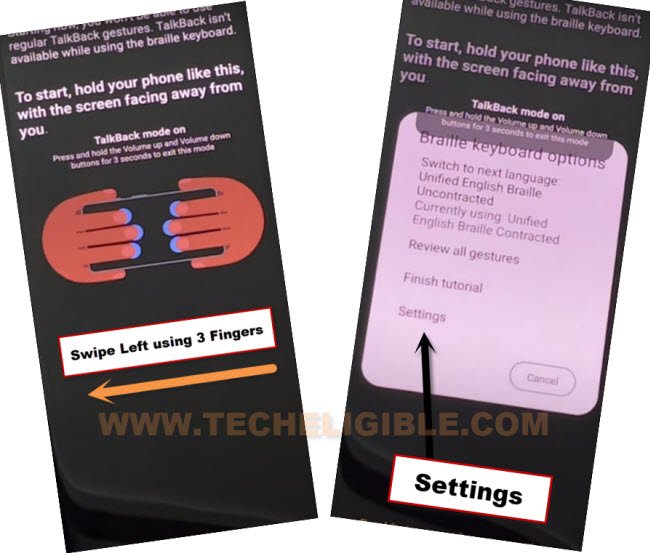
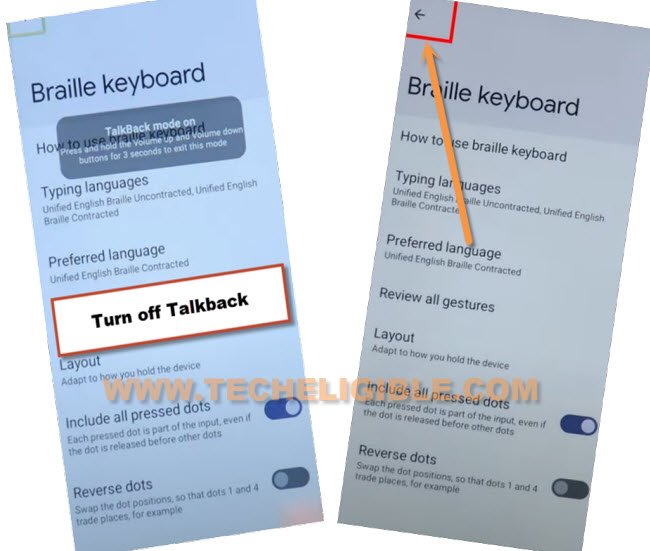
-After reaching on a (Braille keyboard) screen, you don’t need enabling talkback feature anymore. Let’s disable this just by long hold both keys (Volume UP + Down).
-Double tap to “Back Arrow” from top corner.
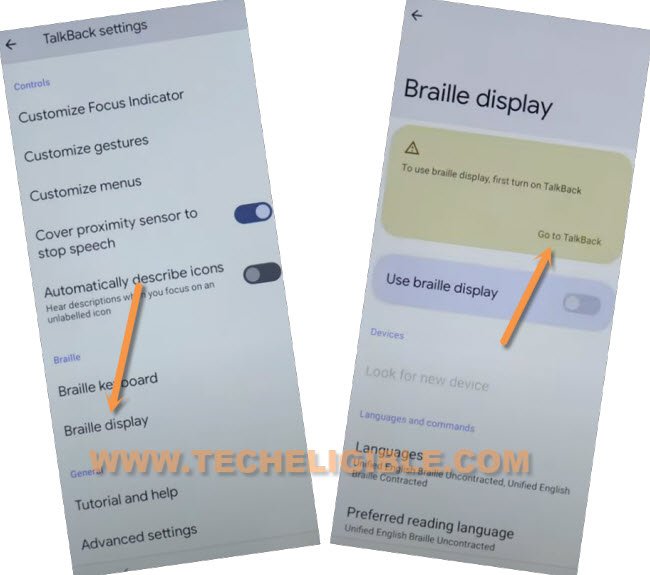
-Tap to > Braille Display > Go to Talkback. (See below image).
-We are gonna turn on (Accessibility feature) in this device. Tap to “Accessibility MENU”.
-Turn on “Accessibility Menu Shortcut” option. After that, from popup window, go to > Allow > Got it.
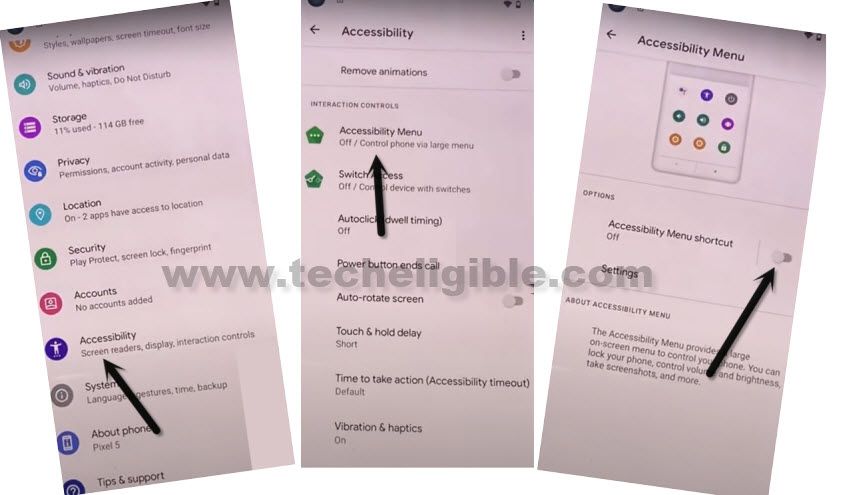
-Once the accessibility feature is enabled successfully, you will see (3 dots) icon at the right side screen.
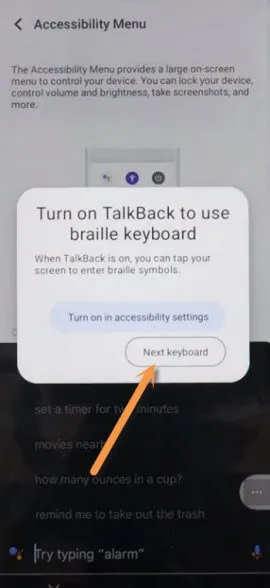
-Tap to those > 3 dots > Assistant > Keyboard icon (See below screen shot).
![]()
-Choose “Next Keyboard” option from popup window.
-Just type “Settings”, and tap to “Send button” from bottom of the keyboard to send your typed text.
-After that, tap to “Open Settings” option from there to get inside the device main settings page.
Note: You can also reach to our device settings just by saying loudly “Open Settings” after hitting on “Mic icon” from there.
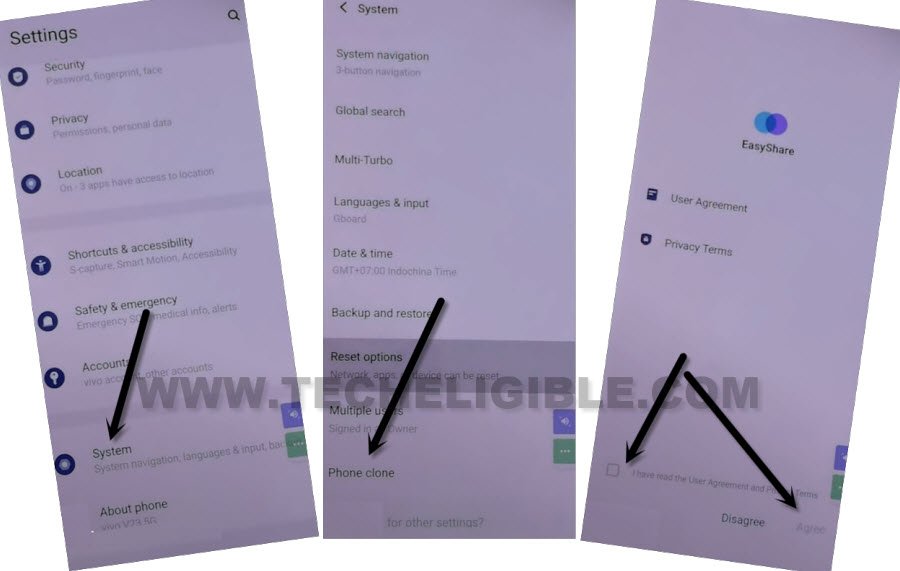
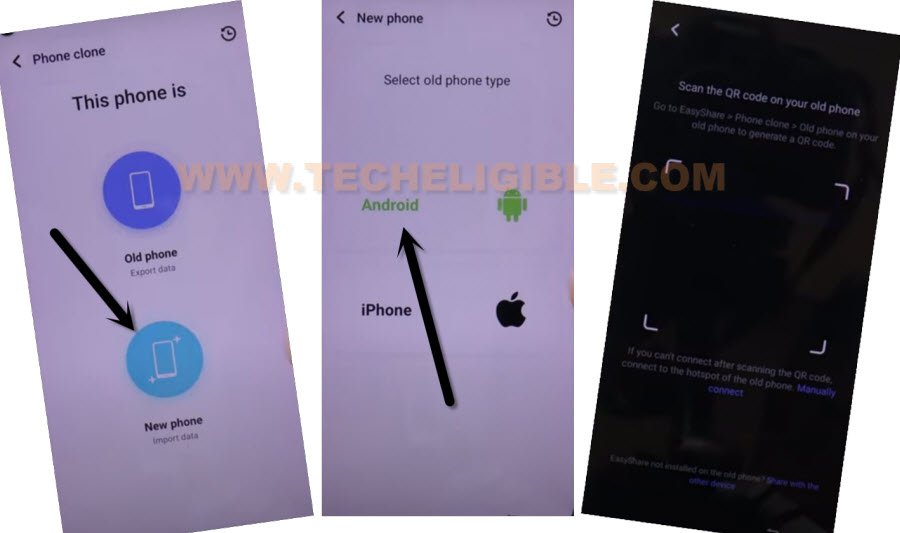
-Lets run (Phone Clone) app from your device settings page by going over > System > Phone Clone > Agree.
-Go to > This is a new phone > Android > Got it.
-Tap sometimes over (While using the app) option. Tap to “Allow”. You will be shown “QR Code scanner” screen.
Follow Steps in other any Android Phone:
-You need any other android device too, because, in other phone, we will use (Easyshare) app to transfer an app to our VIVO device to Remove Google FRP VIVO Y02t.
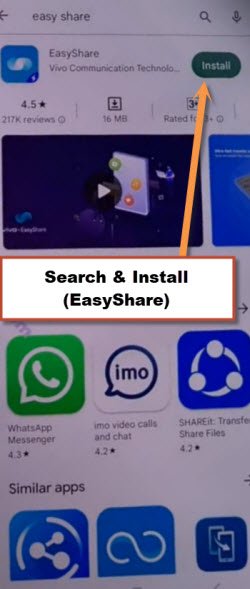
-Lets Install (EasyShare) application via google play store in other android device.
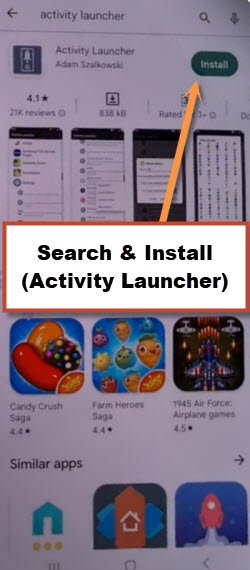
-Install (Activity Launcher) application too from same platform google play store.
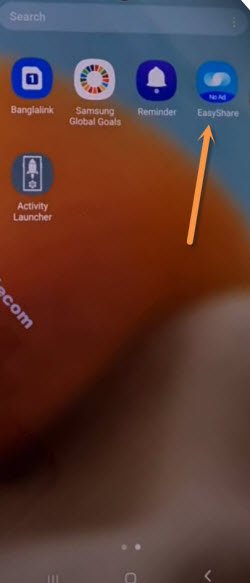
-Run “Easyshare” to start bypassing frp process.
Lets Send Activity Launcher to VIVO Y02t:
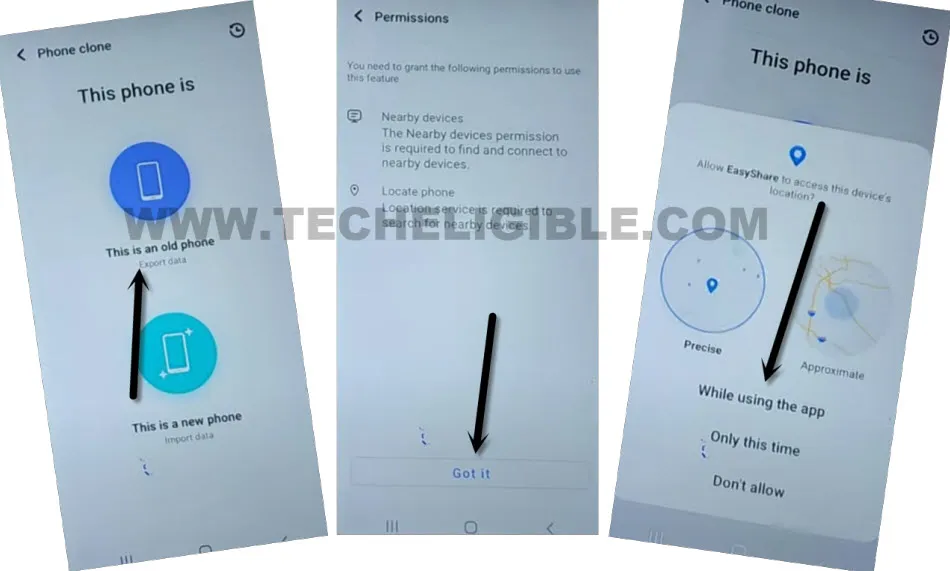
-Go to > Phone Clone > This is an old phone > Set Now.
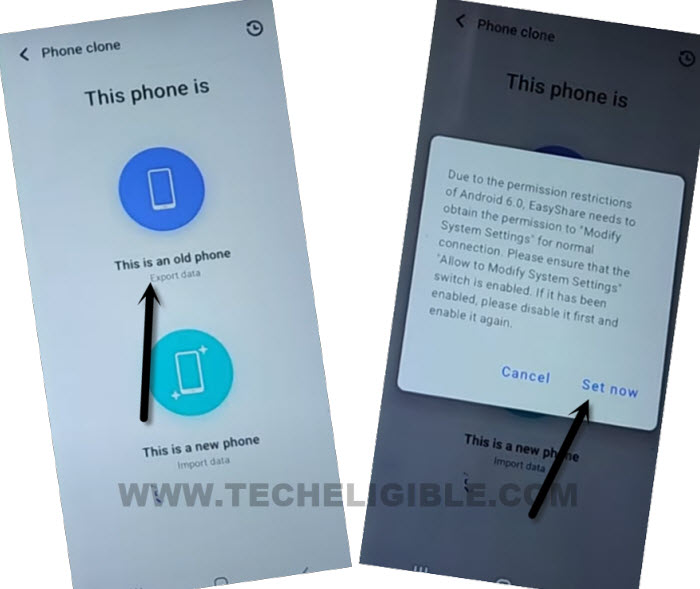
-After hitting on “Set” option, turn on some options, such as (Allow modifying system settings or Display Over Other app). If you are redirected on a (App list) screen, from there, tap and turn on (Eayshare app).
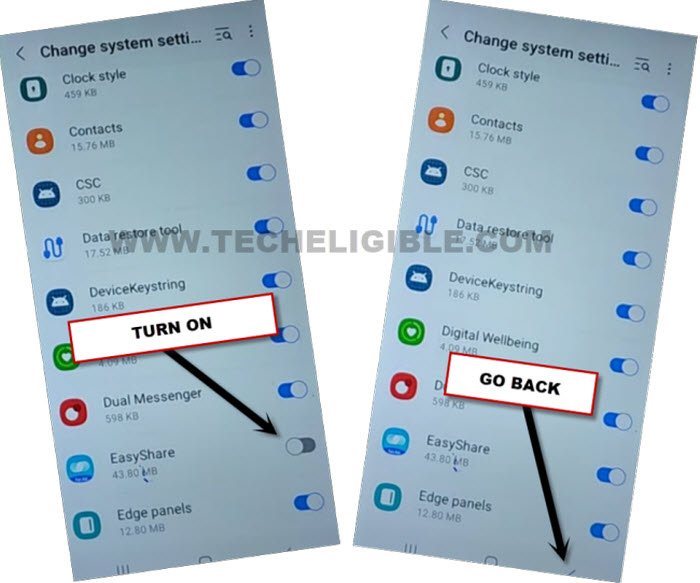
-After that, go back by tapping on “Back Arrow” from bottom. Hit again on > This is an old phone > Got it > While using the app > Allow.
-You will be displayed a (QR Code) on screen.
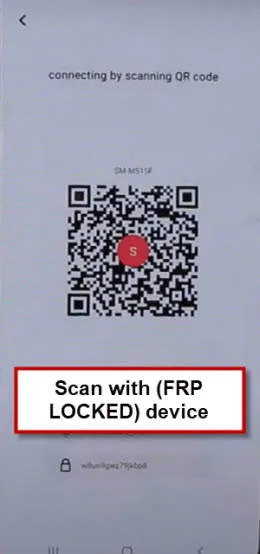
-Let’s scan code using VIVO device. After that, both device will be connected together to easily Remove Google FRP VIVO Y02t.
-Once the code is scanned successfully, from popup window in other android device, just go to “Set Now” option.
-Turn on “Easy Share”. Hit on “Got it” option.
-Afterwards, hit on “Allow” option for several times.
-You will be displayed some app list, just de-select all check marked options same as shown in below image.
-Go to only “Apps”.
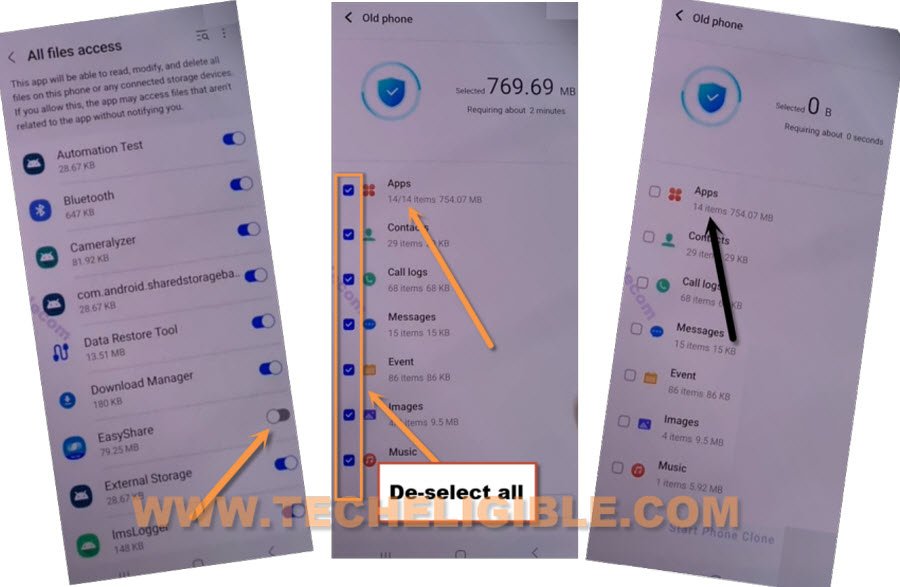
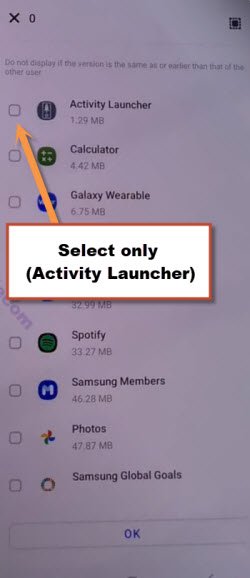
-We are gonna send (Activity Launcher) to our VIVO Y02t device. Select “Activity Launcher”. After that, tap to “Ok”.
-Tap to > Next > Start Cloning.
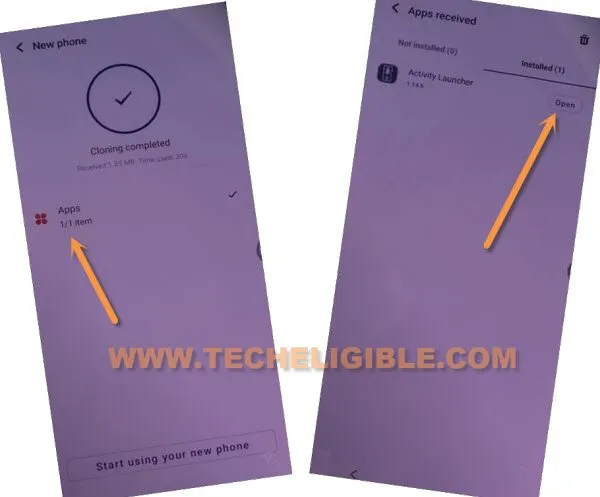
Let’s RUN Received App from VIVO Y02t:
-Go to “Clock icon” from top right corner.
![]()
-Tap on > Apps > Open > Ok. Within few seconds, the activity launcher application will be fully launched.
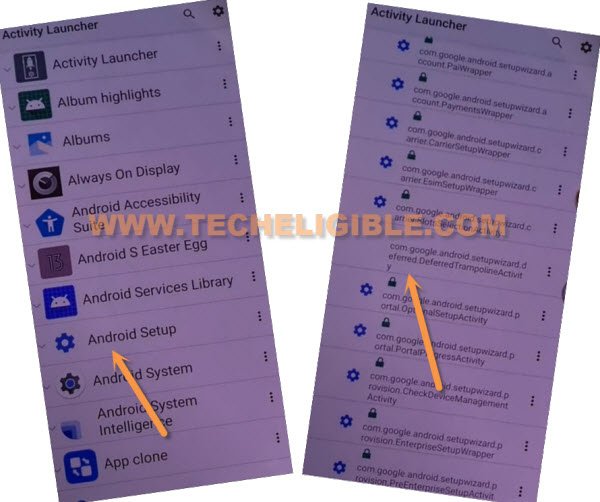
-Hit on “Android Setup”, you will see there a big list of too many android setup, just scroll down, and tap to “com.googel.android.setupwizard.deferredTramplineactivity” same as shown in below image.
-Tap to > Start > Skip > Next > Next > No Cable > Copy Without Cable.
-Hit on “Next”. Tap to “Next Keyboard” from popup window.
-Hit over “Use my google account instead”.
-Just tap to > Next > Next, you will be displayed (Verify your device) screen.

Connect through Gmail Account using Other Android Phone:
-From your other android phone, open “Google App”.
-Search and go to “Set up my device” from there. After that, hit on “Next”.
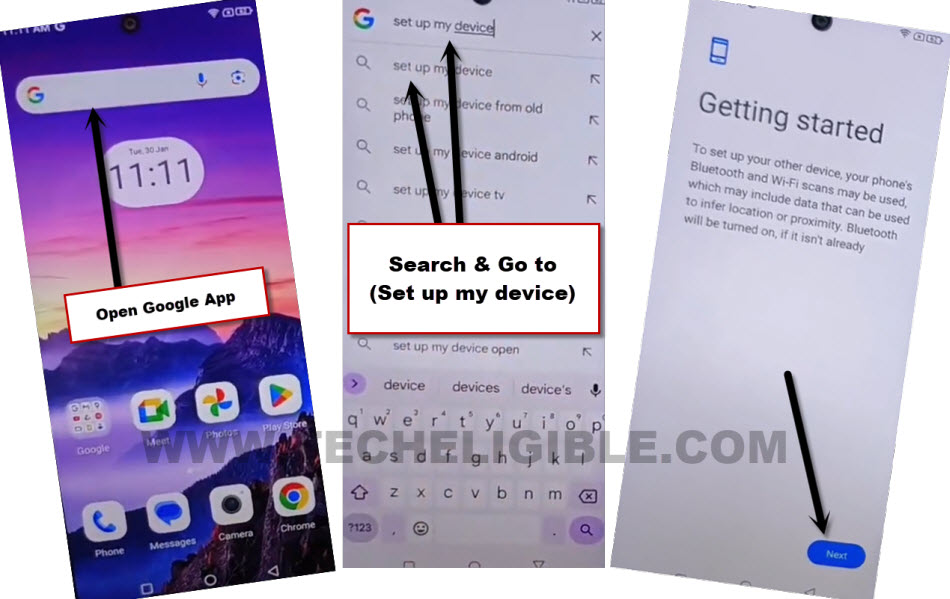
-You will see verify shape screen on both phones. Do make sure, your both device are on same WiFi connection.
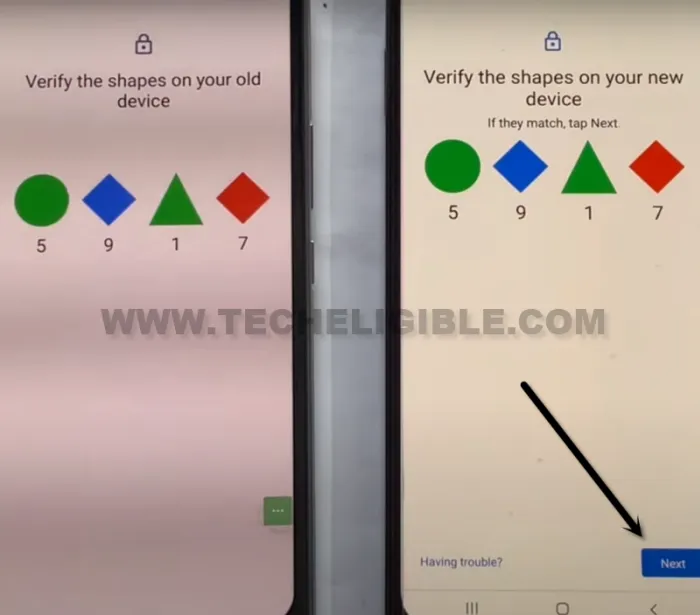
-From other android phone, hit on > Next > Copy.
-After that, you will see (Verify its you) screen on your VIVO Y02t device screen. Simply, login with the same google account, that is already logged in in your other android phone.
-Once the logging process is done, the device will start showing you (Copying your account..) screen.
-Tap to “Back Arrow” from bottom when you reach on (Connecting to your other device) loading page. After that, you will get back to (Account Added) page. That means, we have successfully setup new google account on our device to bypass frp completely.

-Tap 2 times on “Back Arrow” from bottom to reach on (Let’s copy your data) page. From there, tap to > Don’t Copy > Don’t Copy.
-Tap to “Next” from account added screen. Afterwards, you can finish up all remaining steps as per your choice. Its all done from Remove Google FRP VIVO Y02t device. Thanks for visiting us.