
Remove Google FRP HTC ONE M9 By Talkback Function
If you have a HTC phone with FRP Protection, and, you have performed a hard process on this device. After that, you have forgotten already synced Google account. That means, your device is locked. You won’t be consider as a device owner until you sign in again with already added google account. To get back this phone, follow up our guideline to Remove Google FRP HTC ONE M9 with the help of talkback function.
Disclaimer: We highly recommend you to apply this method only on your own device, if you are not owner of this device, or you found this from some where, you must return to its real owner.
Let’s Start to Remove Google FRP HTC ONE M9:
-Switch on HTC device & Connect WiFi first. After that, go all the way back to first HTC (Welcome) page.
-Long hold on screen with two fingers together. Keep holding until you see (Talkback) page. After that, double tap on “Use Talkback” option.

-Double tap on > Next > Next > Next > Next > Finish.

-Make “L” shape on screen by swipe down and swipe right. after that, double tap on “Talkback Settings”.
-Scroll down using two fingers, and go to “Privacy Policy”.

-Go on > Accept & Continue > No Thanks. You will be inside google chrome browser.
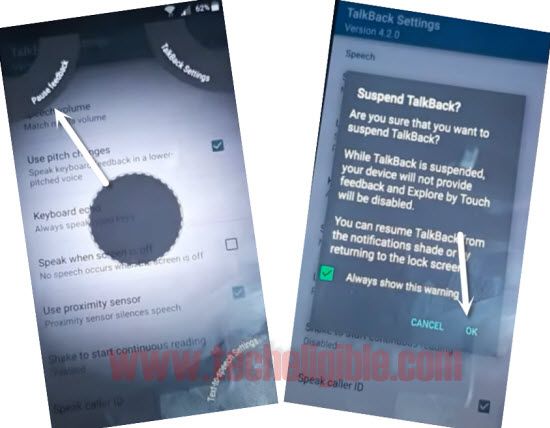
-Let’s switch off talkback now just by making “L” shape again on screen by swipe down and swipe right. After double hit on “Pause Feedback” option from top left corner of the screen.
-Tap two times on “Ok” from popup window. Afterwards, the talkback function will be switched off.
-We are gonna download some free applications on this phone to Remove Google FRP HTC ONE M9.
Download FRP Apps on HTC Device:
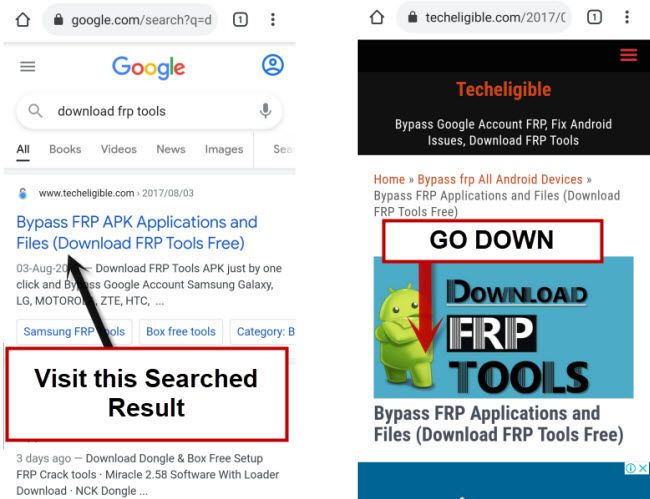
-Search in address bar “Download FRP Tools“.
-Go to 1st searched result of our website page. You will be on FRP Tools page.
-Scroll down, and download below 2 apps.
1st app: Google Account Manager 6.
2nd App: Account Login.
-After downloading both apps successfully, just go to top of the page, from there, tap on a option “Access Google Search Box”.
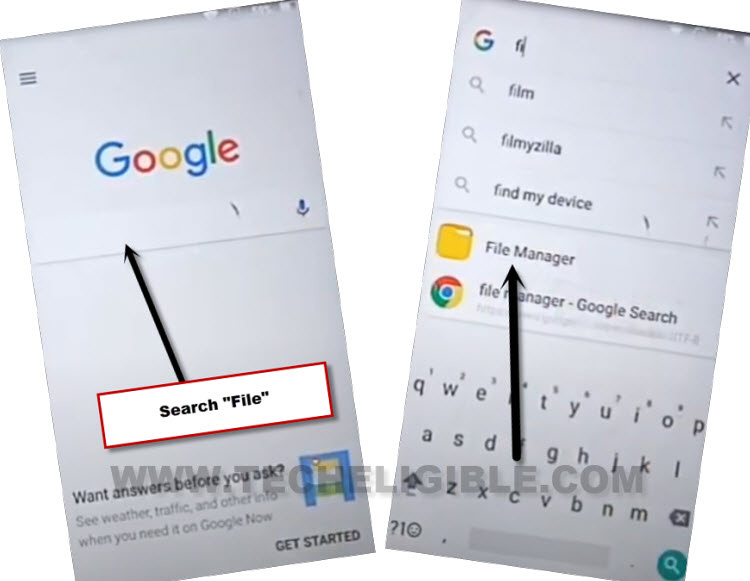
-Tap to “No Thanks” from google app screen. After that, search there “File”, and go to “File Manager”.
-Go to “Download” folder, where you will be able to see your both downloaded app.
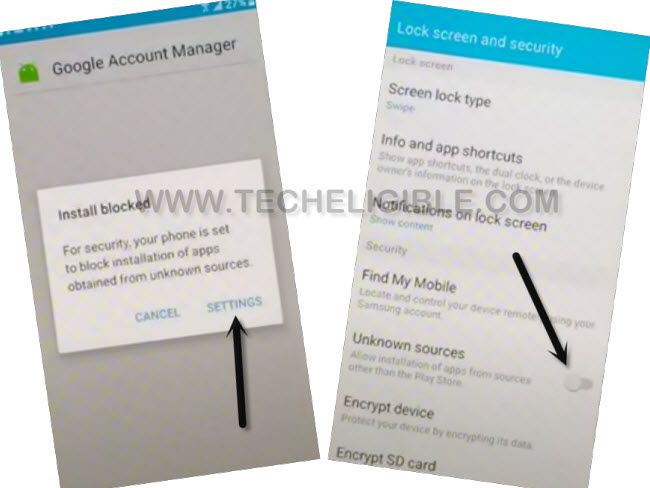
-Lets tap to “Google Account Manager 6” to start installation process. From popup window, go to “Settings”, and enable “Unknown Sources” option from there. Tap to “Ok” from popup window.
-After enabling unknown sources, just tap once on “Back Arrow” from bottom to go back to download folder. Tap again over > Google Account Manager > Install > Accept > Done.
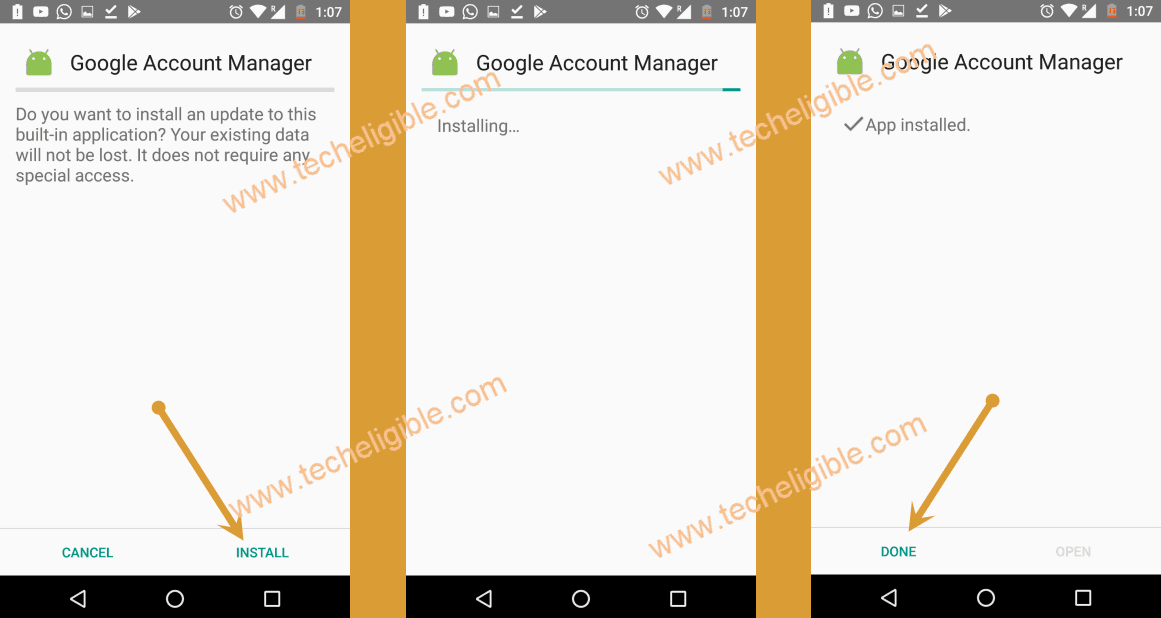
-Let’s install second app by tapping on > Account Login > Install > Open.
-Tap to “3 dots” icon from top corner, and go to “Browser Sign in” option.
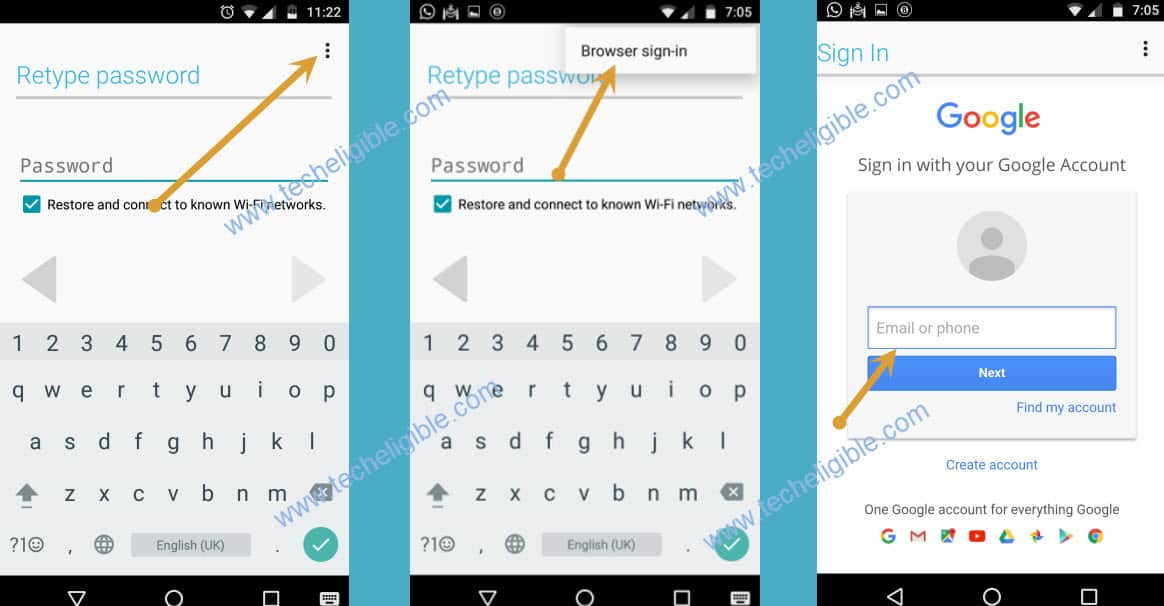
-Sign in with your any Gmail account. After that, you will be able to complete setup wizard easily without stuck on google verification page.