
Bypass Google FRP TCL 10 SE Android 11 By Capturing Image
We fix FRP issue from our device just by using a PIN locked SIM card and google map application. Follow up our easy to understand guideline from below to Bypass Google FRP TCL 10 SE (Android 11) without using any paid services. After that, you will be able to complete setup wizard easily without facing any google verification screen.
Warning: Do not try this frp method on a stolen phone, this is a serious crime, if you are trying to bypass frp on a stolen phone, you may also be jailed, this process is for device owner and for educational purpose only.
Let’s Start to Bypass Google FRP TCL 10 SE:
-Prepare any working PIN locked SIM card using other android device.
-Turn on & Connect WIFI on TCL 10 Se device. After that, go all the way back to first page (Hi there).
-Insert PIN locked Sim card, there you will have a (Enter SIM PIN) screen.
-Keep your finger finger nearby (POWER OFF) button. After that, insert “Sim removal PIN” on sim tray hole. But, do not press this right now.
-After that, at the same time, press “SIM Removal PIN” & quickly press “Power Button”.
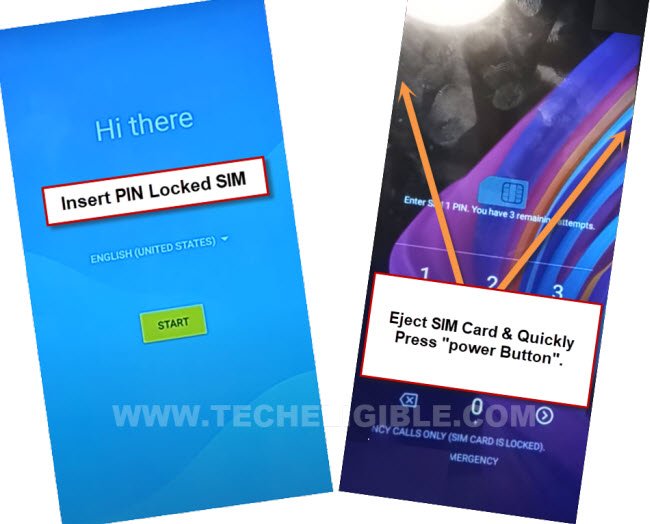
-After that, press “Power” key again to wake up the screen, and there you must see (Lock Screen) same as shown in below image.
Note: If you don’t get (Lock Screen), and you are seeing (Hi there) page again, that means, you failed in your attempt, try again as much as possible.
-Swipe “Camera” icon from right corner to left side. After that, the camera app will be launched for you. Capture any random image and go to your captured image by tapping at circle image.

-Tap to “Allow” from popup window, after that, you will be displayed your captured image. Tap on image, and go to “Share” option.
-Tap to “Google Map” icon from sharing popup window.
-Tap to > Skip > Allow > Cancel.

-You will be taken to your captured image gallery page. Simply, tap to “Back Arrow” from bottom, and hit on “Yes” from popup windwo to get back to (Google Map) app.

-Tap to “Next Arrow” icon from google map.
-Give any location in Google Map and tap to “Start” button to start driving (See below image).
-Go to “Mic” icon from top corner, speak there loudly “Open Youtube”.

-You will be taken inside youtube website, just tap to > Profile icon > Settings > History & Privacy > Youtube terms of service.
![]()
-Tap to > Accept & Continue > No Thanks.
Let’s Reach to device Settings:
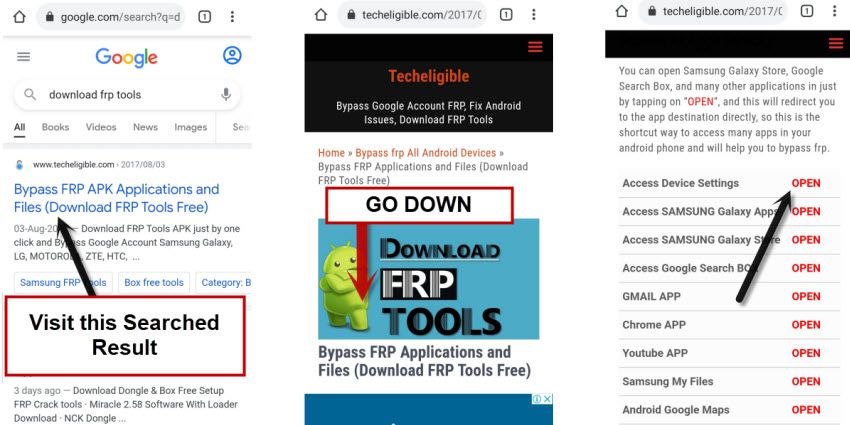
-Search in top search bar of the browser with “Download FRP Tools“. Go to our website 1st searched result same shown in below screen shot.
-Scroll down from frp tools page and go to “Access Device Settings” option to Bypass Google FRP TCL 10 SE.
-From settings page, just go to down and tap to > Accessibility > Accessibility MENU. Turn on “Accessibility Menu Shortcut” feature from there.
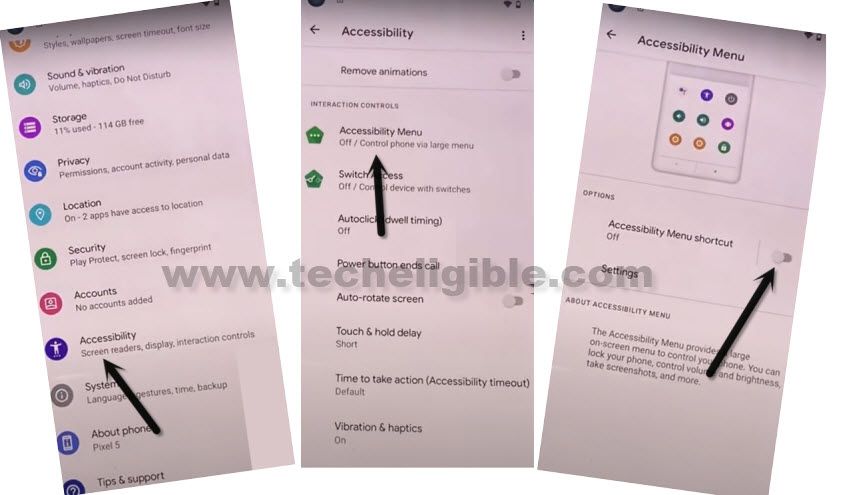
-Tap to > Allow > Got it. After that, you will start having a small “Human” icon at the bottom edge of the screen. That means, we have enabled accessibility feature successfully.
Disable Some Apps from App info page:
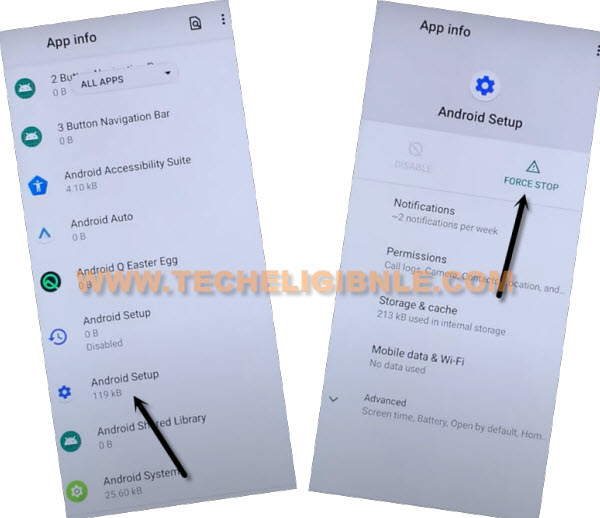
-Tap to “3 dots” from top corner and select “Show System”.
![]()
-Afterwards, we have to force stop settings icon (Android Setup), so tap over > Android Setup > Force Stop > Ok.
-Go back to (App info) page by hitting back arrow from bottom. From there, tap to > Android Auto > Disable > Disable App.
![]()
-Go back to app info page again. From there, find and tap over > Carrier Services > Force Stop > Ok.
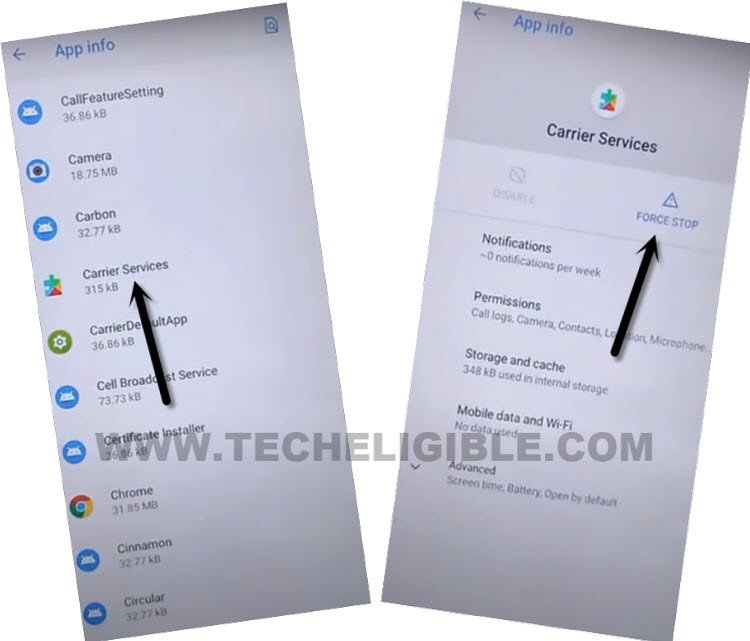
-This is the final and most important to disable for successfully Bypass Google FRP TCL 10 SE.
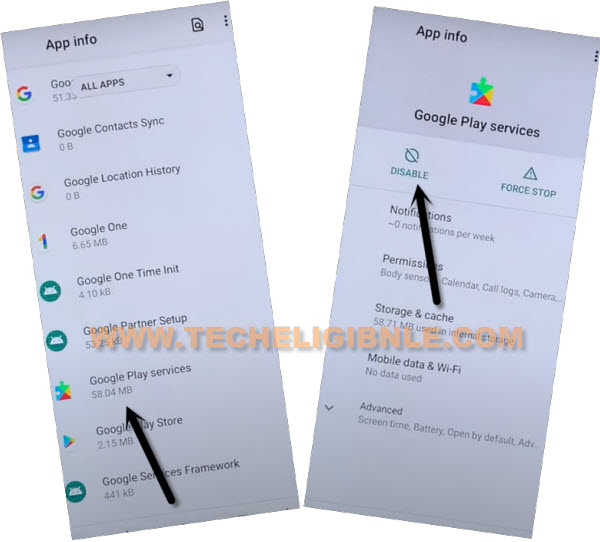
-Find & Tap to > Google Play Services > Disable > Disable App.
-Restart your device now. After that, from first startup page, just tap to > Start > Skip.
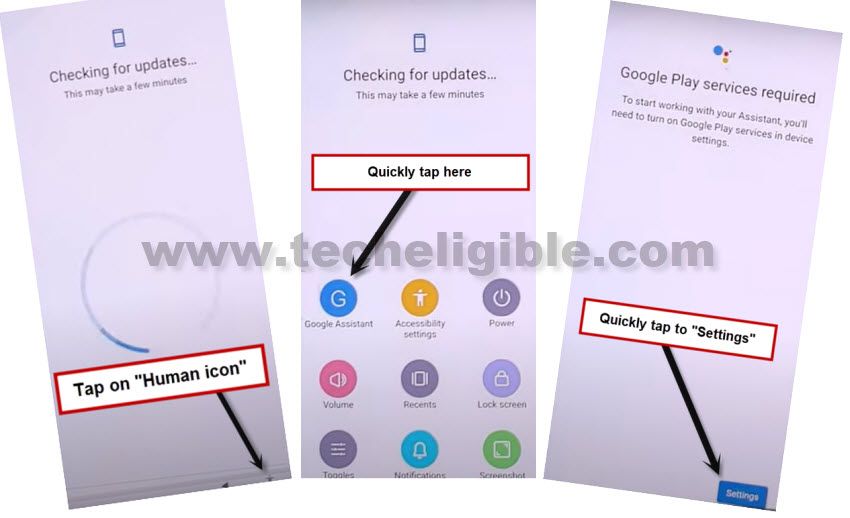
-Wait on (Just a sec) loading page, once the message turns to (Checking for update…). Here, we have to use (Accessibility feature).
| Do this very fast: Tap to > Human icon > Assistant > Settings. Note: You may not get (Settings) option easily at first few attempt, but keep tapping at (Human icon > Assistant) until you see (Settings) and hit on that option successfully. |
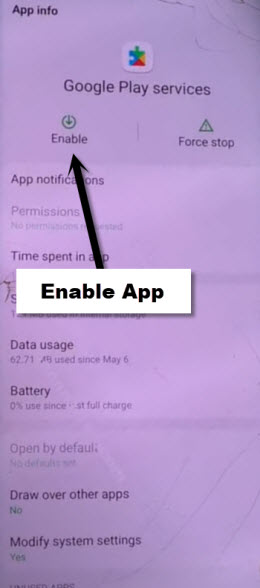
-Let’s enable google play services app by tapping over “Enable” button from there.
-After enabling above app, just go back to (Checking for update…) page by hitting back arrow 1-2 times. Wait on that loading page to be finished.
-After that, you can easily complete all setup wizard steps on your own without stuck on google verification page. After that accessing your device main home-screen, don’t forget to setup new google account and new security lock protection to avoid future lock. Thanks for visiting us.