Remove FRP Account Oukitel C8 Without Talkback [Updated]
We will use talkback and apex launcher application to gain access to this frp protected Oukitel phone. If you have done hard reset your device and can’t get yourself verified by Gmail account. Don’t worry, we will assist you to get back this device just through Remove FRP Account Oukitel C8 without a PC.
Warning: This method is only for a real device owner, who has lost his/her Gmail account after hard reset. If you are unknown to this phone & trying to gain access, you will be jailed once the device is traced. This is a serious crime & Sin. You must return this phone to its real owner.
Let’s Start to Remove FRP Account Oukitel C8:
-We will use SD Card to successfully bypass frp account from this phone. Simply download 2 frp apps in your SD card using any other android device.
⇒ Apex Launcher 3.3.3 [DOWNLOAD]
⇒ Google Play Services [DOWNLOAD]
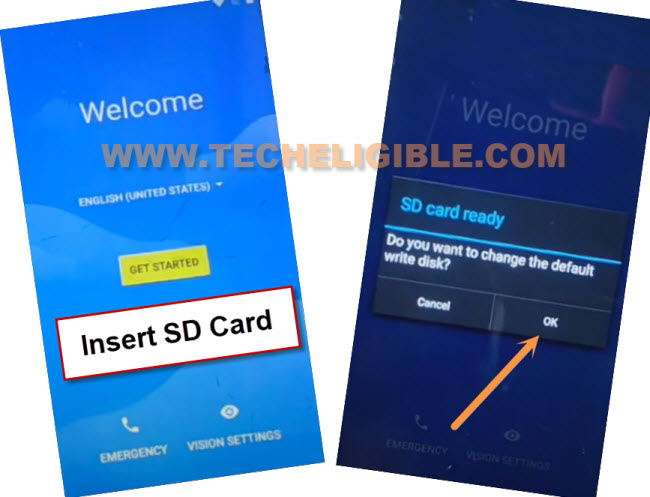
-Firstly, connect WiFi to Oukitel C8 phone. After that, go back to first (Welcome) page.
-Insert SD card and tap on “Ok”.
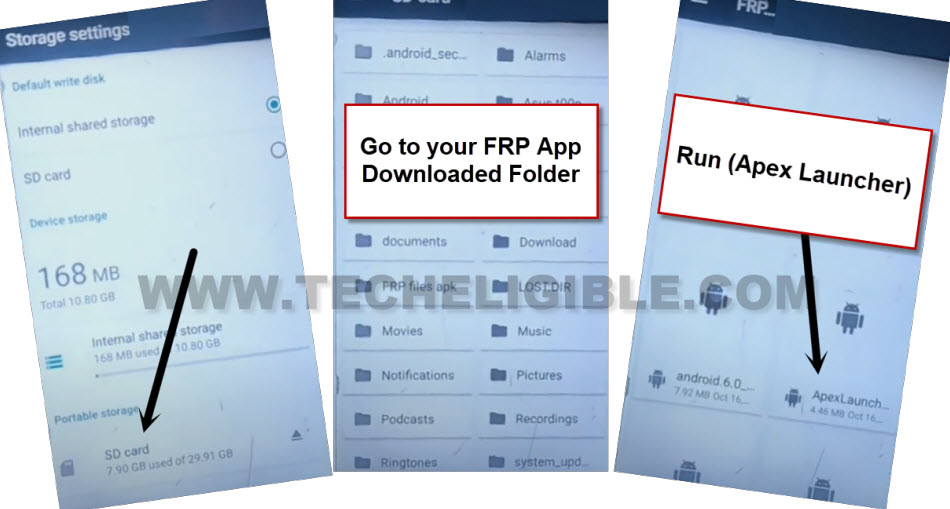
-You are now inside your device (Storage Settings). From there, tap over “SD Card”.
-Go to the folder where you saved your both downloaded frp apps. After that, tap to “Apex Launcher” app from there.
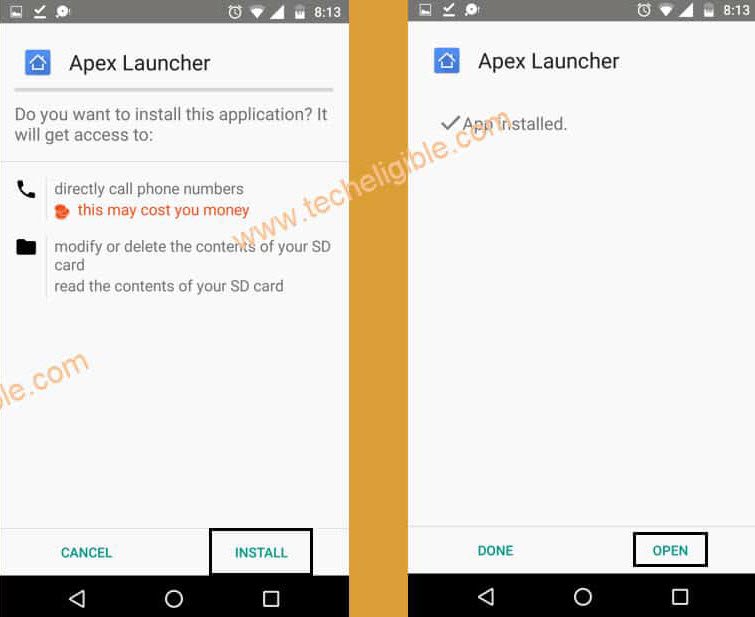
-After hitting on that app, you will be shown a popup window, just hit over “Settings” and turn on option “Unknown sources”.
-Go back and tap to > Apex launcher > Install > Open.
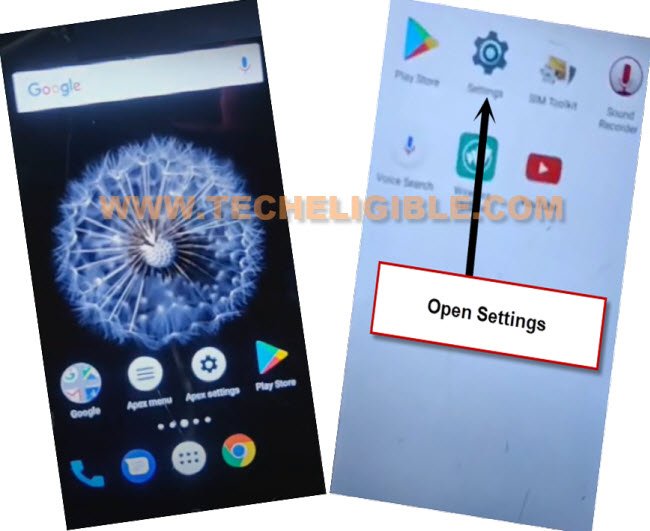
-After hitting on “Open” option, you will be redirected to your device main home-screen using apex launcher application. From there, go to device menu, and tap to “Settings” icon.
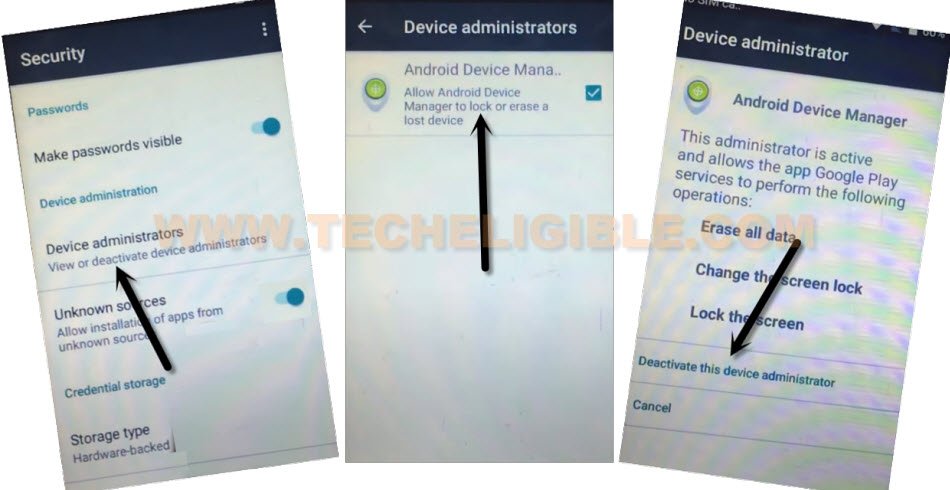
-We have to deactivate device administrator first. For that, just hit on > Security > Device administrator > Android device manager.
-Tap on “Deactivate this device administrator”.
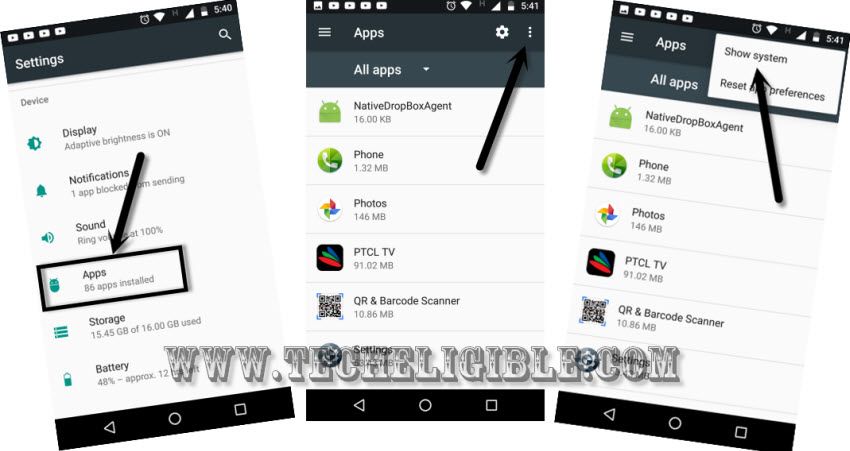
-We have to go back to (Settings) page again, from there, tap to “Apps”.
-You are now inside app list page. Just hit over “3 dots” icon from top corner. Afterwards, hit on “Show system”.
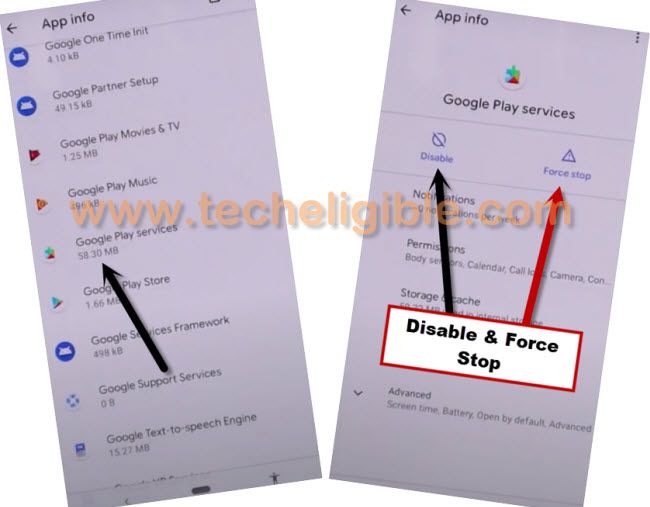
-From app list page, find and tap to “Google Play Services”.
-Force stop and disable this app same as shown in below image.
-We have to install our final app from SD card. For that, just go back to main (Settings) page by hitting back arrow icon from bottom. From there, tap to > Storage > SD Card.
Let’s Setup new Account:
-Tap to > Google Play Services > Next > Install > Done.
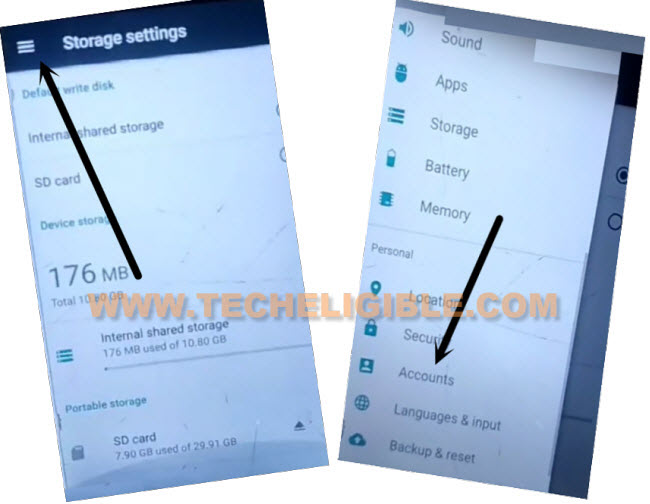
-After installing last app, tap to 1-2 times on back arrow icon to go back to (Storage Settings) page.
-Tap to “3 parallel” line from top left corner. After that, scroll down and tap to “Accounts” option.
-Hit on > Add account > Google.
-You will be displayed google sign in page. Just enter any valid Gmail account to login with and Remove FRP Account Oukitel C8.
Enable Again Google Play Services App:
-Once the login process is done. We are going to back to app list page to enable back google play services application.
-Go back to > Settings > Apps.
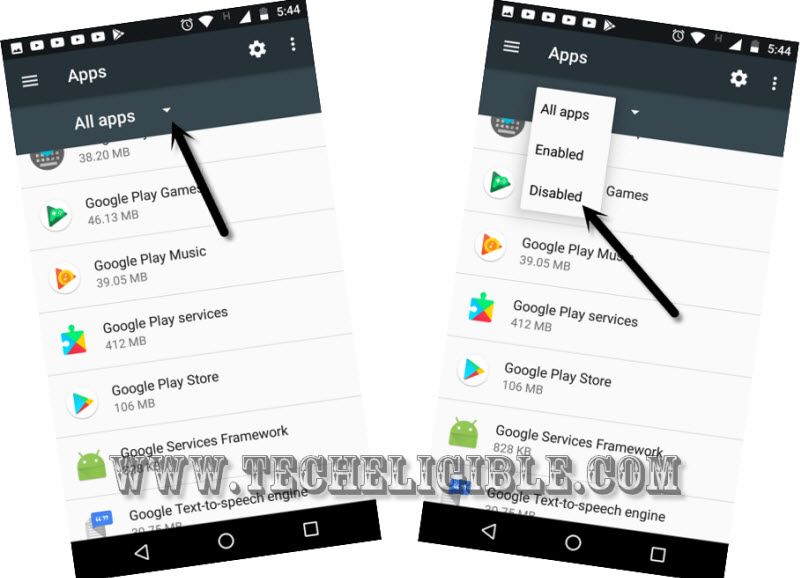
-Hit on down arrow “All Apps” option, and tap to “Disabled”.
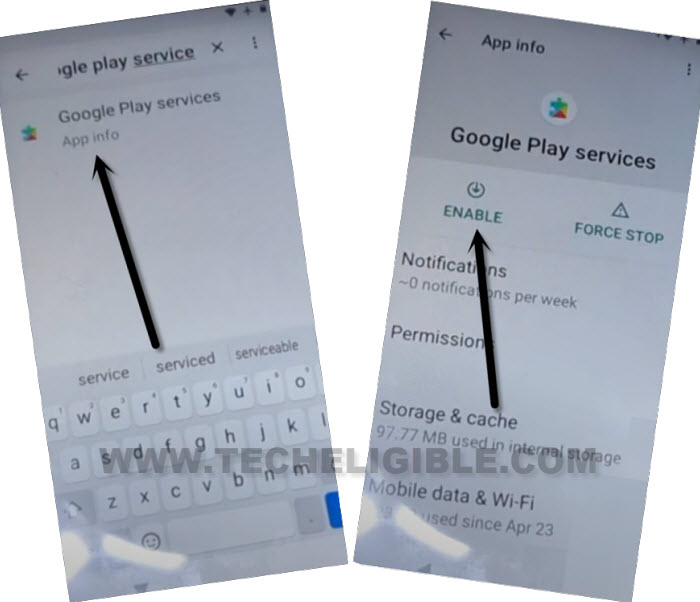
-From there, tap to “Google Play Services” application. After that, tap to “Enable” option to enable this app.
-Congrats, you’re all done now from bypassing frp account. Just restart your Oukitel C8 device and finish up setup wizard easily without facing google verification page. Thanks for visiting us.

