
Remove FRP Account Oukitel U20 Plus Android 7 By SD Card
We will use SD Card in this process to get back your Oukitel phone just through installing (Apex Launcher) application. After that, you can easily access to your device main homescreen and sign in with your latest Gmail account to Remove FRP Account Oukitel U20 Plus (Android 7) without using any PC. Steps are very easy and can be followed on by anyone to fixup this problem.
Warning: This method is only for a real device owner, who has lost his/her Gmail account after hard reset. If you are unknown to this phone & trying to gain access, you will be jailed once the device is traced. This is a serious crime & Sin. You must return this phone to its real owner.
Let’s Start to Remove FRP Account Oukitel U20 Plus:
-Before starting this process, we are going to prepare a SD card, that has some essential frp apps downloaded in it already.
-First of all, download below applications in your SD card using any other android phone. Open this same post link in other android device chrome browser. After that download below 2 apps.
⇒ Apex Launcher 3.3.3 [DOWNLOAD]
⇒ Google Play Services [DOWNLOAD]
-Turn on your device & Connect WiFi first.
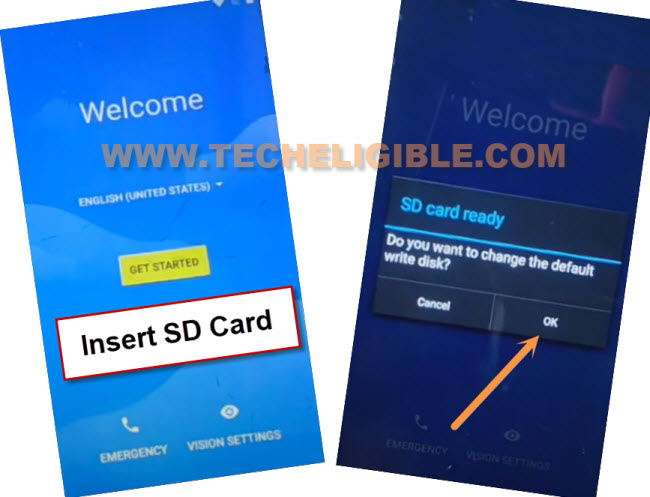
-Go back to main first (Welcome) screen. Insert SD in your Oukitel U20 plus device.
-Let’s FRP App Downloaded SD Card into your device, you will see popup window of (SD card ready), just hit on “Ok” option.
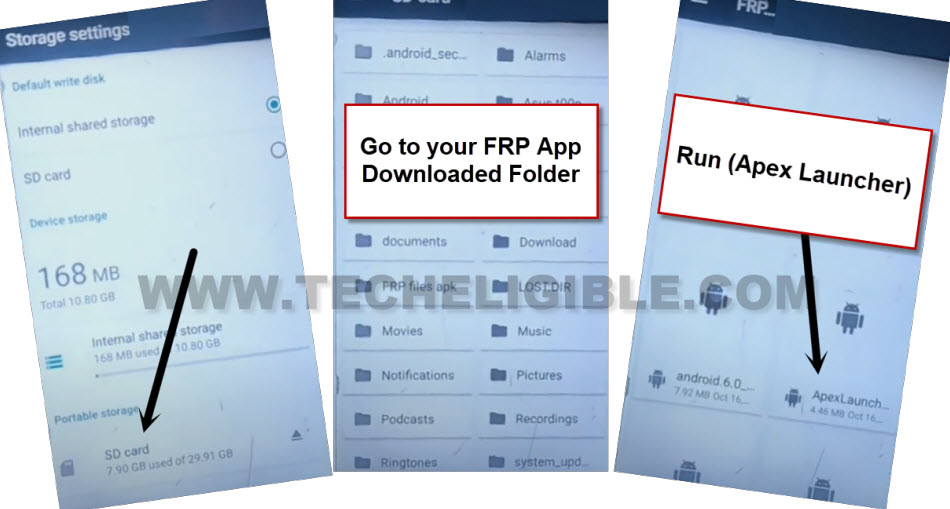
-Tap to “SD Card” from there.
-After that, go to your folder, in which, you have your already downloaded frp apps.
-Tap on “Apex Launcher” app from there. After that, you will have a popup window, just hit on “Settings” and allow “Unknown Sources” option from there.
-Go back to your SD card by hitting back arrow from bottom.
-Tap again on > Apex launcher > Install > Open.
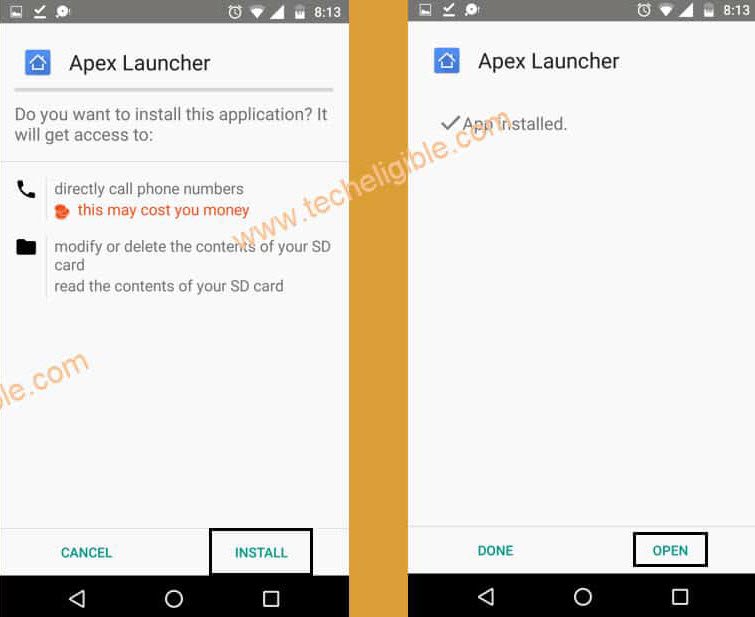
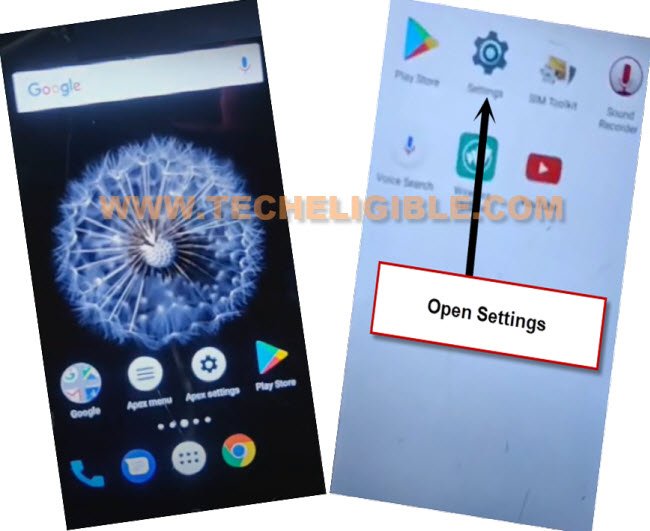
-After that, you will be taken inside your device main home-screen.
-Go to your device main “Settings” page.
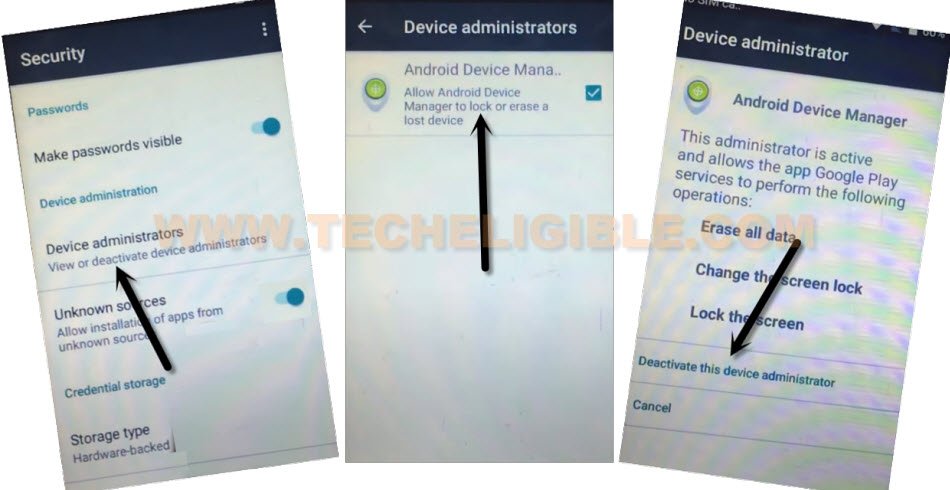
-After that, hit on > Security > Device administrator > Android device manager.
-Tap on “Deactivate this device administrator”. We have successfully deactivated this option for now.
-Let’s go back to your device “Settings”.
-After that, tap to > Apps > 3 dots > Show System.
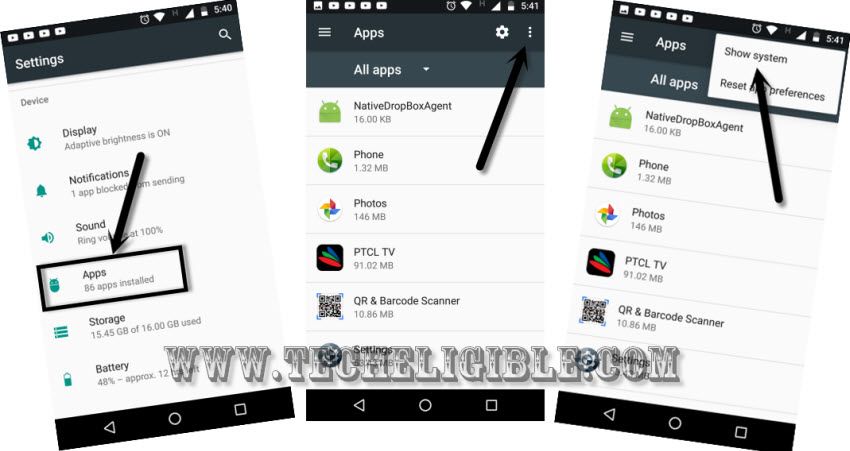
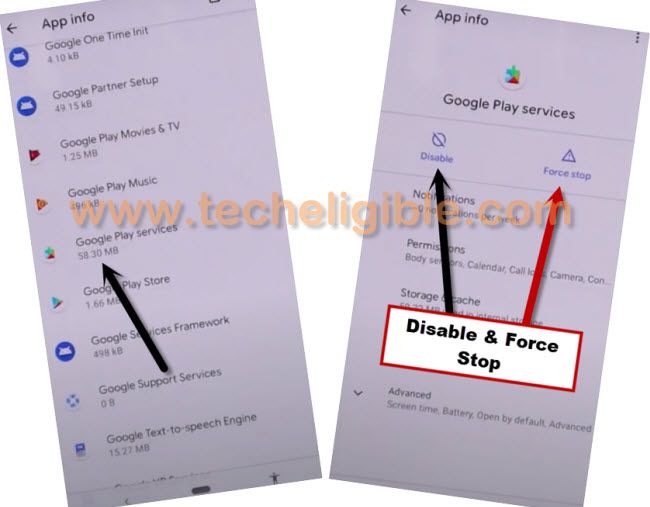
-After that, from app list page, find out and tap to “Google Play Services” application.
-Force stop and disable this app same as shown in below image.
-After doing these all, just go back to main “Settings” page by hitting back arrow icon from bottom.
-Access back to SD card by hitting on > Storage > SD Card.
-Install final app “Google Play Services” application from your SD card.
-Tap to > Google Play Services > Next > Install > Done.
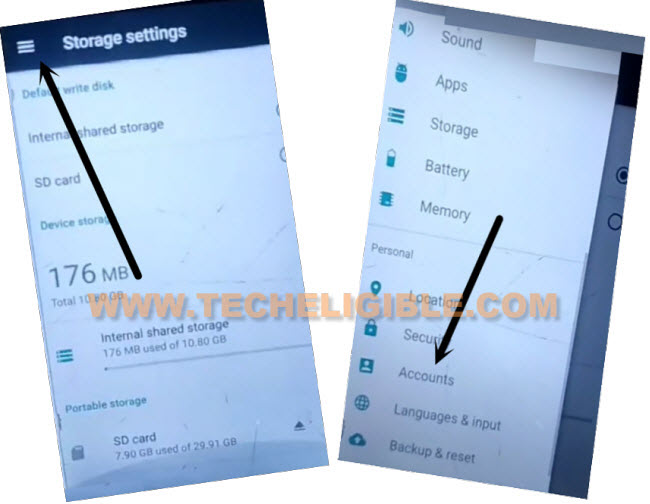
-After that, tap to 1-2 times on back arrow icon to reach back to (Storage Settings) page. From there, hit over “Menu icon” from top left corner and go to “Accounts” from there.
-Hit on > Add account > Google.
-Let’s sign in with your any valid and active Gmail account to Remove FRP Account Oukitel U20 Plus.
-After signing in process is completed. Just go all the way back to main “Settings” page of your device. From there, tap to “Apps”.
-Hit on down arrow “All Apps” option, and tap to “Disabled”.
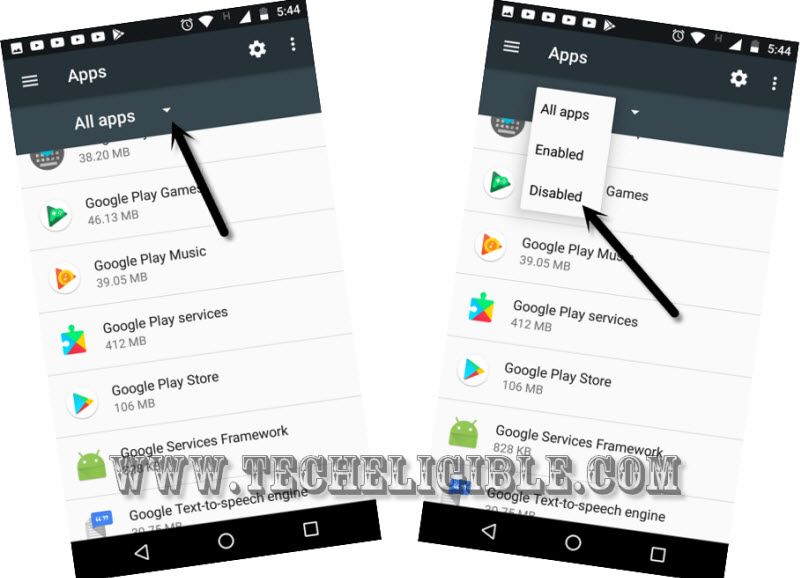
-You will be displayed all disabled apps there, just tap to > Google Play Services > Enable.

-Its all done now, lets restart your device.
-After that, you can easily complete setup wizard steps without stuck on google verification page. The new google account has been signed in on this phone. Thanks for visiting us.