2 Ways to Remove FRP Moto G4 Plus to Setup New Account
You have 2 methods here to get back your Moto device with updated Gmail account without using any paid tool. If you are unable to recover your previously added google account and you are a legitimate owner of this phone. So, you can follow up methods from here to Remove FRP Moto G4 Plus.
Remember: Do not try this frp method on a stolen phone. This is a serious crime, if you are trying to bypass frp on a stolen phone. You may also be jailed, because this process is for device owner and for educational purpose only. Just to assist device owner, how they can recover back their phone and setup new account.
| Method 1: Bypass FRP MOTO G4 Plus [By PC Tool] |
| Method 2: Bypass FRP Moto G4 Plus [By ES File Explorer] |
Method 1: Remove FRP Moto G4 Plus By PC Tool
-First of download Moto FRP Tools from below link.
⇒ Moto G4 PLUS FRP Tool [DOWNLOAD]
-Once downloading is done, extract downloaded file.
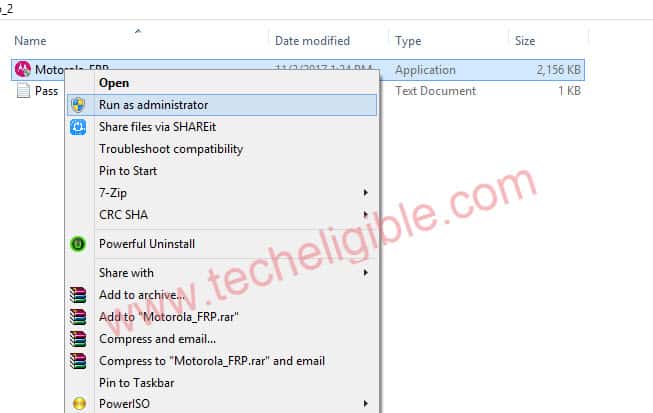
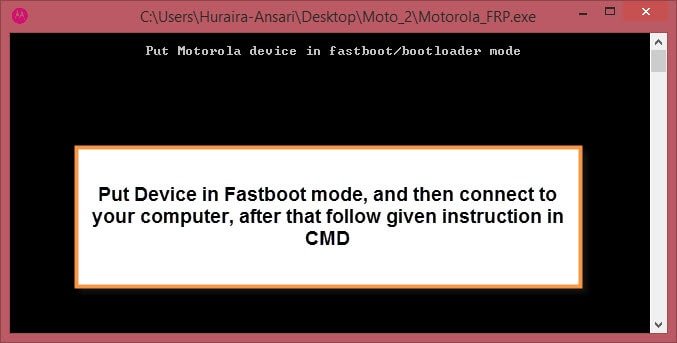
-Go to extracted folder, and then open “Motoroloa_FRP” as administrator.
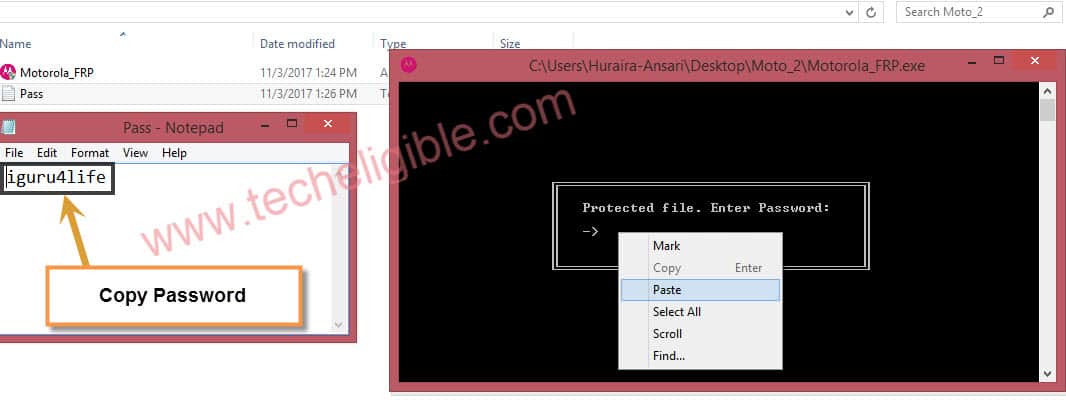
-Open “PASS.TXT” file, and copy password.
-Paste “Password” in “Motorola FRP Command Prompt” window, and then press “ENTER” key.
Reboot Moto G4 Plus to Recovery Mode:
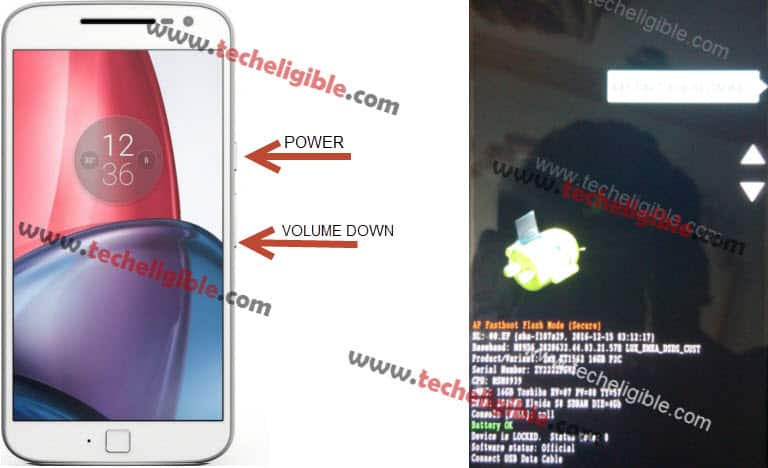
To successfully Moto G4 PLUS FRP Bypass, you have to enter in “Recovery Mode” from your Moto G4 Plus device, and then connect to computer. Follow below step-2 to understand in detail.
-Press & Hold “Power + Volume Key” together until you see “Recovery Mode” window.
-Connect Moto G4 Plus to computer / laptop via micro usb cable.
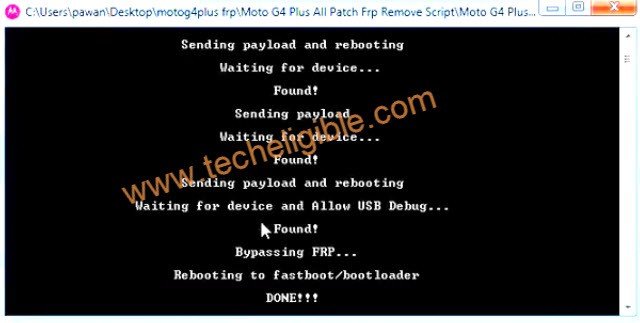
-Once you successfully connected to computer, then you will start getting messages in cmd window like:
♦ Waiting for device…
♦ found!
♦ sending payload…
Note: You have to allow “USB Debugging” when you get usb debugging screen on your device to continue frp bypass process.
-At last, you will get message in cmd “DONE!!!”. That means you have successfully bypassed google account from Moto G4 Plus.
Summary:
• Download “MOTO FRP Tool”
• Extract file, and open folder.
• Run “Motorola_FRP” exe file as administrator.
• Open “PASS” txt file and copy password, and then past into “Command Prompt” window.
• Reboot “MOTO G4 PLUS” device into recovery mode.
• Take Micro USB Cable, and connect to moto g device to computer.
• Enable “USB Debugging” and wait until you get message in cmd of “DONE!!!”.
Method 2: Remove FRP Moto G4 Plus Without PC
-Let’s switch on your moto phone and connect WiFi.
-Go to (Verifying your account) screen. After that, hit on “Back Arrow” icon from bottom to go back to (Select WiFi network) screen.
-From there, tap on “Add another network”.
-Type any text in (Enter the SSID) field tab, and long tap on your typed text.
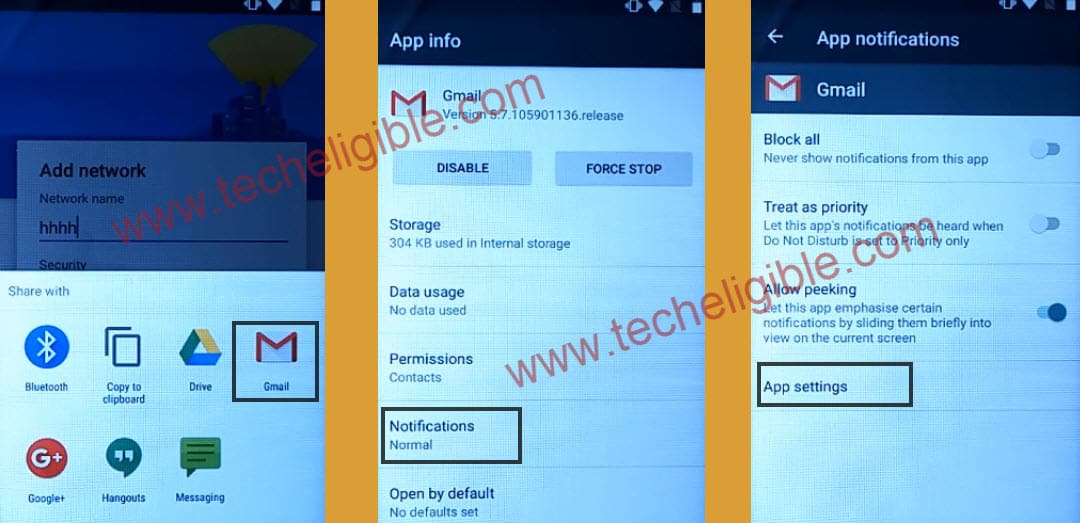
-Tap to “Share” option and long hold on “Gmail” icon.
-Let’s tap to > Notification > App Settings.
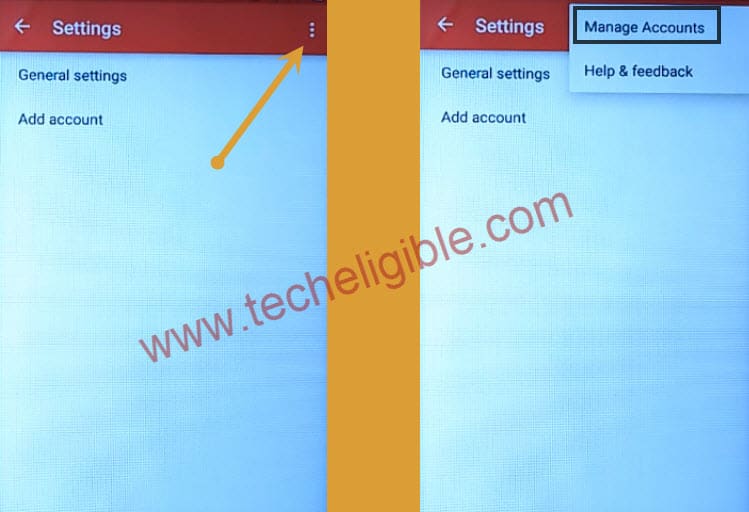
-We will be inside Gmail app settings page, from there, hit over a > 3 dots > Manage Accounts.
Let’s Launch Chrome Browser:
-You are inside your device main settings page, from there, hit on > Apps > Google App > Notifications > App Settings.
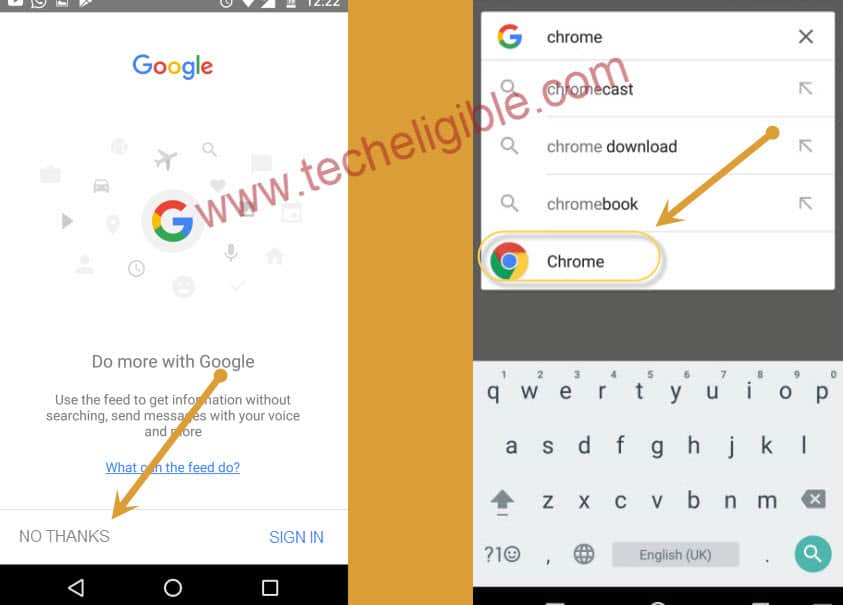
-From google screen, hit on “No Thanks” option from bottom. After that, make search and tap on “Chrome browser” icon.
-After that, Tap on “Accept & Continue” and then “No Thanks”.
-Search in browser “Bypass FRP Moto G4 Plus Techeligible”. Visit 1st searched result, that belongs to our site. After that, you will open up this same article in your frp protected device.
Download Moto FRP Apps:
-Scroll down and download below apps in your Moto G4 Plus device.
| ⇒ Es File Explorer [DOWNLOAD] ⇒ Nfc Tool [DOWNLOAD] ⇒ Provisioner [DOWNLOAD] ⇒ Bypass Moto [DOWNLOAD] |
-Wait until downloading process is done, after that, you must have a notification at the bottom of your device screen. From there, tap on “Open” link to access download folder.
Install Apps in Moto Device:
-We will be able to see all downloaded apps in download folder. Let’s install apps to Remove FRP Moto G4 Plus.
-Tap on “ES FILE EXPLORER” > Install > Open.
-You will be inside (File Explorer) application, let’s swipe to left side and go to “Download” folder.
-You will see again all downloaded apps there in download folder. We’re gonna install all apps one by one.
-Tap on “Provisioner App” to start installation process.
-Tap to > Install > Install > Done.
-Tap on > NFC TOOL > Install > Install > Done
-Now install the last 4th one app (Bypass Moto) by tapping on > Bypass MOTO > Install > Install > OPEN.
-After that, select “Setup Device Owner” option and tap to > SET UP > ENCRYPT > ENCRYPT PHONE.
| Is your (ENCRYPT PHONE) Option is not highlighted? -This is because of your device is not charge more than 80%. Put your device on charging. -Switch off your moto device, and let your moto device to charge till 80% charging or full 100%. -Once the charging is full, simply, switch on moto phone. -Tap to “Next Arrow” icon, after that, choose (English) language from language list page. Tap to “Next” from bottom right option. -After that, tap on “Encrypt” option. -Put your device on charging, after that, “Encrypt Phone” option will be highlighted. |
-Wait until (Encrypting…) process is done, after that, your device will auto restart.
-Tap to “Next arrow” icon. Select (English) language, and tap to “Next”.
-Wait on (Checking connection…) page. After that, tap to > Set up > Ok.
-You will have a popup screen of (Not signed in), just tap to “Set up Phone” option.
-Tap 2-3 times on (Set up phone) option, if this window do not disappear, just restart your device.
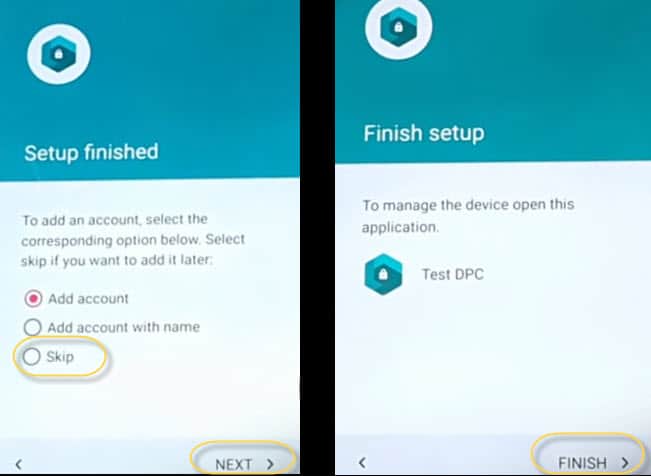
-After restarting is done, you will have a (Lock Screen) there. Simply, swipe up that lock screen, after that, choose “Skip” option and tap to “Next”.
-Finally, tap on > Finish > Got it.
Soft Reset Moto G4 Plus:
-To completely Remove FRP Moto G4 Plus, we are gonna factory reset this phone from settings.
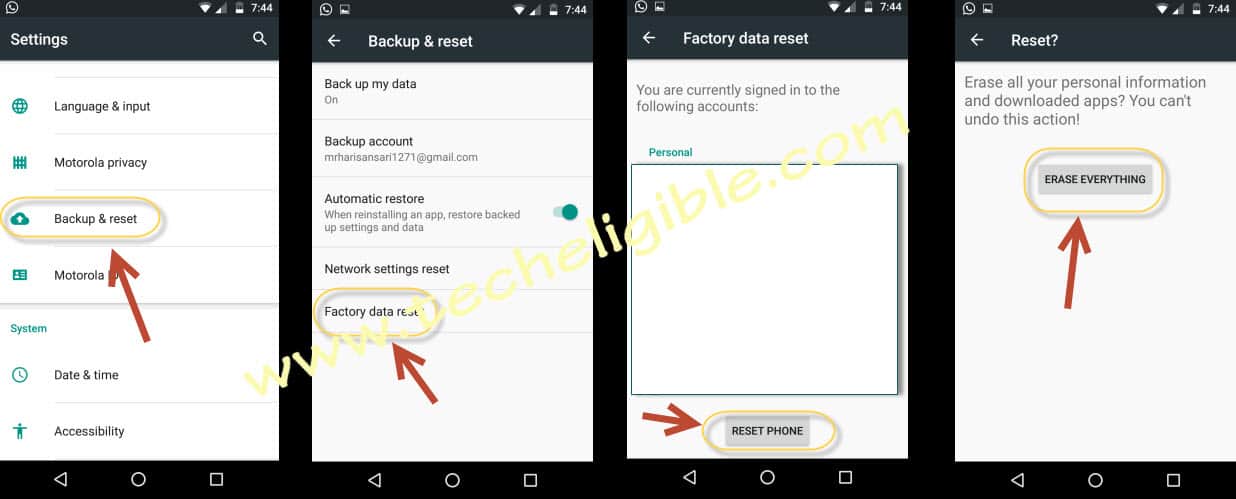
-Open up device “Settings”. Tap on “Backup and Reset”, select from there “Factory Data Reset” and then “RESET PHONE”.
-Tap on “ERASE EVERYTHING” option.
-After that, you will be able to complete start up steps on your own. Forgotten google account has been removed from this phone.
