Bypass FRP Tecno POP 3 By Using SIM Contacts Method
You can access back to your tecno device main home-screen even after forgetting currently logged in Gmail account. We will access sim contact list through (Emergency Calling) option. After that, we can open up (Phoenix Browser) in this phone to successfully Bypass FRP Tecno POP 3 without using any paid services.
Remember: Do not try this frp method on a stolen phone. This is a serious crime, if you are trying to bypass frp on a stolen phone. You may also be jailed, because this process is for legitimate device owner and for educational purpose only.
Let’s Start to Bypass FRP Tecno POP 3:
-Before starting all frp bypass steps, do make sure, your device has sim card inserted with some contacts saved already.
-We are gonna turn on and connect WiFi first to our tecno pop 3 phone.
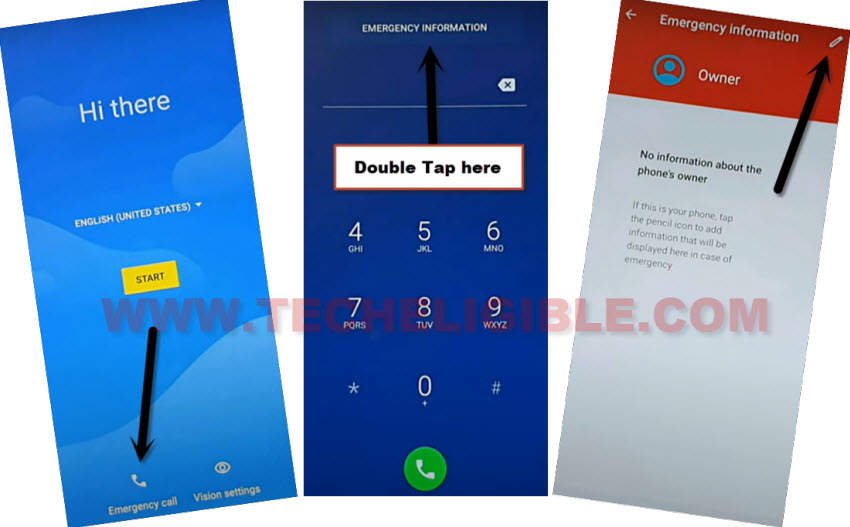
-After that, go all the way back on first startup page (Hi there).
-Go to “Emergency Call” option from bottom. Tap two times on “Emergency information” button from top.
-Go to “Edit” icon from top right corner.
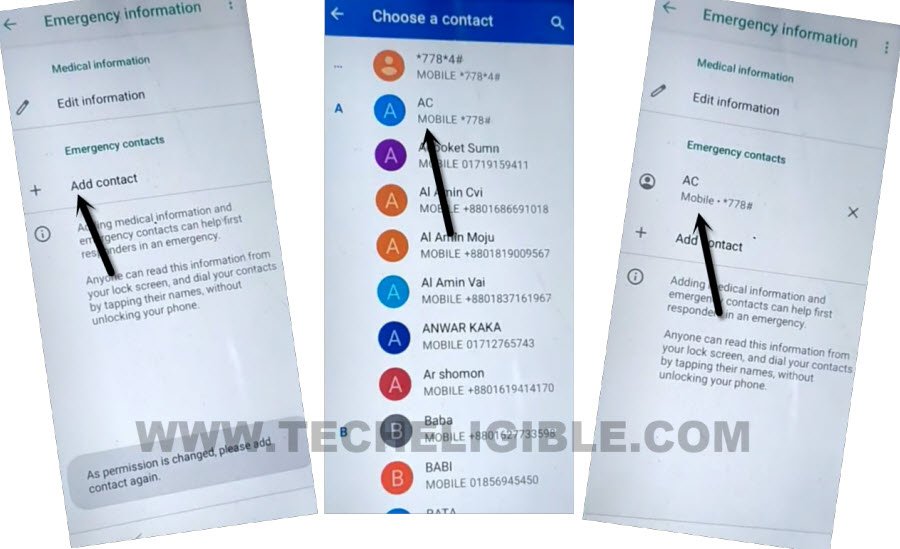
-Let’s go to “Add contact” to reach contact list page. From there, tap at any random contact name.
-Tap again on same contact name, that you hit on previously.
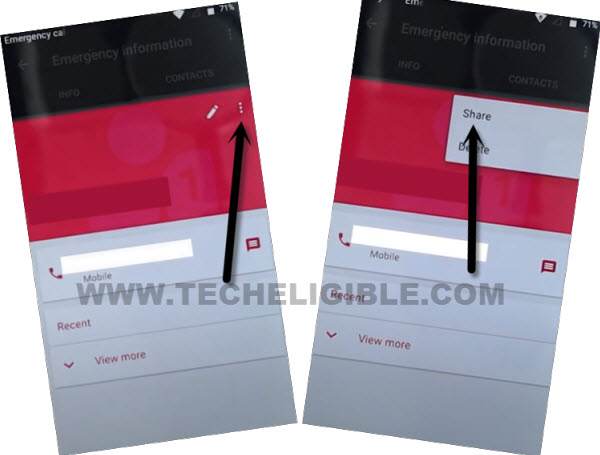
-By doing everything correctly, you must see this popup window of your contact name, just tap to “3 dots” icon and go to “Share” option.
-From popup window, tap to “Share with text” option. After that, tap on “PHX Browser”.
-Hit on a orange button “Agree & Start”.
-You will be redirected inside your device browser page. We will make some search from there to access techeligible frp tools page.
Search & Download Quick Shortcut Maker:
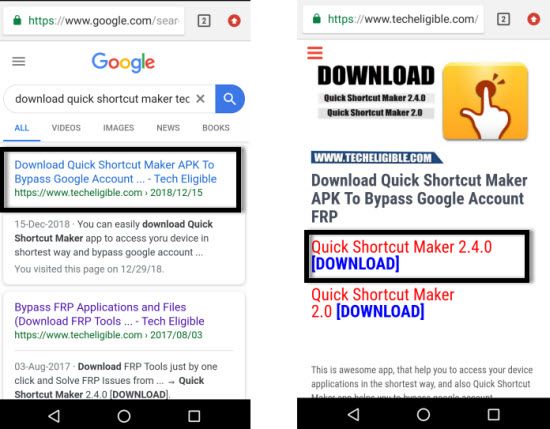
-Type in top search bar “Download Quick Shortcut Maker“.
-Visit 1st searched result same as shown below. After that, download from there “Quick Shortcut Maker 2.4.0“.
-Once the downloading process is done, just tap to “Menu” icon from bottom center and got o “Downloads” option to access download folder.
-From there, tap on “Quick Shortcut Maker” app.
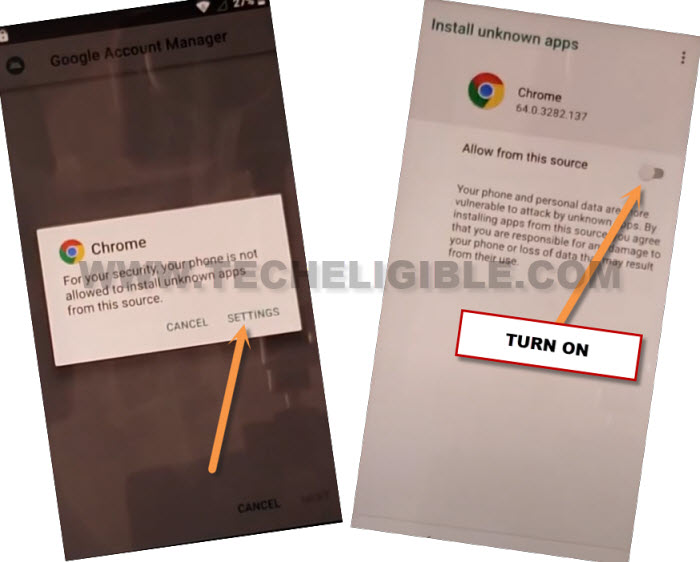
-You will be displayed a popup window, just tap to “Settings”. After that, turn on “Allow from this sources” option.
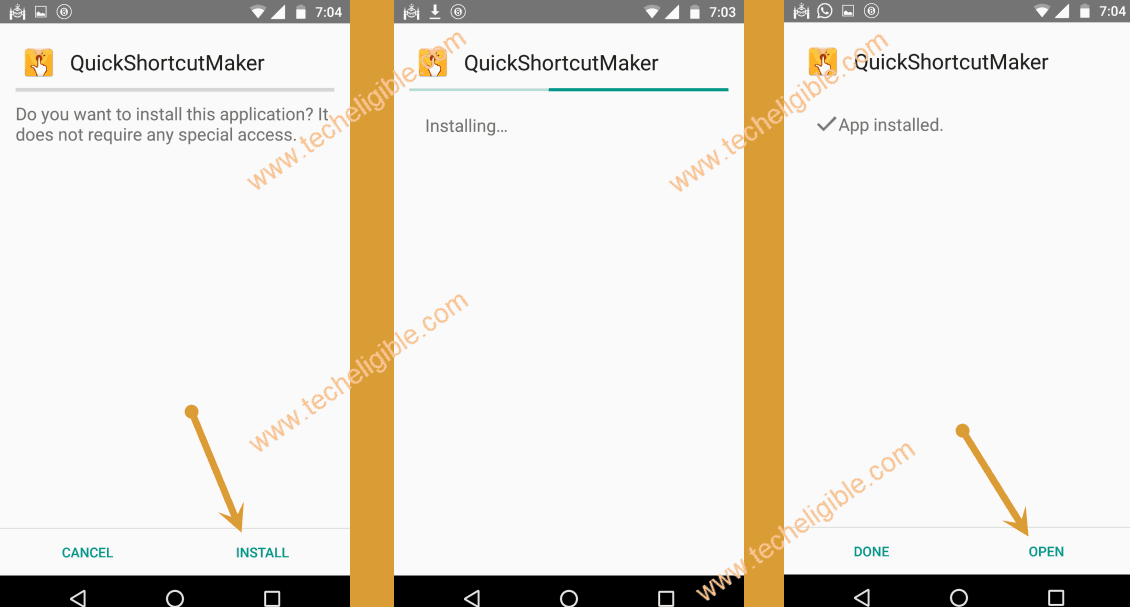
-Tap on “Back Arrow” icon from bottom to get back to installation page.
-Tap to > Install > Open.
Setup new Pattern:
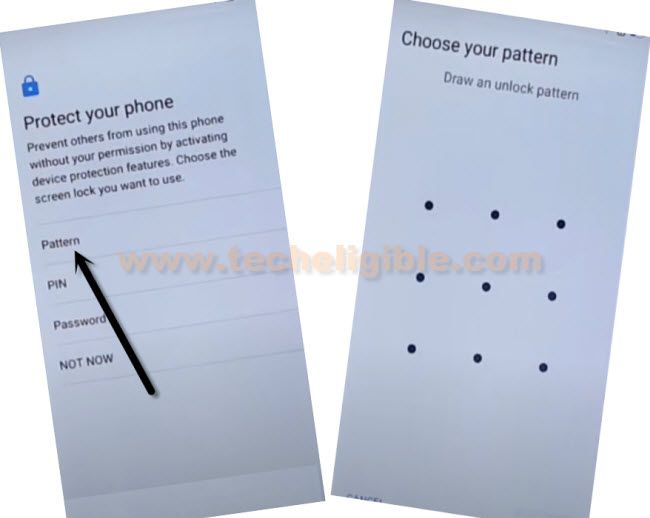
-Let’s tap to “Pattern” option. After that, draw your any desire pattern and tap to “Next”.
-You are supposed to draw same pattern once again, after that, tap to “Confirm” option.
-Go all the way back to first (Hi there) screen. From there, tap to > Start > Set up as new.
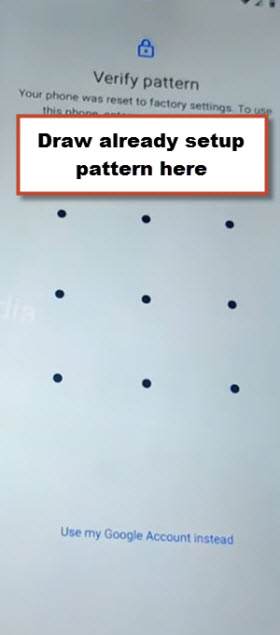
-You will be redirected to the verify pattern lock. You have draw same pattern that was recently setup.
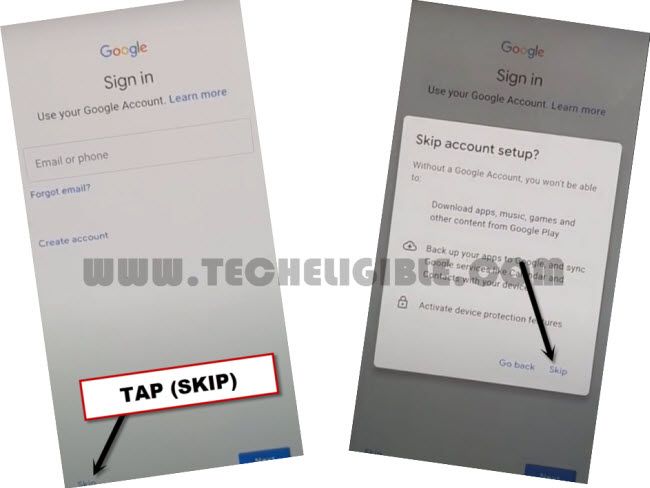
-After that, skip google sign in screen to go ahead and complete all remaining setup wizard steps.

