Remove FRP Account Moto Droid Maxx 2 By Talkback
Have you lost your moto device after hard reset? If you can’t complete your device verification process from google sign in page, then, you can follow up this method to Remove FRP Account Moto Droid Maxx 2 with the help of (Talkback) function. We will access to main settings page and disable few apps to remove frp easily.
Warning: This method is only for a real device owner, who has lost his/her Gmail account after hard reset. If you are unknown to this phone & trying to gain access, you will be jailed once the device is traced. This is a serious crime & Sin. You must return this phone to its real owner.
Let’s Begin to Remove FRP Account Moto Droid Maxx 2:
-Turn on moto phone & Connect WiFi. After that, go all the way back to (Welcome) page.
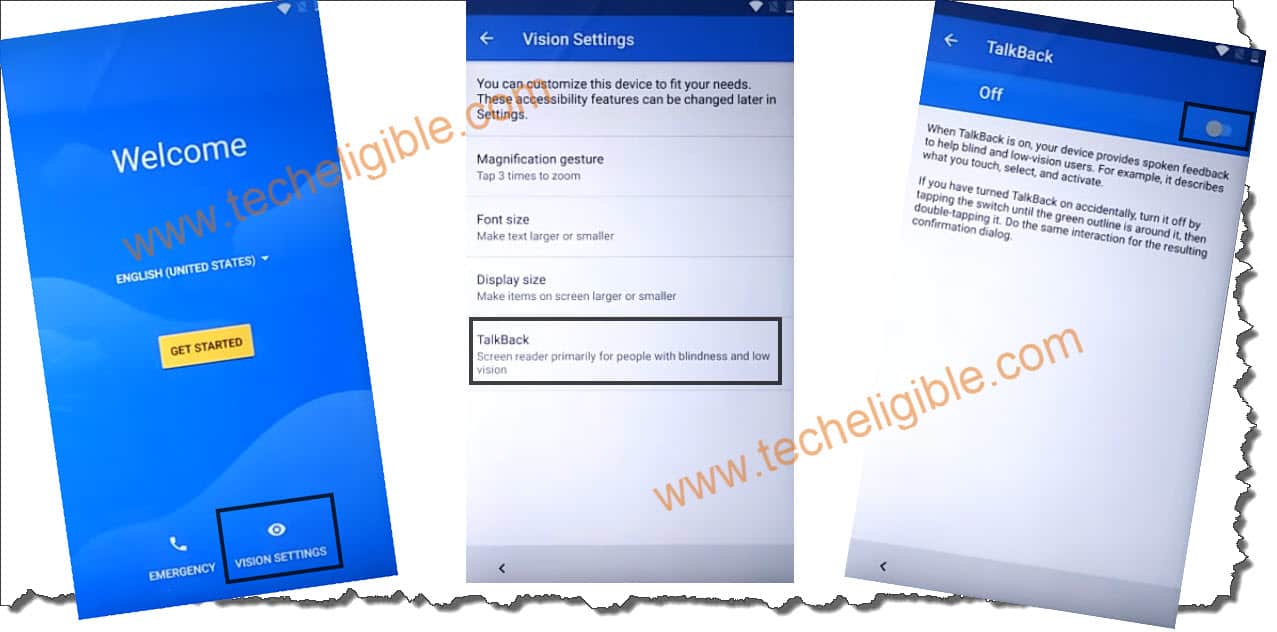
-From there, tap to “Vision Settings”. After that, tap to “Talkback” option.
-Turn on talkback by toggling on a button from top corner.
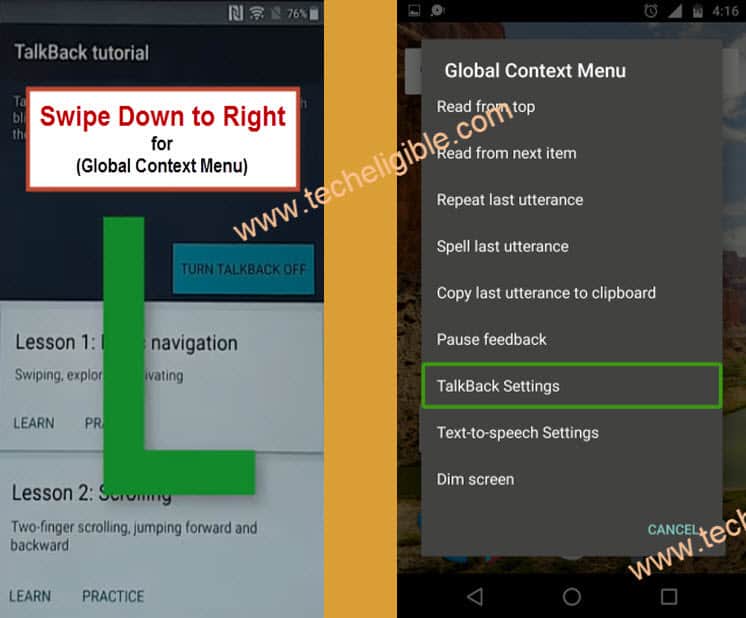
-You must have a talkback tutorial page. Just swipe down and swipe right from there to get (Global Context Menu) option.
-Let’s tap twice on “Talkback Settings”.
-We don’t need talkback function anymore, let’s turn this option off by long press both volume buttons (Volume up + down).
-Once you get a popup window of (Suspend talkback), you can release both keys. From there, double on “Ok”.
-From same page, just go to “Help & Feedback”.
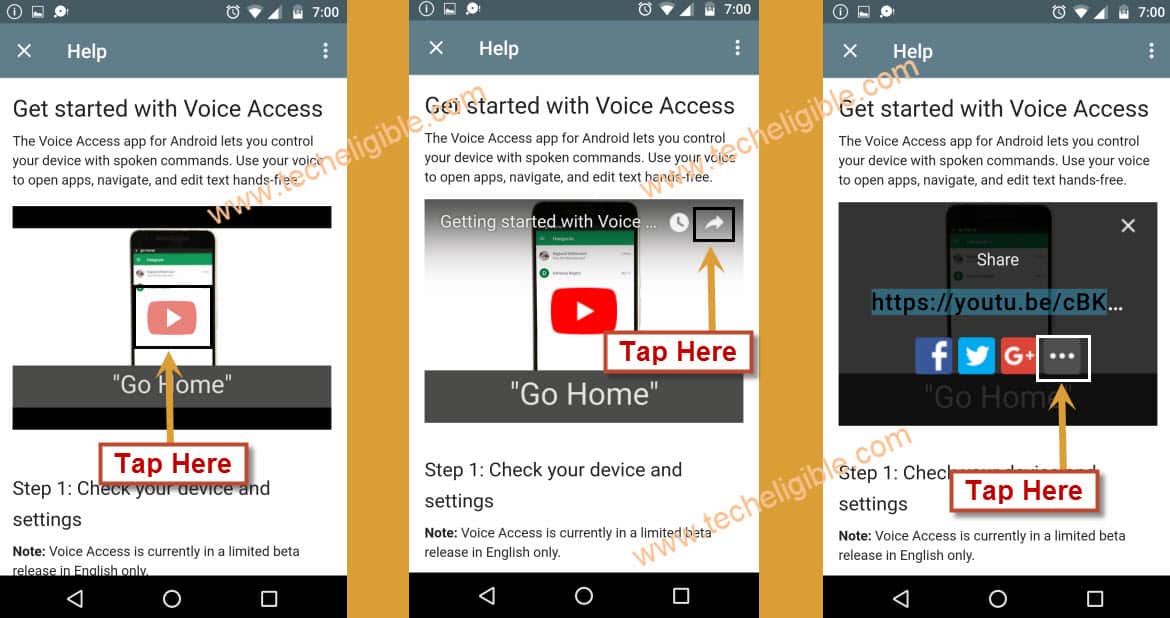
-You will be redirected on (Help) screen. Just tap on “Get Started with voice access”.
-Tap on > Video Play icon > Share Arrow > 3 Dots.
| Note: You may face youtube update screen, just tap to “Not Now’ option to skip that page and go to youtube website directly. |
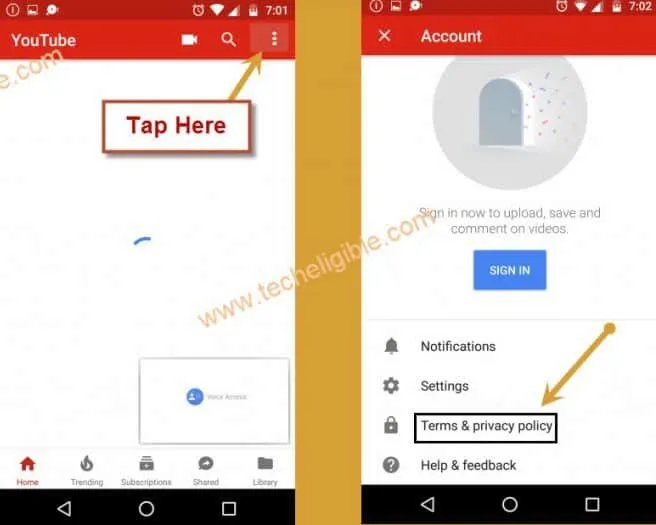
-Once you reach to youtube website successfully, just long tap on video drag that video down. After that, tap to > 3 dots > Terms & Privacy Policy.
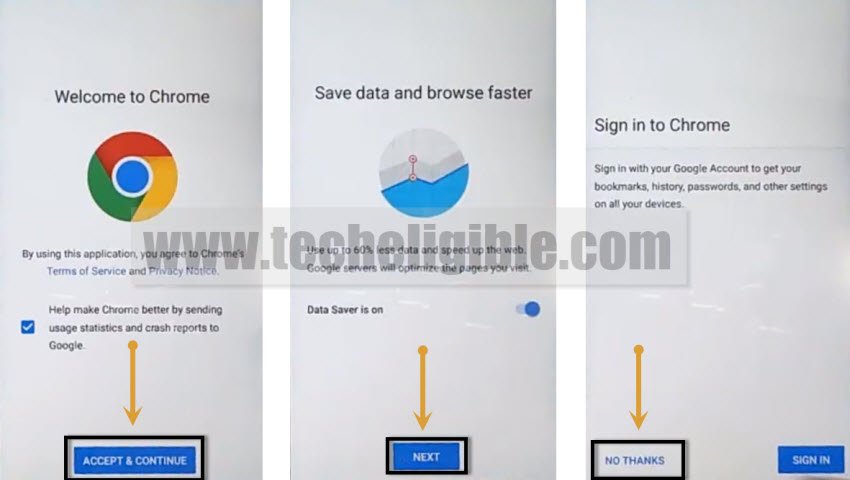
-From chrome welcome screen, just hit on > Accept & Continue > Next > No Thanks.
Download FRP Apps for Droix Maxx 2:
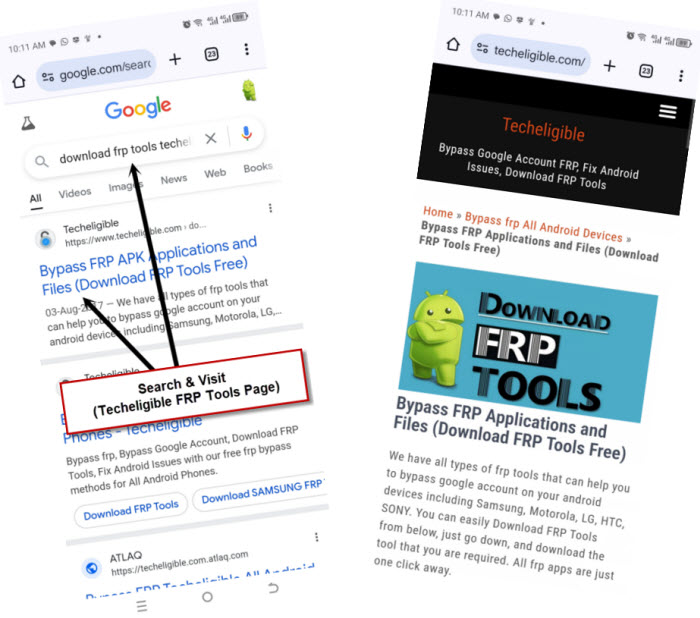
-Type in chrome browser search bar “Download frp tools Techeligible“.
-After that, visit same searched result as shown below.
-Just scroll down little bit and tap to this app “Apex Launcher 3.3.3” to start downloading process.
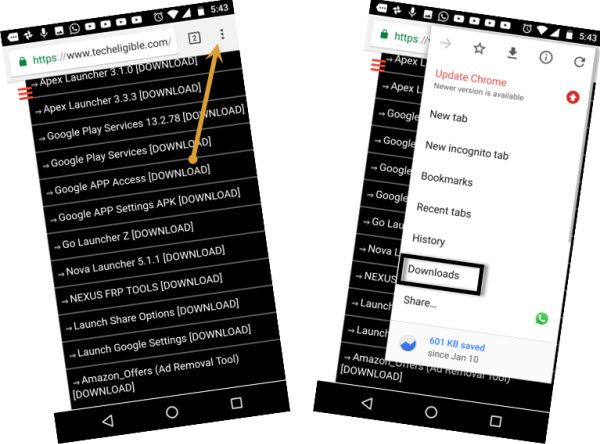
-After downloading is done, just hit on a “3 dots” icon from top corner same as shown.
-Go to “Downloads” option to Remove FRP Account Moto Droid Maxx 2.
-You will have a (Apex Launcher) app there, just tap on that app to start installing process.
-From popup screen, tap to “Settings” and turn on “Unknown Sources” option.
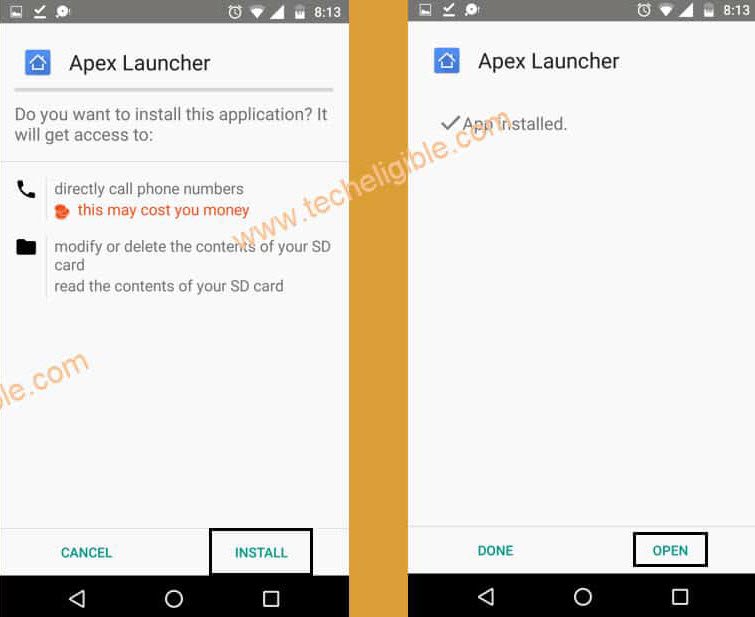
-Go back to apex installation page, and tap to > Apex Launcher > Install > Open.
-After that, you will be redirected into moto droid main home-screen.
-Let’s open up “Chrome” browser again from there.
-You will access back to (FRP Tools) page. From there, download another app named “Google Play Services“.
-Access back to download folder by hitting on > 3 dots > Downloads.
-Let’s install this app by tapping on > Google Play Services > Install > Done.
-Go all the way back on your device main home-screen. After that, open your device main “Settings” page.
-From settings, just go to > Security > Device Administrator.
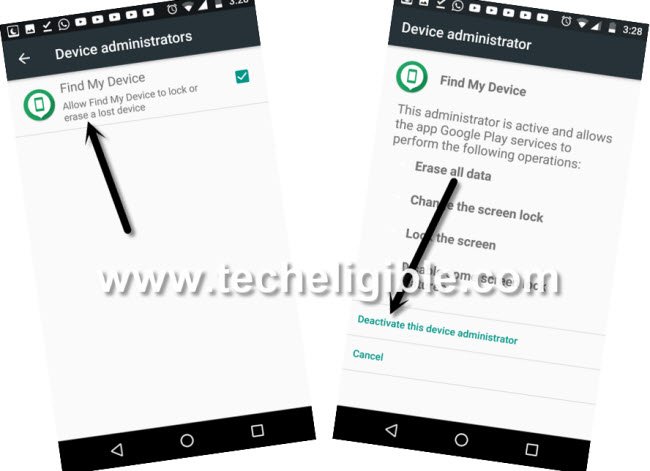
-After that, tap on > Android Device Manager > Deactivate this device administrator.
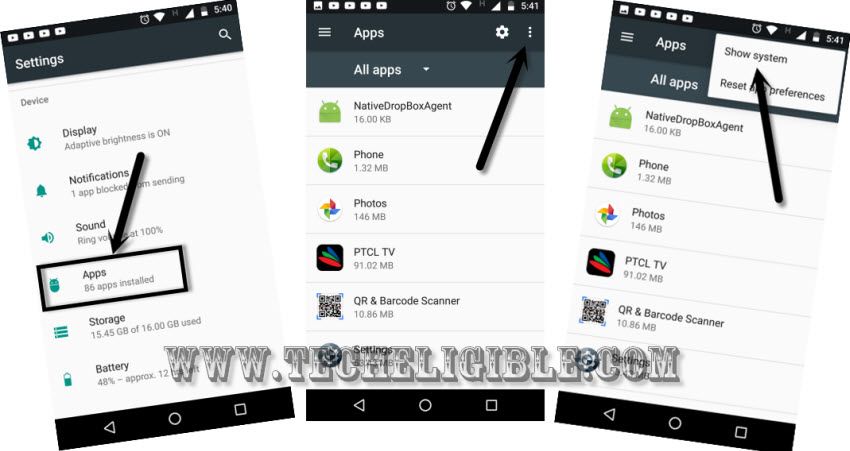
-Let’s get back to “Settings”. From there, tap to > Apps > 3 dots > Show system.
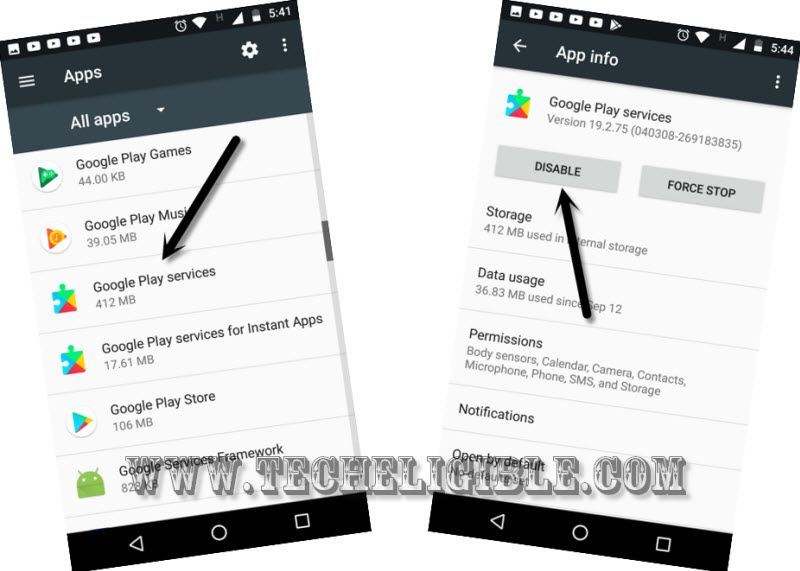
-We’re gonna disable google by find and tapping on > Google Play Services > Disable > Disable this app.
Sign in with new Account:
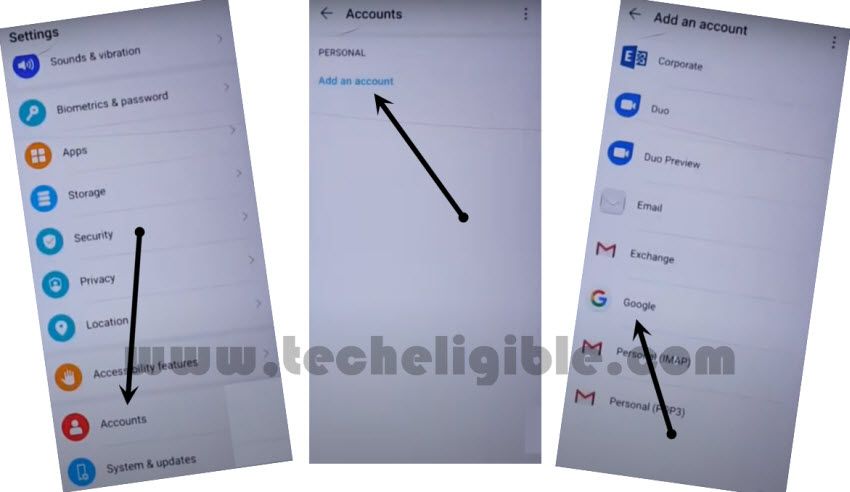
-Get back to “Settings” page again. After that, tap on > Accounts > Add Account > Google.
-Setup new your new google account.
-Once the signing in process is done, just go back to “Settings” page again.
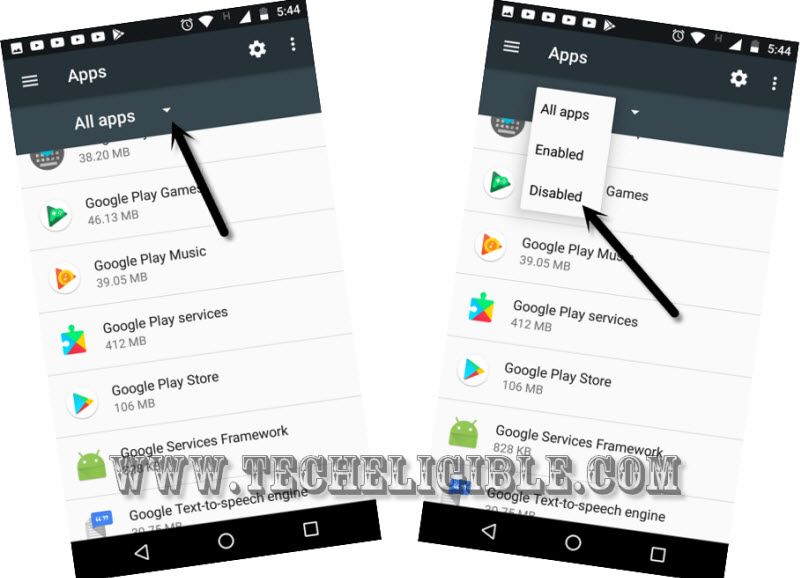
-Tap on “App”. After that, tap to “All Apps” option and go to “Disabled”.
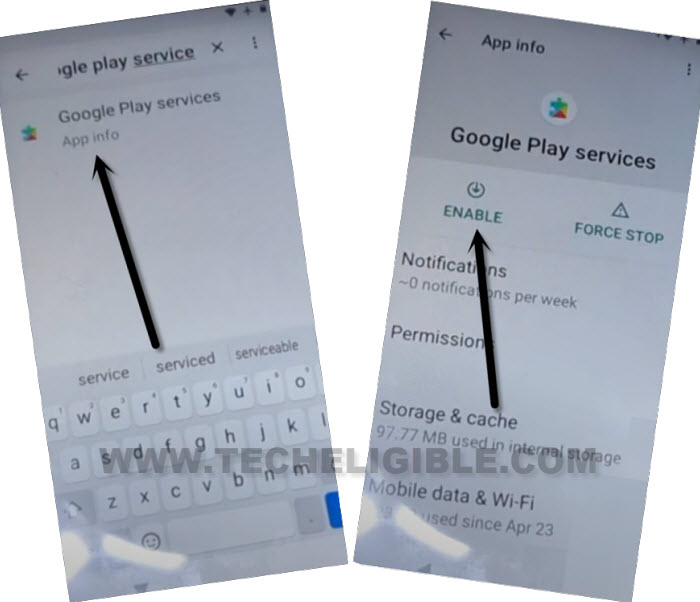
-Let’s enable back the disabled app. Just tap to > Google Play Services > Enable.
-You are all done from Remove FRP Account Moto Droid Maxx 2 without using any paid service. Restart your moto phone & complete setup wizard steps.
