
Remove FRP Account Moto E14 By Flashing Process [Free]
If you can’t access back to your MOTO E14 device after hard reset and forgetting google account. That means, your device is on a FRP protection. We can resolve this issue just by Remove FRP Account Moto E14 with the help of flashing process. You will have to download MOTO E14 flash file first in your PC. After that, put your device into the fastboot mode to flash your device. Follow steps from below.
Disclaimer: We are creating this post to educate people about how to get back their lost device due to forgetting Google account. This method is only for device owner and for educational purpose only.
Let’s Start to Remove FRP Account Moto E14:
-Firstly download flash file from below in your PC.
⇒ MOTO E14 Flash File [DOWNLOAD]
-Turn off your device by long holding “Power key” and tap on a “Power off” option.
-Let’s put your device into the (Fastboot Flash Mode) by long holding both keys (Volume Down +Power).
-Once you get the same screen as shown in below screen shot, just release both keys & Connect your device with PC using proper working USB cable.
Note: Do make sure, your PC or laptop has proper MOTO USB drivers installed.
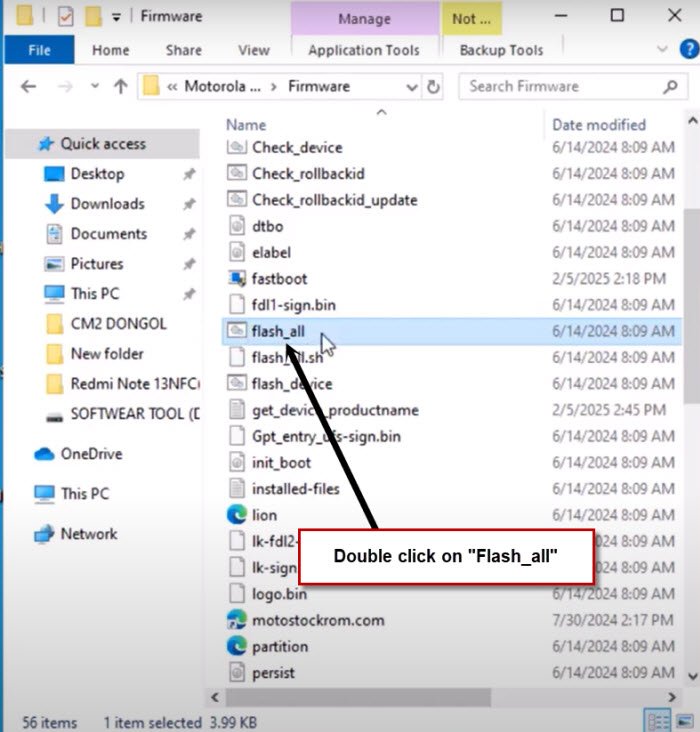
-Go to your PC screen and extract the downloaded file and go to extracted folder.
-Run “Flash_All” file by double click.
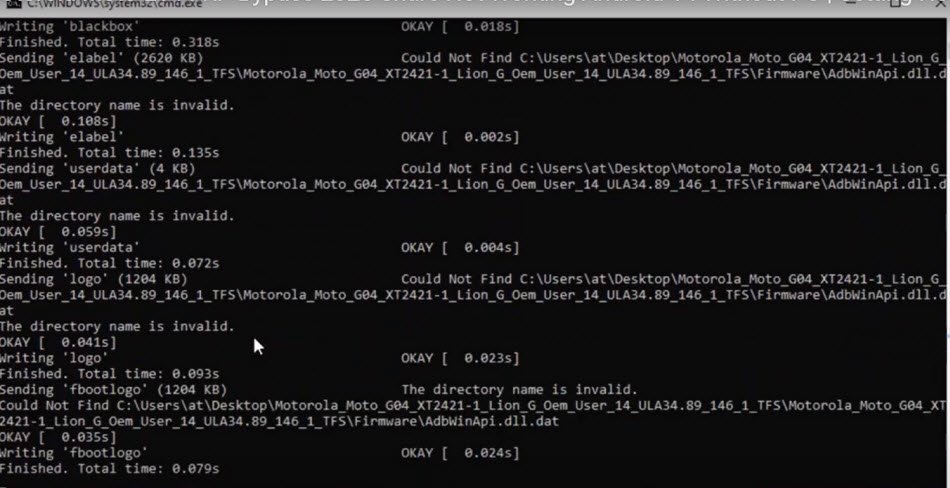
-After that, the flashing process will continue shortly. Just wait over there until its done.
-Your moto device will auto restart and you will reach back to (Hi there) startup page.

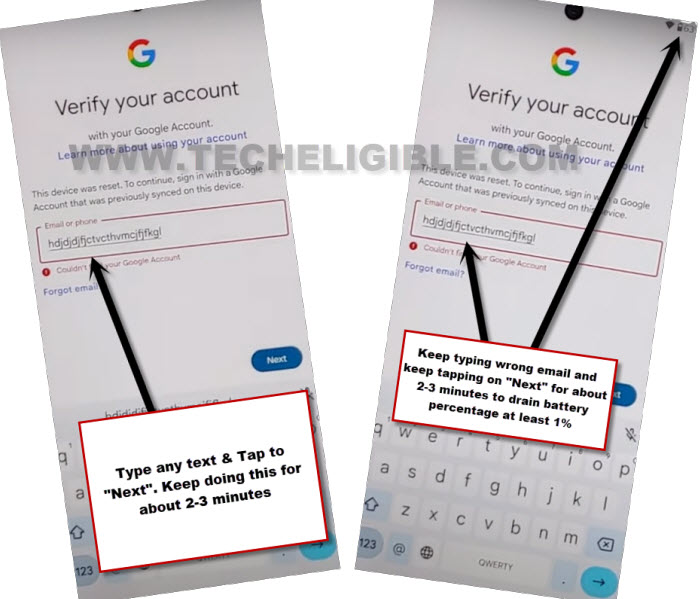
-Firstly, connect WiFi and go to (Verify your account) page.
-Enter any random alphabate and tap to “Next” option. Keep this such activity for 2-3 minutes until you see 1 or 2% battery is has been drained.
| Note: By doing this type of activity on (Verify your account) screen, you will be able to have (Google Play Services) app in your battery usage option. |
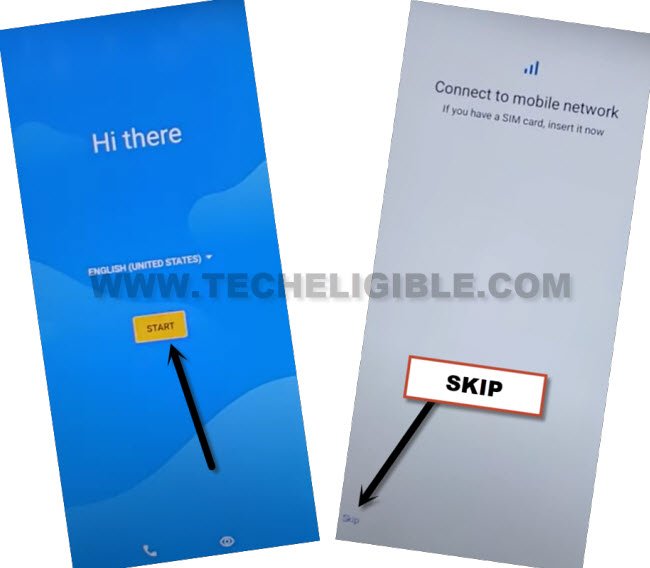
-Let’s get back to first (Hi there) screen. Afterwards, tap on a > Start > Skip.
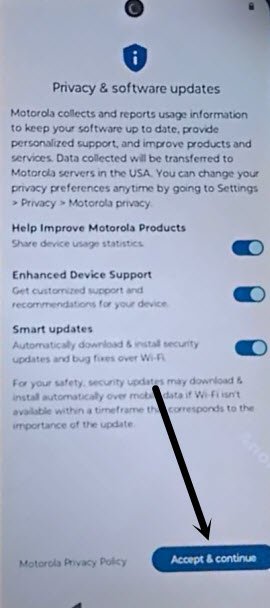
-Connect WiFi. After WiFi is connected successfully, you will be redirected to the (Privacy & Software update) page.
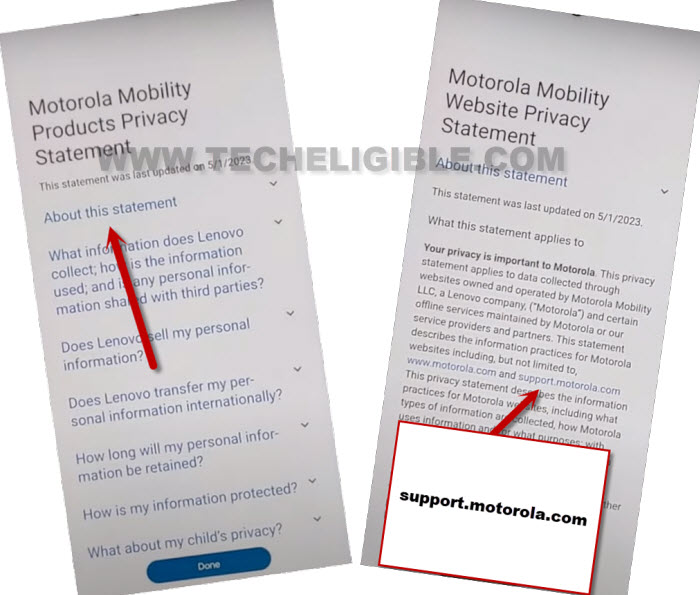
-Let’s go to > Motorola Privacy Policy > About this statement > Website Privacy Statement.
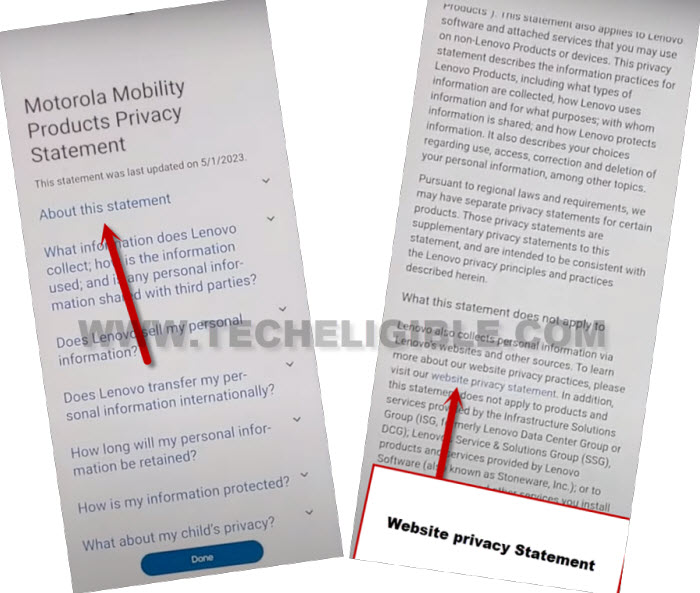
-Let’s hit again on a “About this statement” option. This time, hit on this email from text page “support.motorola.com”.
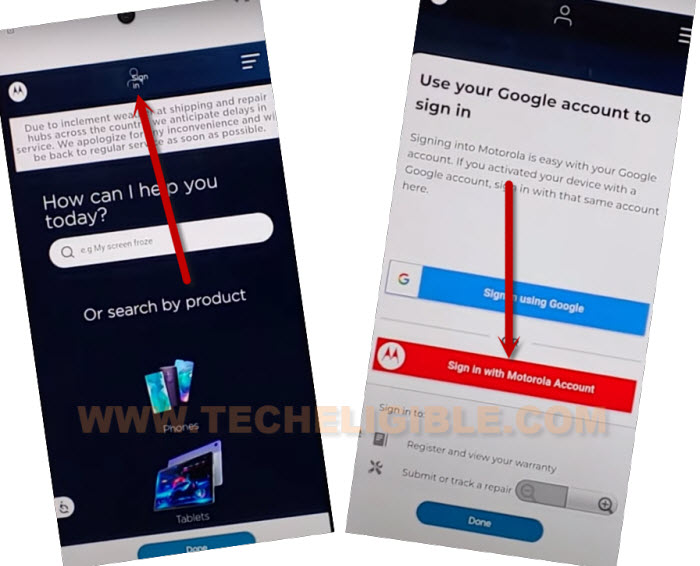
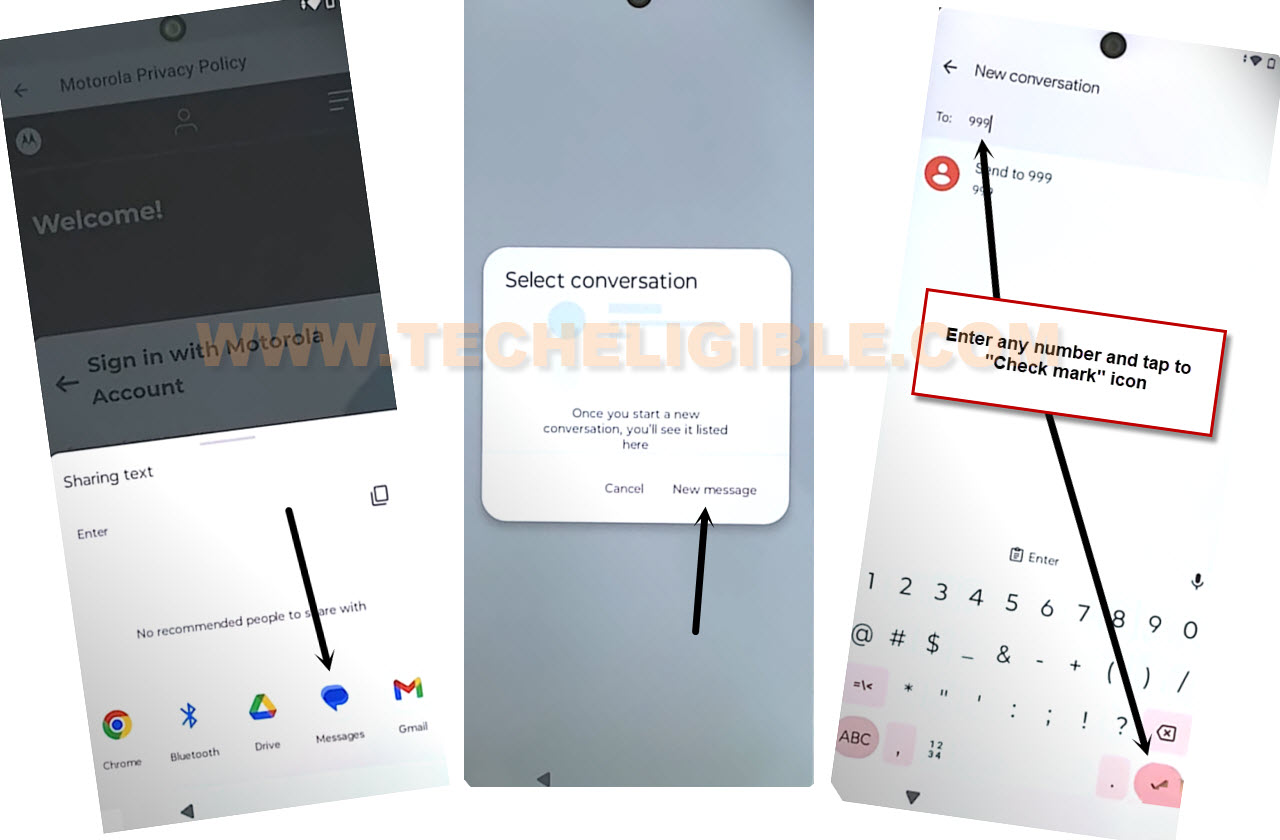
-Afterwards, tap on a “Sign in” option from top center and go to this option “Sign in with motorola account”.
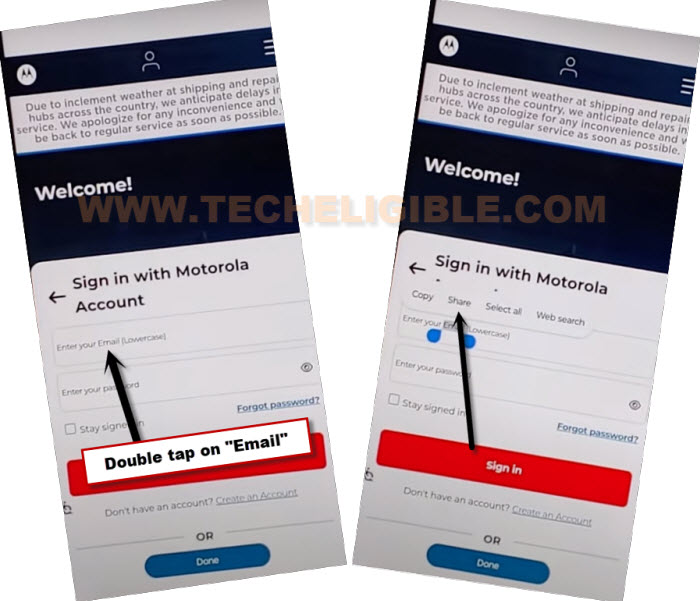
-Double tap over this text “enter your email”. You will see some more options, just tap to “Share” option from there.
-From popup window, let’s hit on a “Message” app. Tap again on “New message” from popup window.
-Enter any random numbers in (TO) field tab and tap to “Check mark” icon from there. You will be taken to the message sending page.
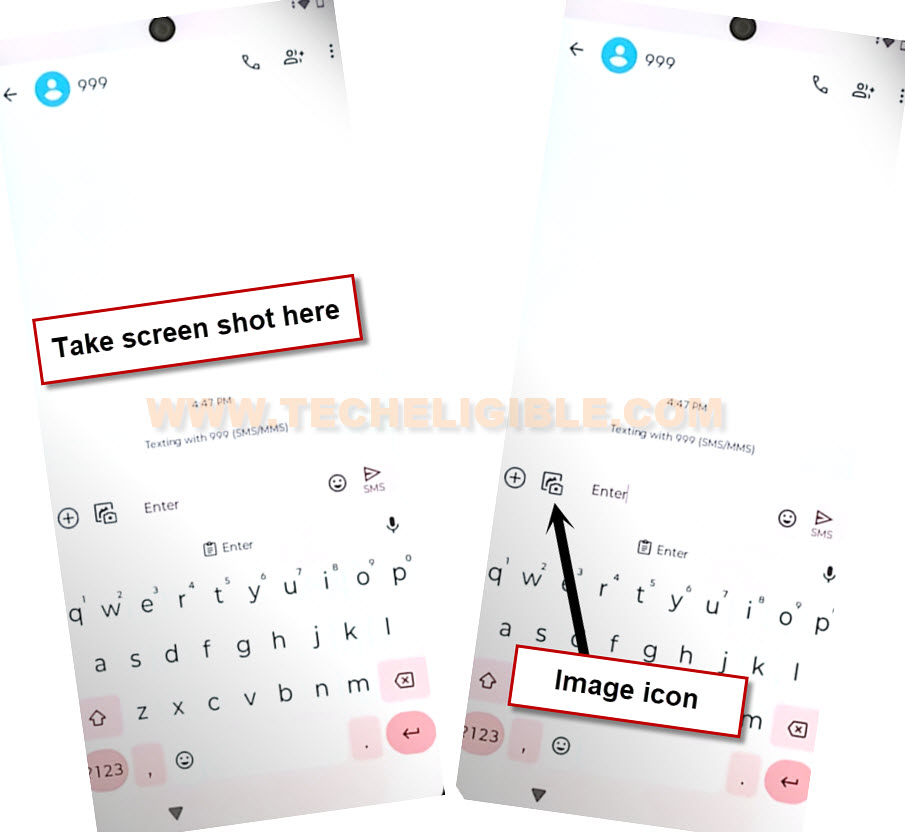
-Let’s tap on a “image” icon and capture any random image from there.
-After capturing image, this image will be displayed there, just tap on your recently captured image (See below image).
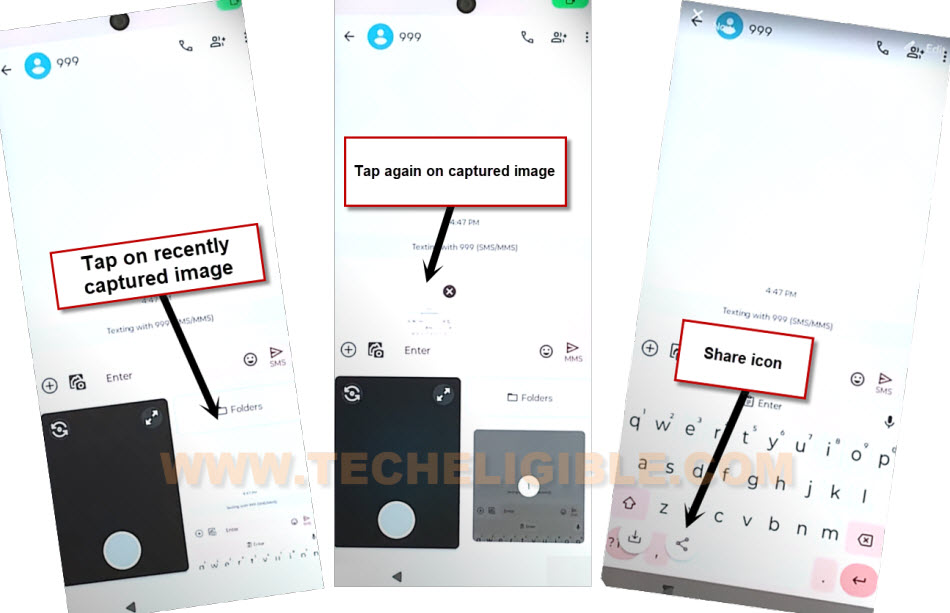
-From bottom popup screen, just go to “Google Search image” icon same as shown in below screen shot.
-Afterwards, hit on a “3 dots” from top corner and tap to “Privacy Policy”.
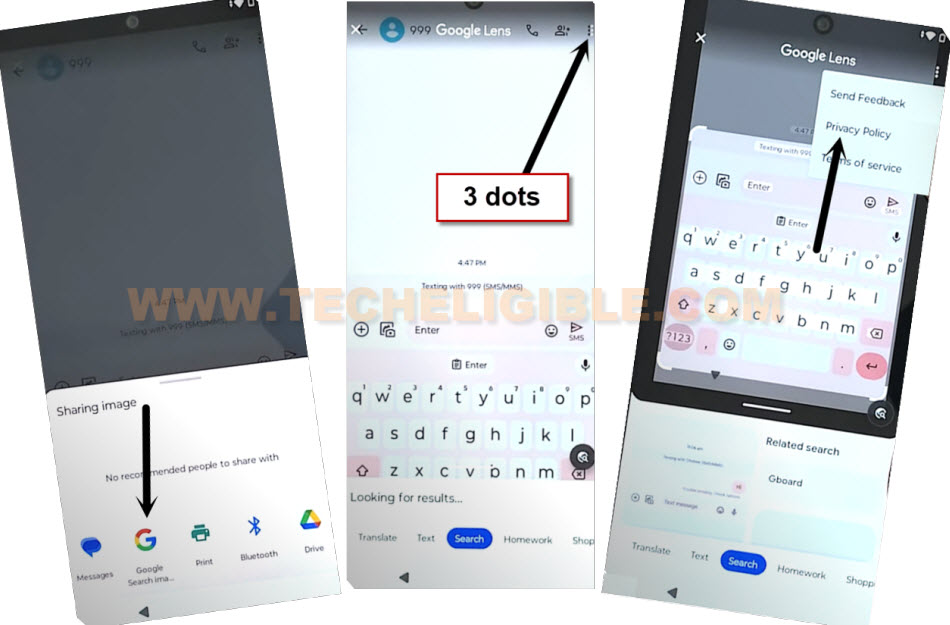
-After reaching on a (Privacy & Terms) page, just tap to “MENU” icon from top corner and go to “Search”.
![]()
Disable Google Play Services App:
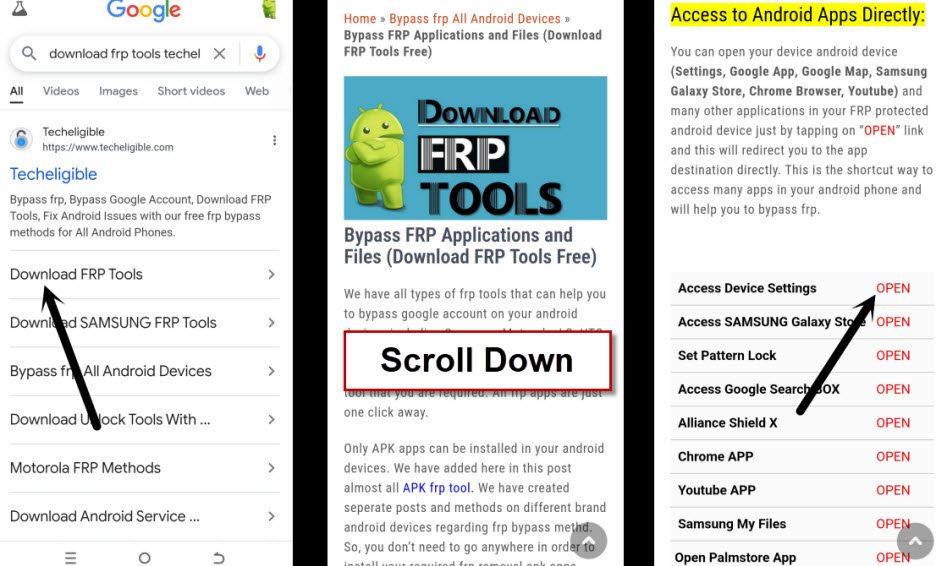
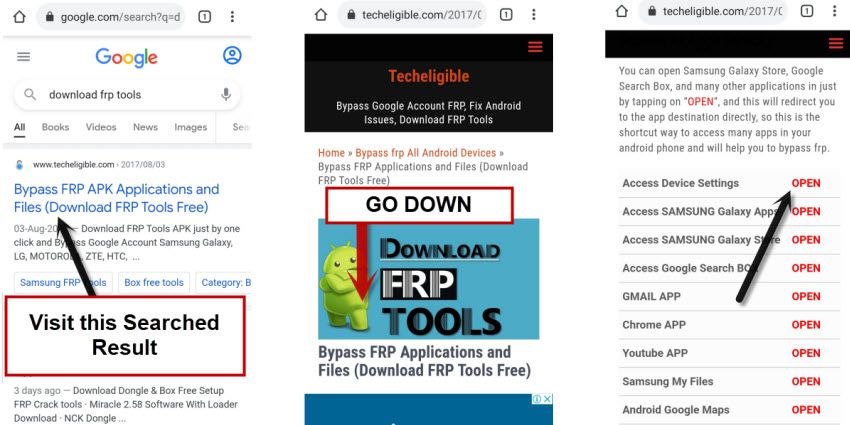
-Let’s type in search bar “Download FRP Tools Techeligible”. Visit 1st searched result same as shown below.
-From frp tools page, hit on a “Access device Settings“.
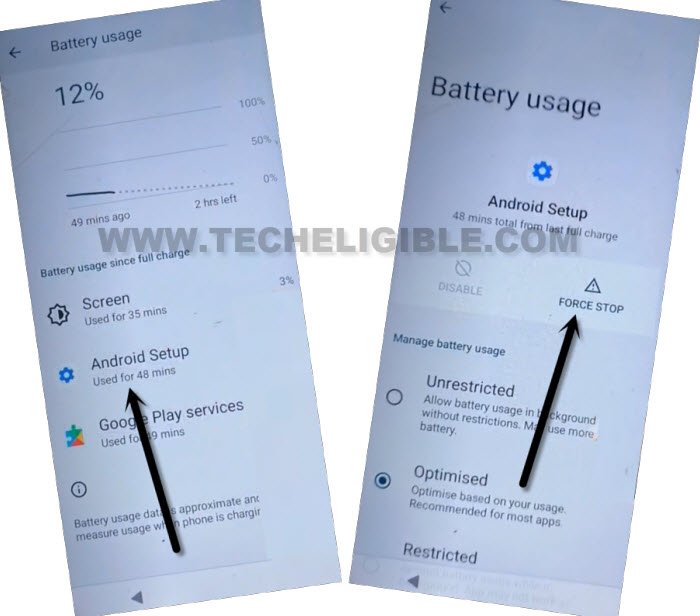
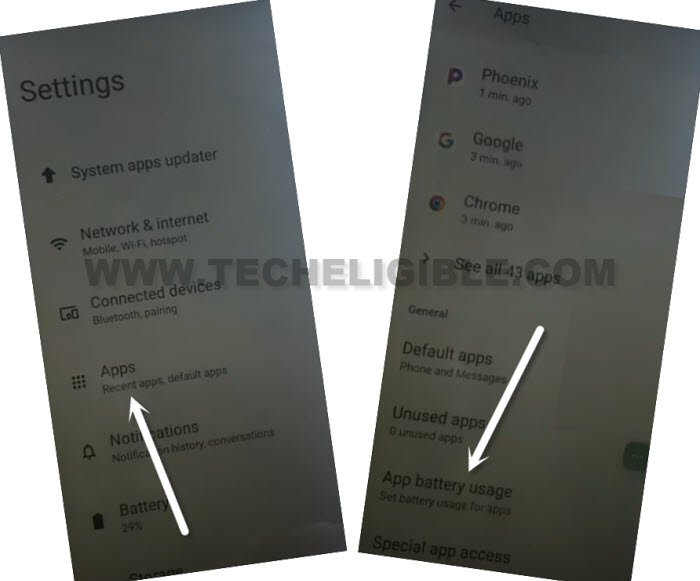
-Let’s get into the battery usage by tapping on > Apps > Apps battery usage to Remove FRP Account Moto E14.
-You will see big list of all installed apps there.
-Let’s go to > Android Setup > Force Stop > Ok.
-Get back to app list page again by hitting on a “Back Arrow” icon from bottom.
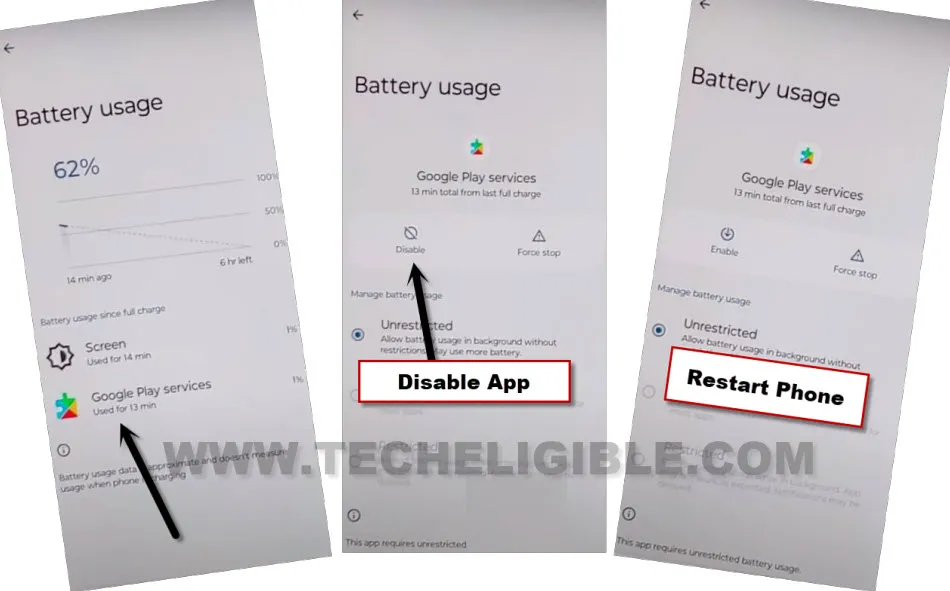
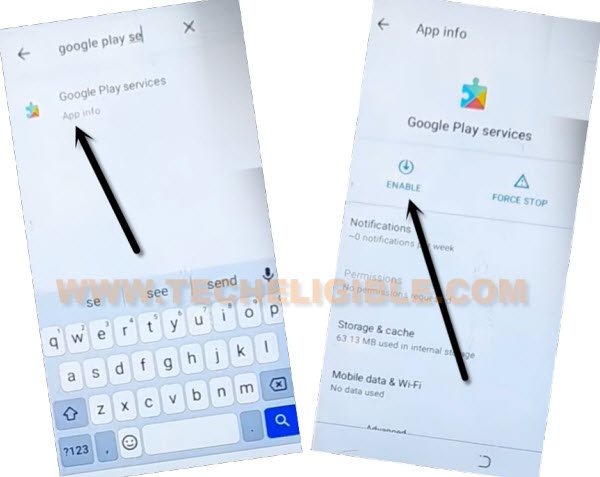
-After that, go to > Google Play Services > Disable > Disable this app.
-Tap also on a > Force Stop > Ok.
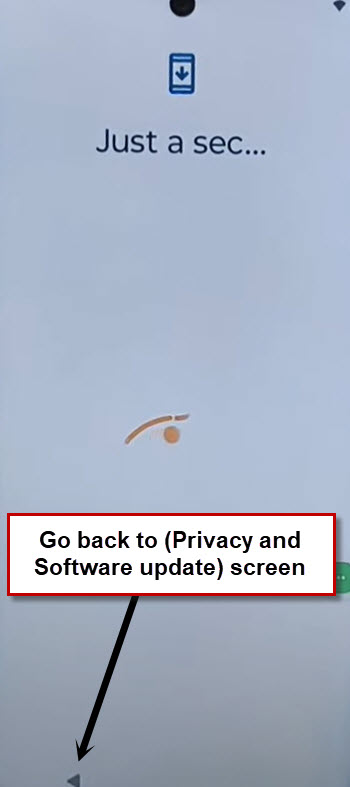
-Go all the way back on (Privacy & Software update) screen. From there, hit on “Accept & Continue” option. After that, tap to “Don’t Copy”.
-You will have a (Just a sec or checking for update…) loading page there. To get this done, we have to enable back google play services application.
Let’s Repeat Steps to Enable Google Play Services:
-Let’s get back to first (Hi there) screen. Afterwards, tap on a > Start > Skip.
-Connect WiFi. After WiFi is connected successfully, you will be redirected to the (Privacy & Software update) page.
-Let’s go to > Motorola Privacy Policy > About this statement > Website Privacy Statement.
-Let’s hit again on a “About this statement” option. This time, hit on this email from text page “support.motorola.com”.
-Afterwards, tap on a “Sign in” option from top center and go to this option “Sign in with motorola account”.
-Double tap over this text “enter your email”. You will see some more options, just tap to “Share” option from there.
-From popup window, let’s hit on a “Message” app. Tap again on “New message” from popup window.
-Enter any random numbers in (TO) field tab and tap to “Check mark” icon from there. You will be taken to the message sending page.
-Let’s tap on a “image” icon and capture any random image from there to Remove FRP Account Moto E14.
-After capturing image, this image will be displayed there, just tap on your recently captured image (See below image).
-From bottom popup screen, just go to “Google Search image” icon same as shown in below screen shot.
-Afterwards, hit on a “3 dots” from top corner and tap to “Privacy Policy”.
-After reaching on a (Privacy & Terms) page, just tap to “MENU” icon from top corner and go to “Search”.
![]()
Disable Google Play Services App:
-Let’s type in search bar “Download FRP Tools Techeligible“. Visit 1st searched result same as shown below.
-From frp tools page, hit on a “Access device Settings“.
-Go to > Apps > App battery usage.
-From app list page, find and tap on > Google Play Services > Enable.
-We can easily complete setup wizard steps now after enabling this app.
-Go back to (Connect to WiFi) page. From there, hit on > Setup offline > Continue to Remove FRP Account Moto E14.

-From there, hit on a “Accept & Continue” option. After that, you will be redirected to the google services page.
-From there, hit on a > More > More > Accept.
- -From PIN lock setup screen, go to > Skip > Skip > Not Now > Not Now > Next > Finish.